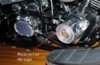
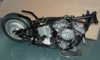
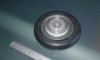
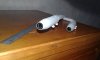
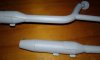
Here are the finished disc brakes. I'm showing the rear disc brake again because it now has a different, lighter finish than before. I found Alclad Stainless Steel made it too dark.
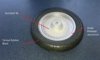
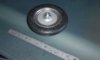
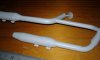
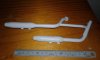
In order to get the pattern of eight openings in the front disc brake completed to a high level of detail/finish, I created a pattern which I used to produce a photo-etching mask. I then did a very deep etching, not all the way through the 1.2mm aluminium sheet but enough so that I had good accurate set of shapes which I could then finish off by drilling out and filing.

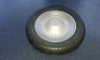
In order to get the pattern of eight openings in the front disc brake completed to a high level of detail/finish, I created a pattern which I used to produce a photo-etching mask. I then did a very deep etching, not all the way through the 1.2mm aluminium sheet but enough so that I had good accurate set of shapes which I could then finish off by drilling out and filing.


![IMG_2736[1].JPG](https://therpf-f28a.kxcdn.com/forums/data/attachments/480/480685-db9b3d152b32c29c8ccf6f6d367df1b4.jpg)