DeltaDesignRus
Well-Known Member
Of course, that would be very helpful.Do you think I could pour some silicone or something similar onto my timeless skull and send you a casting? Might work?
Of course, that would be very helpful.Do you think I could pour some silicone or something similar onto my timeless skull and send you a casting? Might work?
I remember once comparing photogrammetry taken with a telephoto lens and a standard lens, and contrary to my expectations, there was not much difference between the two.Sharing experiences or thoughts on how to improve the process is not arrogance, I appreciate it. And you're right, the paint application should be so minimal as not to damage the details, and the paint droplets should be very small. I will try not to paint the model entirely, but will apply the paint as dust, allowing the plastic to show through this layer of paint. This way, I will introduce minimal distortion to the size of the part and avoid spoiling the details. Another issue is that I don't have such a long-focus lens. I have a 300mm lens, but the minimum focusing distance is large. I also have macro rings and a teleconverter. I also have a 500mm mirror lens, but unfortunately, it's not suitable for this purpose, as its minimum focusing distance is approximately 4 meters. In general, I will experiment.
I have a problem in that all my lenses won't allow me to take photos of small details in such a way that they occupy at least half of the frame because bringing the camera too close to the details doesn't allow for the minimum focusing distance. And some details are only 6-7mm in length, occupying only a very small part of the frame.I remember once comparing photogrammetry taken with a telephoto lens and a standard lens, and contrary to my expectations, there was not much difference between the two.
Moreover, I was surprised to learn later that photogrammetry can be performed even if the zoom ratio is changed during the process.I have a problem in that all my lenses won't allow me to take photos of small details in such a way that they occupy at least half of the frame because bringing the camera too close to the details doesn't allow for the minimum focusing distance. And some details are only 6-7mm in length, occupying only a very small part of the frame.
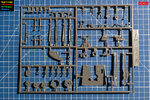
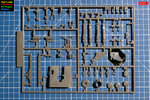
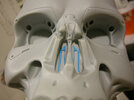
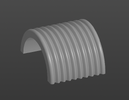
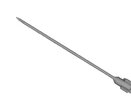
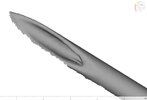
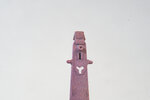
I tried to replicate this detail with silicone, but the platinum silicone was inhibited and did not cure around the edges of the detail where there was sculpting clay (plasticine). Moreover, when I poured the same silicone into a mold made from the same plasticine without degassing, everything was fine, but as soon as I degassed the silicone with the clay simultaneously, the silicone did not cure. I will try again. In the meantime, I made two details that aren't worth scanning; they have a simple shape, and measuring them with a micrometer and caliper was not difficult.It's pleasing that there are almost no rounded edges on all these parts, which complicates measurements and modeling.
Exactly, I noticed that too in 2017 when I started learning Agisoft Photoscan and began doing photogrammetry from screenshots from T1.Moreover, I was surprised to learn later that photogrammetry can be performed even if the zoom ratio is changed during the process.
I had assumed that it could only be done at the same zoom ratio.
The best option is most likely a stationary DIY scanner with a projector, two cameras, and lenses on a tripod.Cool.
I'm wondering if anyone has actually tried any of the newer Revopoint high resolution scanners such as the Miraco or Mini 2 on anything 1:1 endoskeleton related?
 www.therpf.com
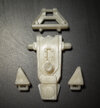
looks very detailed ,did you scan this? what resolution does the scanner have and what is it's name of the scanner ?The best option is most likely a stationary DIY scanner with a projector, two cameras, and lenses on a tripod.
RV DIY (rangevision).looks very detailed ,did you scan this? what resolution does the scanner have and what is it's name of the scanner ?
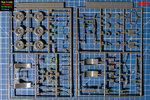
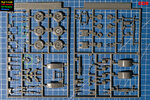
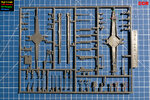
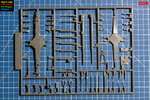
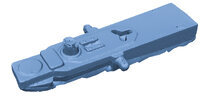
Looking goodDid a test recast of all the necessary details from the Flak gun kit, got a lot of bubbles, but nevertheless the results are interesting. The tiniest surface details from the original were copied without any problems in maximum detail.
")