Subject Delta- Bioshock 2

Good progress! Thanks for sharing your work!
For sure! Excited to share more, I’m trying to finally make a dent in this guy over the next few months to hopefully have the costume done for spooky empire next spring.

Missing DragonCon this year for Halloween Horror nights and my honeymoon, so there’s no reason (and really no way) to get him fully done before then, but I’d like to have the helmet done at the very least by that time, so I can move it out of the shop and onto display.
 
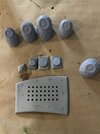
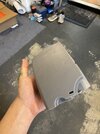
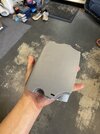
Resin printed finger tips, hand plate, and knuckle busters. The finger tips, are of course, facing upwards when those little circles will be facing towards the palm.
75780E9C-772B-40DF-A4F5-D219F7290B39.jpeg
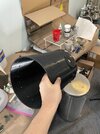
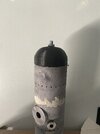
Half the large oxygen tank printed
4A63EA6F-8B82-4981-8292-01EE4EE8BB41.jpeg
7D7EC1B6-36C7-4F23-B961-BBA5DC784ABE.jpeg
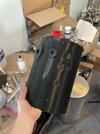
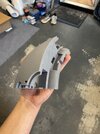
Backplate clear tubes/tanks connectors resin printed.
0254FE21-3405-4F8F-AE81-573B130C32AA.jpeg
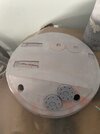
Top “bolt” printed for the small oxygen tank
C89E4B04-E3EB-4441-B739-0318AA72B19D.jpeg
 
Waiting on a piece to attach to my FDM printer before I finish the big tank print. Started resin printing the drill. 5 more of these larger pieces to print (hollow). Then I’ll switch onto a different part of the drill.

The actual drill portion will be made out of something light, not planning to print any of that.

All the little gears and cogs you see will actually spin with small motors upon completion.

File was designed by LilyKill, who I thought was on this forum but I suppose I am mistaken.

C929DE7B-F1D3-4EEC-ABE0-65F379FB90B6.jpeg

0F8F41CF-DAE2-4170-B9F4-1293F44674CE.jpegF875A7C7-4D79-44FE-945B-9DC9C8EB5C25.jpeg6890F841-4CCA-4C39-B08D-6ED54CFEE081.jpeg
 
0A23BE6F-E43E-440B-82C2-47238E36018E.jpeg

535C3BE4-9686-441D-9992-B41B9EB30696.jpeg


Drill outer rim almost finished printing. Full resin, but hollowed for weight (and $$$… much cheaper to print out hollow).

Starting to print the pieces where the little rotary motors will be held.
 
26A9106C-06DB-4485-8B5B-1157876B54C9.jpeg


92C4A6CA-49EF-49DD-B888-02F1297C39E4.jpeg


Two small updates, started printing the inner back side for the drill.

Made the mold for the hand plate and knuckle busters.

As a preview of something else to come….
36D54552-C53B-449E-B497-B511D511E95E.jpeg

But that’s all you get for now, when it comes to the left hand… I have some cool plans that are coming together with the left hand, so once I get a decent amount further with it, I’ll update.
 
Working on the feet for the big papa… although right now they look a little more like slippers.


C831E9C0-97E0-4516-AF14-57AC86C643CD.jpeg

3AB8C473-7345-4C5E-96FC-E27D2FCCFBF3.jpeg

9BDF08BA-AF87-4223-B374-648F4A4F4BDC.jpeg


So to be clear, this whole costume was modeled over the in-game model. This includes everything except the drill as that came from a separate modeler (though the proportions somehow line up PERFECTLY).

The character was scaled to the appropriate height of about 7’1 and then my friend Ben went from there.

The plan with the shoes is to not reinvent the wheel and just do them the way Volpin and 2StoryProps did them for their Big Daddies. XPS foam lifts covered in leather, with a shoe inside for me to wear. The only difference being for mine that we have 3D printed the models according to the in-game height, so that we are guaranteed proportionality.

Fun fact! If you were to have this shoe in the U.S, you’d wear a size 32 shoe.
 
I feel like my life is just consistent sanding. But here’s two updates. The drill is really starting to pull itself together. Started texturing the tanks too. Granted, they will be cast in a thin resin layer and then foam filled to conserve on weight, then painted with a “real rust” type paint. However the pitting will really help to sell that dingy beat up oxygen tank look.

A83506A3-1BC7-4088-ABED-06C1184D5457.jpeg

4DC9A428-C62E-4B3F-A368-F54B36EAD3F4.jpeg
 
D2ED72E6-A7D5-483B-A119-ECD4D7E1F454.jpeg

2A289B61-961F-4662-84FF-20C24FC6F073.jpeg

C161C8B2-A9BB-480F-896D-5D8062E16208.jpeg


Did a test fitting with some of the drill pieces I printed, with just some temporary hot glue. Also textured the big part of the drill that gets a more heavily pitted texture.
 
I'm digging your progress! Keep up the great momentum!
Thanks so much! Had to order some more resin, luckily today is Prime day... so got 3 new bottles coming in. So far, the pieces of the drill I've printed have taken up about 4 and a half bottles of resin. And shockingly that sounds a lot heavier than it actually it... it's not too bad to feel it all together so far! Should start up some more work on it tomorrow, but we'll see!
 
484ACD7B-1134-4C51-9EB7-C8640EFA985B.jpeg

8921BA54-AC59-4CF2-BB6A-C16053C511C6.jpeg

6F766499-EACA-48C4-AEA2-26E6A9BA7316.jpeg


Added some temporary screws to the tanks tonight to make sure I had the placement lined up. The tanks just need a bit more work and then will be molded, so before I do that relatively soon I wanted to make sure I had the placement correct.
 
delta chest.jpg
Boot.jpg
Delta height test.jpg


Alright a couple more small updates. I actually got my modeler, Cobbatron Props, to remove the middle "seam" on the helmet so I could print it out separately so that it won't get as textured as the rest of the helmet to match reference.

The other picture is of my boots which I am currently working on carving out.

The last picture as absolutely SILLY as I look, is a picture testing the height. Don't pay attention to proportions yet, I have a rig system to work on extending my outer arms up to the top of the helmet, and make my chest look wider (pretty simple, I'll be following a similar method as to what human_h2 did with his Rhino costume from Spider Man that went viral).

The full height of the costume is about 7' at this point. The helmet pushes me up a decent bit and the boots push me up about 9 1/2 inches.

Anywho, you guys won't be hearing from me for about 3 weeks. I'm getting married tomorrow, then on my honeymoon for a few weeks, so no updates between then, but will work on it as soon as I'm home!
 
Last edited:
I’m back! Just a little progress to show y’all. Got some other things I’ll post tomorrow, but here’s the first bit of the drill I’ve painted. Most of the drill just needs to be painted and put together, other than the actual “head”. This is the start.

I wanted this thing to look like an old heavy piece of equipment that had been used way too much. I think I succeeded


AE8B5251-89A6-4E02-B326-7D545A327B5D.jpeg

F27AA7C7-429B-4072-BD81-CA40F70F230A.jpeg
7A966DA8-745D-4B8B-AE6D-38AA982D48FF.jpeg

34A55840-8BDF-4257-BF2D-D8CA7E04C99C.jpeg
 
Outstanding job! The painting looks legit! How did you achieve the texture?
Thanks!! Texture is just acetone mixed with bondo and then stippled on. Then I take about 120 grit and smooth it out a bit. I like to leave in most of the scratches that the sandpaper leaves for a piece like this to make it look a little more realistic, but that all just depends on the piece. The diving weight for example is textured similarly but I smoothed it out a lot more and didn’t leave the scratches from sanding.
 

Your message may be considered spam for the following reasons:

If you wish to reply despite these issues, check the box below before replying.
Be aware that malicious compliance may result in more severe penalties.
Back
Top