Re: Oblivion Movie Rifle - Taking Final Payments!
LAST UPDATE! - BEFORE CASTING THAT IS!
As promised, here is the last build stuff, I'm getting the casting underway and I'm being delayed by a larger pressure pot on order, hope to have it by weeks end, fingers crossed!
The trigger mechanism glued into place finally! Was waiting on a spring for the clip release.
 Trigger
 by
malsfantasyfactory, on Flickr
The spring to make this work was crazy hard to find. But so worth it! Press the release, and the piece moves out to drop the clip.
 Release 1
 by
malsfantasyfactory, on Flickr
Let go and the release button springs back in.
 Release 2
 by
malsfantasyfactory, on Flickr
Push the clip in
 Clip 1
 by
malsfantasyfactory, on Flickr
And the clip release lever holds it in place!
 Clip 2
 by
malsfantasyfactory, on Flickr
Trigger in normal position
 Trigger 1
 by
malsfantasyfactory, on Flickr
Trigger depressed!
 Trigger 2
 by
malsfantasyfactory, on Flickr
I still forgot this rod, but I'll include this in the kit, don't worry. :
")
Also the Sling mount there is resin and I haven't tested it yet with the sling, so not sure if it will hold. You could probably buy the real metal one and mount it, there's plenty of resin to screw it to.
 Rod missing
 by
malsfantasyfactory, on Flickr
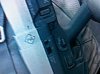
If you look carefully, you can see the inner ridges of the gun thru the holes, this detail was one of the things that plagued me for a while. I finally decided to just mold this part of the actual gun. It came in handy as there are clips that slide onto the top rail to hold the upper shells in place.
 Detail
 by
malsfantasyfactory, on Flickr
Finally got the scope wheel made right. It took a 3D print from shapeways and some finessing.
 Scope wheel
 by
malsfantasyfactory, on Flickr
There are some gaps on the piece that I couldn't stop. Maybe with some sanding on everyone's end, you guys can make it prettier then I did for mine.
 Gaps
Gaps by
malsfantasyfactory, on Flickr
To mount the switches I marked the bottom front shell with sharpie. (sorry for the blurry photo)
 LED wiring 1
 by
malsfantasyfactory, on Flickr
These are the switches I found, but I am looking into the digikey ones, it's just pricier then the ones I ordered from China. I'll compare both when I get them in hand.
 LED wiring 2
 by
malsfantasyfactory, on Flickr
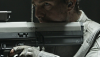
This is the LED light in the front, it's really small, but VERY bright. It has a separate focusing lens that helps make it even brighter. (again, sorry for blurry photo)
 LED wiring 3
 by
malsfantasyfactory, on Flickr
This is the light wired in, but not glued in yet. I actually hot glued mine in and it's still holding so far.
 LED wiring 4
 by
malsfantasyfactory, on Flickr
This is the crazy wiring trick I did on the front to make the LED work. It runs onm a 9 volt that I glued into the gun housing. On the actual airsofts, I'm not sure where you guys will be able to hide this.
 LED wiring 5
 by
malsfantasyfactory, on Flickr
The switch closest to the trigger is the LED one, the other one is a dummy. (Unless you have a winch system hooked up to your folding bike, then by all means hook this switch up!)
 LED wiring 6
 by
malsfantasyfactory, on Flickr
So on to the casting of parts! I have some of the smaller stuff underway, but I'm making gang molds to handle the sheer number of buttons I have to make! :lol I'll be updating in a week or so as I get part batches done and once I get the weights down for shipping costs. Keep those payments coming in, almost there!