New BMF coming

I know I need to go ahead and pick up one of the vintage collection tie interceptors while they're still available on Prime.

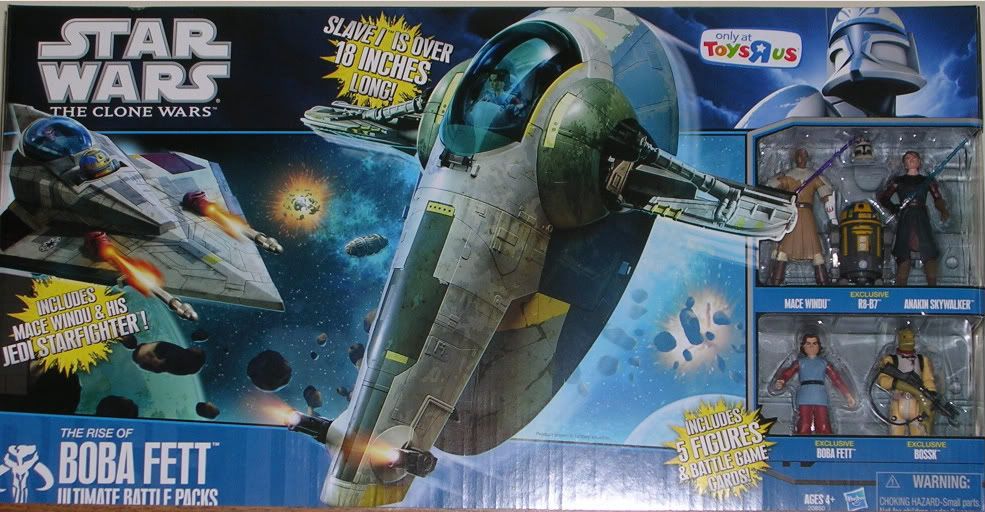
So is the 2010ish Toys R Us Slave 1 with the Jango Fett paint job the same size and model as the vintage collection one or are there some differences between the two models?

The Jango S1 has the slot for Solo in carbonite under the cockpit, and the ESB has the sonic charges on the backside. Different paint, and some different plastic used for certain pieces (for example the wings are softer rubber and the prison cell uses an opaque plastic on the ESB version), but that's it - same mold.
 
Just reading about this Slave 1 in 1/48...is this one of them? here I see them offered from Kenner and Hasbro, prices vary between 15EUR and 180EUR!

Hasbro_zps7cobcblr.jpg


thanks
Uwe
 
Just reading about this Slave 1 in 1/48...is this one of them? here I see them offered from Kenner and Hasbro, prices vary between 15EUR and 180EUR!


thanks
Uwe

I think that's a different one. The "Rise of Boba Fett" Slave 1 that was a Toys R Us exclusive is the correct Jango Fett version just from what I've been reading.
DSCN3765.jpg


- - - Updated - - -

The Jango S1 has the slot for Solo in carbonite under the cockpit, and the ESB has the sonic charges on the backside. Different paint, and some different plastic used for certain pieces (for example the wings are softer rubber and the prison cell uses an opaque plastic on the ESB version), but that's it - same mold.

Thanks I may try and find a Jango Slave 1 in that case. They're going a little cheaper in price and it's going to get repainted and have some work done on it. Either one should work for that, I'm just wanted a good size one.
 
Over the last couple of weeks I've been slowly but surely getting all the pieces together that I needed to get my Falcon "off the ground" so today I decided to test out my Panavise mount and I gotta say I'm more than happy with the way it looks.

I've had to use washers as spacers as the top half of the bolt in the internal brace is smooth and the whole thing was rotating under its own weight and this also accounts for the 2 nuts at the bottom of the bolt as well. I put the attachment hole just forward of the centre as this then puts it between the gun and the mount housing allowing me to keep both of them intact.

I'm notoriously bad for not finishing what I start, mainly through lack of time and skills but I've been enjoying this and enjoy seeing what others do with theirs.

12651240_10208436543941349_6076884473507181603_n.jpg

12662449_10208436546341409_2579075649837566897_n.jpg

12687967_10208436564261857_2664992127734799725_n.jpg
 
Hey, Junk Pilot, you done good! That was just what I was thinking of...looks solid.

For all us suddenly a-twitter over the Slave 1 "companion piece" to the Mill Falcon, perhaps we should start a new thread just for that? That way we could clear up some of the confusion on what to look for (there are a lot of Hasbro Slave 1 releases out there, me hearties...) Anyone want to start it?

Regards, Robert
 
I nominate rbeach84.

Hey, Junk Pilot, you done good! That was just what I was thinking of...looks solid.

For all us suddenly a-twitter over the Slave 1 "companion piece" to the Mill Falcon, perhaps we should start a new thread just for that? That way we could clear up some of the confusion on what to look for (there are a lot of Hasbro Slave 1 releases out there, me hearties...) Anyone want to start it?

Regards, Robert
 
Anyone here willing to duplicate their lighting on commission or give me a parts list of what they used? The lighting seems daunting...
 
Hello to all. There has not been much activity on here lately. I haven't posted for quite a while, not since I finished and posted pictures of my first falcon (page 115). I just wanted to show my progress on my second falcon. It is almost done, I just need to add some more weathering. It has turned out better than the first, but there are still things I need to improve on with my next one.IMG_0057.JPGIMG_0056.JPGIMG_0051.JPGIMG_0052.JPGIMG_0053.JPGIMG_0054.JPGIMG_0041.JPGIMG_0049.JPG
 
Awesome paint job! Did you use MIG pigments, if you don't mind me asking?

Sent from my SM-T350 using Tapatalk
 
Screencheata looks great! Not over done and nice 2 tone on the engine deck and mandibles, what did you use for your light and stand?

Haven't made too much progress sadly. As this is my first lighting attempt I'm slowly trying to figure out engines headlights and what am I doing with the cockpit, Tonys shapeways, printed photo and styrene? Just not sure. But I'm liking the engine glow so far used 2 led strips I found for super cheap from pepboys just need to make the light housing sit flush with the cut out which is becoming a pain lol.

image.jpg
 

Attachments

  • image.jpg
    image.jpg
    799.7 KB · Views: 182
Thanks for your compliments guys. All of the falcon was painted with acrylic paints and an airbrush. I haven't tried the mig pigments, but I do plan on getting some soon and trying them out. I did do some washes and some splattering with acrylic paints and a brush. The rest of the weathering and streaking will be done with oil paints. Crash, I think your lighting looks great! I know exactly what you mean about the lighting housing being a pain to get flush. The stand I'm using I got from my local Macy's. They are going out of business and are selling everything. These were display stands that I pieced together. The bottom is a heavy meatal, telescoping stand... the top is some sort of bendable metal rod that seems to work out quite well. I got them dirt cheap and like the way it looks quite a bit. I'll take some pictures of it later to give you a better look.
 
Last edited:
Also, Crash, I'm sure that we would all love to see some more pictures of your falcon when you get the chance. Maybe we can get some more activity on this thread again, Everybody has seem to move on to the Deagostini falcon thread. I miss the days where this thread would get one to two pages of new posts a day. :( Gus, if you've got a Hasbro falcon and are starting on it, you should post pics of your progress for us, too.
 
Last edited:
I recently decided to get back into modeling after a 20 year hiatus. I spend all day at work on a computer doing graphic design, and what little free time I have at home after getting the kids to bed was often spent in front of a computer playing video games. Fortunately I kept most of my unbuilt kits and supplies, paints etc. so I could easily hop right back into it. I started off by repairing a damaged P-51D Mustang that was my best model from my youth. I’m now working on three kits concurrently: an AMD/ERTL Snowspeeder, ATAT, and B-wing. They’re going well. The amount of knowledge readily available on the internet makes this a completely different experience compared to doing this as a kid with nothing but a few magazines to glean from.


Anyways, the reason I’m posting here is that a few weeks after I got back into this, one of my neighbors was clearing out some old toys, including a Hasbro Rebels Falcon that she gave to me for free. I was already familiar with Randy Cooper and his resin additions for this toy so I knew what I was getting into. I’ve already spent countless hours pouring through RPF and some other sites over what I can do with this thing. It’s very daunting. I can’t decide just how far I want to go with it. The only thing I’m really sure of is that I want to stick with the Randy Cooper package/photo etch, plus Tony’s shapeways parts for the cockpit, radar and guns. I don’t care about it not being screen accurate. I’ll probably get the Bandai 1/144 Falcon before I start the Hasbro conversion for some practice doing the weathering. The thing I really love about the Bandai kit is that it comes with everything to display the falcon with the landing gear and boarding ramp up or down and easily changeable (I think). Randy Cooper makes a boarding ramp and gear well upgrade, plus I thought it would be cool to scratch build the gun wells with the connecting tunnel but all this just adds up to a lot of time and money. I also plan to do some lighting with LEDs and FO but I’ve never done that before. The whole thing will be amazing when it’s done but who knows how long it will take. I welcome everyone’s advice on just how deep of a hole I should dig myself into.
 
Last edited:
Taiters, I think it really depends on what kind of a display you want your Falcon to be. If you want an awesome detailed replica, and have the extra money to spend. you should go all out with it. A nicely finished falcon does make a very impressive display piece. The reason I have been working on these toys is because I use to have a Master Replicas falcon and sold it about 6 years ago. I LOVED it and miss it every day. So this has been an affordable way for me to "kinda" get it back. These two falcons I've done have been more practice for me than anything. The next falcon will be mine and I do plan on going all out with it. I want the appropriately detailed cockpit, sidewalls, radar dish, landing gear....everything that the toy is missing.
 
I agree Screencheata. After thinking about it a bit more I should just do all the bells and whistles. I don't intend to do any other massive Millennium Falcon models as I would rather put that time and effort into a different ship (like say a Star Destroyer). Go big or go home.
 
For those of you with the FZ6 sidewalls, how are you making up the gap they leave lengthwise when cutting the existing rear sidewalls and move them further inward, if that makes sense. The mandible walls all fit well, but the curves walls do not seem to be long enough to take up all the necessary space. Thoughts?
 
Cbrant looks as though the best option would be to build a surround for them ie; a slightly larger curved open box that will act as a support and fill the gaps take a look at how Randy Coopers sidewalls are molded they give a hell of a deep inset and great look.
Curious if anyone has done up a printable cockpit for this? I want to go with Tonys full cockpit for my next/5 footer mod but the one working on I'm thinking of a quick scratch & decal build. Does such a thing exist? Has anyone done this? Or is anyone willing to share a scaled set?
 
Back
Top