My PKD Bladerunner pistol build.

.
Listen, I popped open my BR Blu-Ray briefcase boxset, and decided to watch the theatrical cut, since it has the original color-timing (which makes for more accurate blaster reference study).

Of course, once you pop, you just can’t stop, so I’ll soon be rewatching the other versions AND all of the special features. I’m not sure there is such a thing as a casual rewatch of BLADE RUNNER, especially with that treasure-trove of Blu-Ray extra content to dive into.
Theatrical version it is. I feel a lot of freeze frames coming lol.
 
It's a matter.of finding it
So true. I think I picked up a couple at a vintage gun show a few (many?) years ago.
What you've got will work. Looks like you've got a plan for shortening and mounting it.

As an aside; I've never bothered tapping holes in resin kits. If you choose a drill bit 2 sizes down from your screw, the screw will thread itself in nicely. Just take your time. If you start swapping out resin for metal parts, then you'll want to tap properly.
Thank you i really appreciate your help.
 
Okay, cool. Kinda hard to find reference on the screenused screw. The photos of the resin cast stunt props are a bit murky.

I’ve only been hardcore-researching this prop for a few weeks, so I don’t know all the ins and outs of it.

I also gave the film a rewatch, the other night. A few observations:

* Slotted screw only, no Weaver knob in sight.

* I think a good number of shots—even some close-ups—actually feature the rubber stunts, despite some people using those shots as reference for hero prop details. For example, the close-up of the blaster hitting the ground when Deckard drops it during the final chase with Roy. Looks like a stunt, to me. Literally so, since the prop falls to the floor and bounces. The hero only seems to appear for live-fire moments and non-action close-ups (Deckard stalking along the rain-soaked wall during the final chase, Deckard slowly reaching down to remove the blanket from Rachael at the end, etc,).

*I didn’t notice the green LEDs illuminated at any point. Also, the (definitely cut) white wires coming from the sight seem only visible in that one close-up of Deckard stalking along the rain-soaked wall. The rest of the time, they appear either absent entirely, or covered with black tape. Either way, no lit LEDs the movie that I could see.
Yeah, there's a gap in history from the use of the screw in the movie to when the gun reappeared with the Weaver knob many years later. I do believe the screw came from a Weaver scope as well.
The green LEDs are never lit. I've always suspected that they had trouble with the red LEDs while shooting and had to run those white wires while on set just to be able to keep filming.
 
Making progress. Cleaning up some parts. Primed a few with filler primer. Lightly reamed out the cylinder to allow a looser fit for the dummy rounds.

I also started building up the front bottom edges of the Steyr receiver with putty to eliminate the gaps between the receiver and the barrel.

I also found and ordered a Bulldog mainspring assembly, which saves me the trouble of having to try and fabricate an inaccurate fascimile out of rods and/or bolts.
 
Well, you guys have inspired me. I just finished a Tip Top Luv’s blaster and have K’s on the go, but I just ordered this one too. It looks like a great kit to build and Incant wait to see your final products.
Tom
 
On the flipside, I’ve kinda been eyeing TipTop’s K blaster. I enjoyed BR 2049 (and am grateful that it didn’t go out of its way to completely destroy the original film, as pretty much every other genre franchise sequel of the past few years has done), although I still feel that BR should have remained standalone. It is a completely unique, challenging film which insists upon itself.


Meanwhile, as I get closer to the painting stage, I need to make some decisions. It appears that the graphite-rub method is good for getting a faux-metallic finish, but I’m kinda leaning toward using Alclad paints.

Any thoughts?
We don’t have Alclad in Canada but it’s probably not too far from any other enamel like Testors or Tamiya.
I’ve liked Dupli-color gunmetal on the barrel in the past. That’s what I used on this snub nose pic below.
The Luv’s blaster has the same paint with a graphite powder rub and a satin clear coat.
CF471AF4-C880-47FA-85BD-BE53A07B2B9A.jpeg

828B2F6D-0591-474E-9297-EA43A32D4E05.jpeg
 
And which method gave you a better result, in terms of both appearance and durability?

I’m very familiar with Testors enamels, as well as general use (non-hobby) products like Rustoleum and Krylon. Alclad seems to be a popular choice for faux-metal finishes on hobby projects, but I’ve never used it, and this would certainly be a good opportunity to give it a shot. But the graphite method looks pretty awesome.
I’ve always been happy with the dipli-colour but I think the graphite powder takes it to a new level. It adds a sheen and patina much closer to real metal. I’ve seen it done without a base coat and that can look good too.
You’re probably going to paint the grip frame black so you could test it there and see what you like more. I didn’t have an inconspicuous spot to test it straight on the resin but I think having a base coat adds some depth to the final product.
 
I’m planning on a black basecoat for everything, no matter what topcoat I decide on. If I go with metallic paint (specifically an airbrush paint), I can vary the coverage a bit to help convey a sense of depth and weathering. With the graphite technique, I’d probably have to apply weathering on top of the metallic finish. For the receiver, I’d like the sharp angles and edges to have a lighter, less-blued-looking tone, thus conveying a sense of wear.

I may experiment with Rub N Buff, too.


Also, I’m having so much fun with this kit that I’m almost tempted to get another one, and do it up as the 2049 version, with the Worldcon style weathering and the Weaver knob (...and maybe even the different serial number that was apparently on the live-fire prop). But that’s perhaps a bit TOO obsessive!

As an aside, while I appreciate the detailed greebly which is the Weaver knob, I find the slotted screw to have a really appealing aesthetic value that is missing from the later iterations of the design. That sort of strange, “retrofitted” style which permeates the film. Futuristic mixed with retro.

Meanwhile, I’ve come back to thinking that the vertical rod connecting the clip housing and the barrel is indeed too small in diameter. Hmm. And I should soon be receiving the LED kit, so then I can modify the clip to accommodate the plastic switch housing, and get the LEDs wired up after that.

Also, it appears that the resin sight/screwdriver piece in my kit is slightly warped. Not sure if I should try to heat it up and straighten it, or upgrade to one of TipTop’s metal ones. And maybe a few other bits, like the metal binding post. We’ll see. As it is, the dummy rounds are already making this thing fairly heavy, and I haven’t even added the recommended metal rod into the barrel for weight, nor the metal mainspring.
 
Sounds like a well planned build. I haven’t experimented with aging the graphite but I’m sure it’s not too difficult.
I usually do a black base followed by a chrome coat and then the final colour. It gives you a bit of leeway when aging. A little wet sanding can expose chrome on the edges and corners. Good luck with the rub n buff. It always gets away on me.

I too am a fan of the slotted screw over the Weaver knob. I can’t put my finger on why but I think you’ve articulated it well. Personally, I’m not a fan of the World-con aging as I believe the prop was used and abused during filming and then left in storage until it showed up at the convention having been left to rust and deteriorate for 24 years. But that’s just my opinion.

I think it’s great that you’re adding more metal. I plan to do the same. As with my other BR blasters I plan to add as much metal to this one as I can. Barrel/grip frame/butt plate/ trigger and guard as well as all the hardware. I don’t think they can be too heavy. If you have a Tomenosuke you know what I mean. They’re probably the closest to the weight of the hero prop.
 
Yes, the Worldcon version of the prop obviously reflects decades of disuse and decay, which is why the weathered look far better suits the 2049 version of the blaster (with the time-gap also nicely providing wiggle-room for the Weaver-knob swap-out).

The original film (and the references available from that period) show a far cleaner version, with more of a dark look to the blued metal areas (so much so that they often read as black on film and in photos, and are depicted as black in artist renderings and merchandise and whatnot of the era). The prop was clearly never meant to look like something out of STAR WARS, in terms of rust and weathering. Rather, it was a sleek and slick futuristic police gun with some subtle indicators of previous use. And, really, the most obvious weathering during filming was the buffed-off paint on the lower front and rear grip frame, apparently due to the machining of the pinky rest on the buttplate (and the subsequent removal of the paint from the top and side of the plate).

So, the trick will be backdating the weathering to something resembling the prop during filming. For example, the grip’s buttplate shows some weathering and scratches during production (moreso as filming went on), but nowhere near the extent of the Worldcon photos.


I may end up snagging a Tomenosuke if conditions are right, someday. But, for now, I might as well go as all-in as I can, since this may be my only shot at doing the prop justice.
 
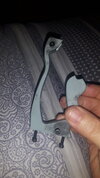
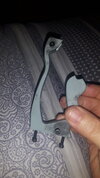
Really struggling with threading the holes so tried countersinking some m3 slim nuts into the grip frame with a little success. Only one nut didn't stick in using jb weld so working on that one again the others seem to have stuck ok.
 

Attachments

  • 20210523_071155.jpg
    20210523_071155.jpg
    1.5 MB · Views: 124
Really struggling with threading the holes so tried countersinking some m3 slim nuts into the grip frame with a little success. Only one nut didn't stick in using jb weld so working on that one again the others seem to have stuck ok.
My concern here is that you’re using a tap to thread the holes. The holes are fairly shallow and since the tap is tapered you won’t get a thread cut to the bottom. If you try to over work the resin it’ll strip the threads.
If you get into trouble here, I would suggest filling the hole with the JB weld and re-drill and tap a hole.
That's why I thought of adding suncken nuts for better grip.
 

Attachments

  • 20210523_071155.jpg
    20210523_071155.jpg
    1.5 MB · Views: 104
Well, I successfully heated and straightened the resin sight. I also glued in some brass tube to give it structural integrity, and to make sure it retains its shape.
 
My concern here is that you’re using a tap to thread the holes. The holes are fairly shallow and since the tap is tapered you won’t get a thread cut to the bottom. If you try to over work the resin it’ll strip the threads.
If you get into trouble here, I would suggest filling the hole with the JB weld and re-drill and tap a hole.
I suffered another set back and now feel really dejected. Will I ever solve my thread tapping woes
 
Oh no! What happened?
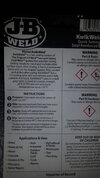
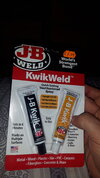
I drilled countersink holes for the nuts but I can't get them to retain the nuts using jbweld. I have filled the holes in with jb weld but it doesn't seem to want to set. I've followed the mixing guide, 1 to 1 mix, but it isnt setting hard and it's been 9 hours.
 

Attachments

  • 20210523_202758.jpg
    20210523_202758.jpg
    1.5 MB · Views: 109
  • 20210523_202741.jpg
    20210523_202741.jpg
    1.5 MB · Views: 105
Back
Top