FranklyBuilt
New Member
Hello everyone! My name's Frank! I'm 29 and currently stationed in the UK with my wife and doggos. I've been in the USAF for 8 years now and been overseas the entire time. I've been a lurker here for a while and i've been wanting to post this but every time i think it's done; i want to change or add something. I apologize now for how long this thread is but i wanted to get all the information i have out in the open. Hopefully this can help someone!

I started 3D Printing just over a year ago after seeing Endgame to make this suit exclusively and it got a little out of hand. As i started to research and prep and eventually print/build I realized how few resources existed for 3D Printed cosplays to this level. It was very scattered. Any youtube tutorials and series either never finished or brushed over so much it was more of a demo. And *****, are people secretive about their strap and harness systems. So i began to document everything i could and share all the things i was learning to great reception. It's been such an amazing journey so far and i can't thank the maker community enough for all the help! So hopefully this is my way to give something back to the next person looking to make a small dream come true.


I'm not too sure on where to exactly start so i'll try to summarize what i think is each aspect of this suit and build. Along with the reasons I did certain things. Here we go!
The
The Skills:
What do you need to do this? How hard is 3D printing? Do you need to know how to design? Draft? Paint? Wire? What does into this? To be honest you don't really need to know much of anything to start. While certain skills obviously put you ahead in some aspects nothing i've needed to do through this was something that took months or years to learn. I've grown up with a heavy background in the car world. I'm very familiar with 12v electronics, painting and bodywork. I've also been building Gundam Models for YEARS so working with plastic and small details is second nature. But again, this only gives me a head start, not an advantage in any way.
Now, being comfortable using a computer and possibly have a slight mechanical inclination will pay out in spades but this all boils down to commitment level. It's not CAN you do this but how much do you WANT to do this. Once you take the dive and start; that's it. Game on!
The Printer:

3D printing technology has made a quantum leap in the past few years. It's cheap! With an quality printer being less that $200! And yes! People make entire suits with that single small printer! Now, i wouldn't recommend that however. While you CAN do it, you will drastically increase the amount of prints, the amount of parts you need to fuse back together, the amount of time spent printing and much more. It's not impossible but not very practical. I HIGHLY suggest a printer around 300X300X400 build volume. I personally went with the Creality CR-10S but other similar volumes exist across Creality and other brands like Artillery, Tevo, and Sunlu. Do your research!
But please do not fall into the trap that so many others do! This is still a growing hobby! These are ENTRY level hobby printers! No, they don't need to be 100% assembled like the Anet A8 (nor do they catch fire like the A8) they still have a learning curve that some aren't ready for. They aren't an appliance like a microwave or a tool like a power drill. They don't always "just work" they take some time to understand and learn. But by no means are they HARD to learn; again it boils down to commitment and drive. And let me tell you about the 3D Printing community; it's HUGE! So many people are willing to help and talk and guide you through nearly anything. Dozens of facebook groups and forums to browse to help you get ready before you even make the purchase.
If you would like a quick summation of what goes INTO 3D Printing you can watch this video i made : How to 3D Print!
But don't stop there! Check out more resources like The 3D Printing Nerd and Makers Muse!
My top 2 current recommendations for printing a Cosplay armour that still remains beginner friendly are:
Creality CR-10 V2
Creality Ender-5 PLUS
The Programs:
How much are the programs? Are they expensive? Nope! They're free! Well most of them are. And actually? They're VERY easy to use! I went with an awesome program called Ultimaker Cura. Very user friendly. COUNTLESS tutorials for it and frequent updates. But what does this program do? Well to take a 3D file and make it into a 3D print you need to convert it into G-Code. This is a long written code that tells the printer exactly what to do not unlike a CNC. It traces out the path the printer must follow in order to properly build the 3D part in the real. If you want to see a little preview of how Cura works check out this video! You can also look into other programs like Simplify3d and Prusa Slicer
But you may need another type of software as well. Some 3D files are obviously too large to fit on a printer. You need a Cutting program! Now i vary between 2 different ones. The first is Slic3r. This is a very basic program and actually is the same type of program as Cura except doesn't work as well. What it DOES do well is let you view the 3D parts in a faster more open space and make "plane cuts" or straight cuts in the XYZ positions to help chop up 3D files! But if you need to get more advanced and accurate you can use Meshmixer! Another free program that is more for organic modeling but holds a great plane cut feature!
You can download Cura, Slic3r and Meshmixer all for free and begin messing with the programs immediately! Head to Thingiverse.com or Cults3D.com to grab free 3D files to play with!
The Files:

Where do you get files from? Are they free? How much? Some 3D files are free, some aren't. A very basic rule of thumb is you get what you pay for. And if you didn't pay for them don't expect too much. Now that's not to say people don't share and post AMAZING files for free but few people release entire armor file sets. Usually you have to pay a little for them which make sense! Someone put a lot of time and effort into them (usually). You can find 3D suits and files scattered all over places like Etsy, CGtrader.com, Patreon.com, DO3D.com, and more! But places like Thingiverse.com and Cults3D.com host many for free!
So wanted the MK85. It was beautiful. From the more muscular shape to the original Ditka armour callbacks i knew it was the one i wanted. I did a lot of searching trying to find the right files and it brought me to DO3D.com. This is where i got my hands on The Mark 85 Armor Files and The MK85 Infinity Gauntlet. And later on in the build after i had printed many versions of the MK85 Helmet trying to find the perfect one (The DO3D one was lacking sadly) i discovered this gem. The beautifully made MK85 by Akira Yumming. It was the most screen accurate model i had found. It's those damn eyes.
But what's included in 3D files? Do they fit them for you? How do you know what size to make them? This leads me to the next topic.
The Filament:
What's it printed in? Plastic? Is it strong? Did you reinforce it? Will it melt in the sun? Much debate exists for the proper filament to use. So many brands with so many variations. The standard most commonly used plastic when printing is PLA plastic. It's cheap. Easy to work with. And actually non-toxic when printing it! Other printable material exist such as ABS, PETG, TPU and more. They all have pros and cons so do your research when hunting! Basically ABS is a much stronger plastic but hard to print (needs a heated enclosed space), PETG is also strong, no enclosure but can be very tricky to print with. And TPU is a flexible rubber type material great for joints. Probably one of the hardest things to print with.
I myself stumbled upon a neat little hidden secret (at the time it was still emerging) call PLA+. Now don't ask me what the difference is because depending on the manufacturer you get different answers. There exist no regulations yet on what material difference needs to be added to standard PLA to give it these properties. Some brands make it have a higher melting temp, others alter it's strength. Whatever the case may be always get some and test it before commiting.
PLA has a very low melting temp and can warp in direct sunlight or in a hot car. But PLA+ has a higher melting temp which can widen that gap. Also let's be practical here; Don't leave your stuff in a hot car. PETG and ABS will pretty much never warp normal hot environments. So pick your poison!
The Scale:

This is the achilles heel of nearly everyone who make their first printed armor. Scaling. Early on i made one big choice. And i stuck with it the entire time. I refused to have my Iron Man costume look like a bobble head. Now i'm not trying to insult or call anyone out and this by no means accounts for everyone. I get it. We aren't built like superheros; especially MCU Iron Man with the impossibly long legs and small waist. But you see it happen. People begin to scale the armour down to fit them more snug but wait. You want the helmet to open and you want electronics for the eyes. You suddenly need to make the helmet bigger to fit everything. You make the arms super skinny because you don't work out like Chris Evans (or at all). You shorten the legs because you're 5ft but you need to be able to walk in the suit properly. And boom. Iron Bobble Head. It's hard to get past without making some major sacrifices.
If i was going to put the time into this; i wanted it to look proper. Luckily DO3D had my back...Kind of.
When you get 3D suit files sometimes nothing makes sense. Nothing is scaled. Everything is scattered. The coordinates in the 3D scape are set to the build plate so you can't even match parts up. But D03D (and some others) actually scaled their parts properly to reference material proportions. Now this automatically means it basically won't fit anyone "out-of-box" but it gives you a baseline to work with. "Oh! That's how that should look!" With these set and scaled properly you can work up from there.
There even exists a wonderful programs called Armor Smith that lets you make a 3D avatar of your own body to help you size and scale 3D parts before you print them. This is an invaluable tool i can't recommend enough!
But alas i didn't take my own advice. I took a different route. I printed everything (except the hands) at 100% scale. Turns out DO3D models the Iron Man files at roughly 6ft tall. But i am no 6ft tall man. I am 5'8" (in the morning) but i AM on the more "fit" side. My plan going into this to avoid that oddly scaled hurdle was to print everything then make MYSELF fit into IT. Instead of the other way around. This required a lot of trimming, sanding, heat warping and some 3" lifter inserts in my 1" heeled boots to get me to the proper height. And it worked!
If you want more explanation on my own method of scaling Watch this video here!
The Welding:

How do you fuse the parts? What glue do you use? You'll also notice i have some very large prints joined together. I originally used a 2 part CA glue until my armor stand fell over one day and broke the chest and abs on my suit. Luckily it was before i painted and it forced me to revise and learn a new method; PLA Welding. Now it wasn't new but it was new to me! I don't use glue. Super GLue, Epoxy, CA Glue; none of that when it can be avoided. I simply use a super cheap $5 soldering iron to fold and melt and interlock the parts. You can even use wasted filament and failed printed as filler material to close gaps and strengthen the joint!
Depending on how comfortable you get at this you can even close up gaps on the OUTSIDE of the prints and smooth over seem lines before you sand and paint! Or i'll use some super cheap Wood Filler to close up the gaps and fill in any holes. Bondo Spot putty is also great but actual 2 part bondo can be problematic and crack if the plastic flexes too much. It's a fast way to ruin a good paint job.
This step is extended greatly when you use a smaller printer. Again, it's possible but you can imagine how many more seams you need to weld and fill.
The Sanding:

How did you get it so smooth? Did it print like that? You must have sanded that for weeks! I've heard it all. And even had arguments about it being called a liar. I don't think something has so much debate in the printing community quite like post-processing or sanding. You don't need to spend days sanding 3D Prints. Aside from an obvious print quality requirement there are a couple ways you can speed up the process of smoothing out a 3D print.
Spray Paint Filler Primer, XTC-3D Smooth-On, Vapor Smoothing (No good for PLA/+) or my personal favorite; Power Tools.
This was something very frowned upon when i started to 3D print. Everywhere i looked for tips on how to sand and smooth my prints everyone said "NEVER USE POWER TOOLS!" so i took that as sage advice. Me, someone who has been working on cars and models and painting for over a decade. Why didn't i just try it? Why did i wait? I shouldn't have. So after getting sick of filler primer ruining my sandpaper i took the risk and tested a theory.
I took a Dual Orbital Palm Sander with 80 gritt sandpaper to an iron man mask. And after that i never looked back. Now this obviously doesn't work on everything but man does it shave DAYS off of sanding large armor parts. I literally sanded my entire suit in about 2 days and went onto priming and painting. It was amazing. I had been sleeping on this method for way to long. But be warned it takes some time to dial in! You CAN melt parts and you CAN ruin a print so always practice!
The Paint:

What color did you use? What's the paint code? Where did you get it? If it's a Metallic Red paint and you can buy it in the UK; I own it. I went through days and days of testing and painting and comparing and clear coating and so many damn plastic spoons trying to dial in the proper colors. But i wanted this to be perfect. It had to be perfect. And why yes; my entire suit is spray painted. It's what i knew and what i was good at. Maybe one day i'll upgrade it.
This is something people often neglect. The amount of messages i received while building this asking what colors i was using and where to get them was insane. Stop asking. No, not because i won't share it; i will! It's because you most likely don't have access to them. Or you live in a different climate. A different environment. Hows the humidity? Temperature? Do you have a paint booth? A cold garage? So many variables play in when painting you NEED to test it for yourself. Find you own colors. Learn what works for you. Because my red and your red may look worlds apart even if they're from the same can. And that's before we even talk about Metallic paint. Many metallic spray paints can't take a lacquer clearcoat; It ruins it! So testing these combinations of paints is CRUCIAL. I ruined the paint job on an entire arm because i got cocky and didn't test my new clear coat on the Gold and Red.

I ended up landing on a combination of a UK specific Rustoleum Automotive line of spraypaint. It was perfect. The 2X red was just a base coat for the Metallic red. And all 3 colors could take a lacquer coat just fine.

After all of the painting and clearcoating was complete i actually went over everything with automotive grade polishing products (Meguiar's sponsor me please!)
This really brought out that deep shine the lacquer had to offer. I started with rubbing compound then moved onto a resin polish. Followed by THE BEST smelling car wax ever; Meguiar's Gold Glass. It also helped add a small small small layer of protection from grime and dirt. Maybe. Probably. But hey isn't it shiny?
The Fitting:

How is everything attached? Can you walk in it? What did you use? Let me start off by saying i messed up big time here. I skipped this step before i painted and i regret it every day. I was too eager to paint my suit and get results i didn't spend enough time right here in this period fitting everything properly. t all "mostly fit" so i went right ahead and painted it. If you take one thing away from this; ANYTHING! Fit the entire suit before you paint a single thing
No, Really. Please. It may seem obvious to some and i know that. You may get confident like i did. But i implore you, just take your time and make sure you are 100% comfortable in the entire suit before you start painting. I had to make many adjustments after the fact but now i had to worry about damaging the paint. It was not worth the headache. But with that said...
I think i did a good job. I spent a lot of time sanding and trimming the edges of the parts with a Dremel to help it wrap around me better. I had made another choice early on; I didn't want gaps. No gaps. No seams. No visible body parts in the Costume (within reason). It was something that always bugged me about Cosplays i saw. But i 100% understand it's a matter of mobility. To increase mobility you NEEDED gaps and openings, i know that. But i sacrificed mobility for accuracy and i'm okay with that. I can still do the typical poses. I can walk. I can move. But sitting? That was never an option. And don't ask me to touch my nose.

What you see here is the very early stages of my strapping system. It was a lot of trial and error (and duct tape) of adding and moving straps. I used very cheap nylon and elastic straps from amazon along with plastic buckles and clips. I then began to incorporate magnets and velcro. I spent months revising and editing and improving the system for comfort. I eventually landed back on much simpler system to the one i started with. It's a lot to cover but here's a basic description.
-Shoes have covers over top
-Shins are free-floating and rest on the shoes
-Thighs are held up by a suspender system over my shoulders.
-Cod Piece is one solid part and wears like underwear (my butt keeps it in place)
-Back is literally a backpack that hooks over my shoulders and the lower back tucks into the cod/butt piece
-Chest has velcro on the shoulders that connects to the "hooks" on the backpack. Then velcro on the sides hook it under my arms and waist.
-Shoulder Pads clip into the shoulder part of the chest and hang free for mobility.
-Biceps clip into the shoulder part of the chest and hang.
-Forearms are free floating similar to the shins. Allowing for more twisting and flexibility
-Gloves are...Gloves
And that's about it! If you want to see more on this you can check out This Video on Strapping and Harnesses
Side note: CA glue works BEAUTIFULLY on elastic and Nylon when fusing it to PLA and PLA+
The Electronics:


I'm proud of this one. I have zero idea how to code and program. And if you start a google search for Iron Man electronics and motorizing an iron man helmet you'll quickly realise a lot of it revolves around Arduinos and Micro-controllers. All of which i have no idea how to operate. And to be honest i had no intention of learning (yet)
But what i do know very well is 12V DC systems from my automotive background. I know relays and triggers and LEDs and parallel circuits. This i could do. This i was good at. So i started in on it with a goal...
100% Analog Iron Man Suit
And i know that seems silly; just learn to code! But it became a goal. Could i motorize a helmet with no arduino? Could i wire up the entire body light system? Could i incorporate finger controls?
Yes, yes i could. I also decided to do this for another reason; Programming is intimidating. And i know for a fact that it can scare a lot of people away from things like this. It's scary! So if i could at the very least make a method that would get people in the door; why not? Help get their feet wet and dabble into electronics. They could then grow into it and expand. That's also what i plan to do.

.jpg")

The systems are actually very basic. And the fact that i found a 12V USB pack still blows my mind but it works! And that's exclusively to power the 12V COB LEDs i use. One day i'll downgrade them back to 5v Piranha LEDS but MAN are they bright. Oddly enough i actually use some Arduino based sensors and triggers except i'm just hijacking the signals for relays.

The other challenge was getting an iron man helmet to open and close with no programming. Enter The Hotwired Micro Servo. Now i was by no means the one to invent this but the tutorials for it were bad. Like next level bad. Basically i'm turning a Micro-Servo into a DC motor. Now, why not just USE a DC motor? Because that same reason of upgrading. I always planned to move onto arduinos and if the system i install with hinges and brackets already used a servo then it's an easy swap!
I went through a lot of testing and methods from Reed Switches to DPDT switches but if you want to see how it all comes together and can be applied watch this: Motorizing an Iron Man Helmet
The systems and features in my suit include:
-13x 12v COD LEDS (White) wired in Parallel to a 12V USB pack
- 2x 12V COD LEDs (White) in the palms that turn on when a trigger in my wrist it activated by tilting my hand back.
-6 Colored 12v SMD lights (Infinity Stones) Wired in Parallel to a 12V USB Pack
-2 Clear Acrylic LED Cosplay Eyes powered by a 5v USB pack that turn on when the mask closes automatically.
-2 Reed switches in the left hand to control the open/close of the helmet limited by triggers on the faceplate
-2 hotwired micro-servos controlling the facemask powered by a 5V usb pack
-1 Reed switch in the right pointer to control a Flip-Flop relay that turns the LED eyes on/off
-1 Reed switch in the right middle finger to control a Flip-Flop relay that turns the Infinity Stones on/off (like a snap)
-1 Thermal distribution system interlaced throughout the suits exterior for high-altitude flight in opposition to cold temperatures and icing
The Extras:
The Infinity Stones


Few words can describe just how proud of this thing I am. It was the focal point. The centerpiece. The main attraction.
The process and idea was actually pretty straight forward. I saw people who had just 3D printed colored stones. Or people who printed stones in clear PLA plastic and backlit them with LEDS. Well the Infinity stones aren't clear. I wanted them to look nice on and off.
Step 1: Print the plastic masters of the stones to proper scale and make resin-safe silicone moulds for them.
Step 2: Buy way to much resin dye and spend a few days testing different colors and combinations. Find the best 6
Step 3: Mix some clear resin with the resin dye and pour into the moulds. Let sit for 6 days because you didn't use enough hardener.
Step 4: Pop them out and let them sit even longer because damn; you really should've used more hardener.
Step 5: Install and backlight the Resin Stones with color specific super bright 12V SMD lights so you can down passing aircraft from the ground.
Step 6: Don't Snap. Ever.
Could the Mind stone be a little more yellow? Could the Soul Stone be a bit more orange? Yeah. But i'll live. I'l still super proud every time i look at them.
The Arc Reactor


Okay i lied. THIS was the centerpiece (literally). One of the most recognizable features on any iron man suit and i wanted it to have depth. So i took a similar approach to the Infinity Stones plus some extra layers. I first took the master print of the reactor cover and resin cast it. But as you can see it came out hazy as all hell. So i utilized the same methods used when restoring and cleaning the headlights of a car! Lots and lots of wetsanding. Plus some extra buffing for clarity. It worked like a charm and gave me a beautiful near-glass like reactor cover that fit like a glove
Next was the depth. I found a free file on Thingiverse (it's gone now; sorry :/ ) and printed out the inner detail part of the reactor. Then i trimmed it to fit better inside the chest. After that i printed a small triangle shape on a HUGE raft in clear PLA plastic to mimic the reactors nano-texture. Then finally i suspended 3 12v COD LED boards behind it about an inch from the clear PLA to help diffuse the light and bam; Arc reactor!
I feel this adds such a nice little detail to the suit. It's not just a frosted lense with a light. Or hazy plastic. I'm really proud of it.
The Rest:
Resources and Tutorials
There is so much more i didn't cover. Things i've already forgotten i did and methods i've always improved upon but i hope this was an good summation of the process.
If you really want to watch the entire journey and see basically everything i've talked about in real time I invite you to watch my progress in the following series. I promise, make it through the first few videos; My production quality goes up.
Becoming Iron Man - A 3D Printed Cosplay Armor
I started documenting this process when i was bright eyes and bushy tailed. I was naive and had no idea where this would take me. I found this insane and wonderful new hobby that puts the things of legend and fantasy at our fingertips. 3D Printing has literally changed my life and i'm trying to do my best to give back to the community that recieved me so openly. It will in no way ever make up for everything that has happened and the benefits or rewards i've received but i promise i'll continue to try.If you've made it this far down i appreciate it more than you know. Thank you so much for reading and i truly hope this helps you or anyone get started on a 3D printed or ANY cosplay for that matter.
If you really like my cosplay and want to see some more of it i invite you to view this video.
Oh yeah! My Cosplay also just recently wont Comic-Con @ Home's Online Masquerade! So that was pretty cool!
Thank you!
Below is a TL;DR version of the post with the resources laid out a bit better. Enjoy!
3D Printing Information
Helmet Files: Akira Yumming MK85 (A much more movie accurate file over the one provided with the suit files)
Suit Files: DO3D Mark 85 Armor (The stock files are roughly 6ft at 100% scale; also, be very very skinny!)
Gauntlet Files: DO3D Mark 85 Infinity Gauntlet ( I had to scale the gaunlet down to about 90%~ to match the suit scale)
Printers: Creality CR-10s - 300x300x400mm build volume (2 printers used) (This is the minimum build size i would recommend or else you'll be cutting a LOT)
Material: SUNLU PLA+ Black Filament (Approx 15 rolls (1kg each) Including waste, failures, and re-prints)
Printer Software: Cura 4.0 w/ Creawsome Mod, Slic3r, Meshmixer (New Cura 4.7 has Creawsome built in! Works great!)
Settings: 215/50 nozzle/bed, 0.6mm nozzle w/ .3mm layer height, 60mm/s, 5% infill, Rafts, Tree Supports Time: Approx 1200 hours of printing total
Scaling: 100% scale (Scaling can be super tricky, I explain in this video how i went about it (or didn't) but for a great scaling resource try The Armored Garage!)
Post-Processing Information
Sanding: I used 80 Gritt sandpaper on an Electric Dual Orbital Palm Sander. Followed by 200 gritt by hand (For more Info. Click!)
Fusing: To join printed parts back together that i cut, i use a soldering iron while adding lost material from wasted prints. (For more Info, Click)
Priming: I used standard spray paint primer. Black, grey, red. Whatever was cheapest. You can try filler primer but i'm not a fan. (For more info, Click!)
Painting: Rustoleum Automotive Line Spraypaint ( Metallic Red, Metallic Gold (Dull), and Sky Grey) (For more info, Click!)
Clearcoat: Rustoleum Automotive Line Spraypaint Clearcoat Lacquer
Post-Work: I wetsanded my paint after the final color coat with 1500. Then again after the final clearcoat with 3000. After that i used Meguiars Automotive Rubbing Compound, Polish, and Gold Class Wax to protect and shine the paint.
Electronics and Extras
LED Cosplay Eyes: I used pre-made see-through LED Acrylic Cosplay eyes from Ebay! Click for more!
Infinity Stones: I 3D Printed the stones then made silicone moulds and cast them in Color Resin
Infinity Stone LEDs: My resin cast Infinity Stones are backlit with Pre-Wired LEDS from Oznium.com!
Servos for Helmet: I repurposed Micro Servos to run with no coding or Arduinos! Click here!
Hinges for Helmet: The MK85 is difficult to motorize. I got creative and used these hinges to do so!
Body LEDs: I used standard 12v COB SMD boards from eBay. But i recommend a 5v LED system
Cosplay Wearables: I used a variety of Nylon/Elastic straps, plastic buckles, and magnets to wear. (Click here for more!)
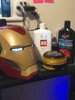
So this is my fully 3D Printed Iron Man MK85 Cosplay. I'm very proud 
I started 3D Printing just over a year ago after seeing Endgame to make this suit exclusively and it got a little out of hand. As i started to research and prep and eventually print/build I realized how few resources existed for 3D Printed cosplays to this level. It was very scattered. Any youtube tutorials and series either never finished or brushed over so much it was more of a demo. And *****, are people secretive about their strap and harness systems. So i began to document everything i could and share all the things i was learning to great reception. It's been such an amazing journey so far and i can't thank the maker community enough for all the help! So hopefully this is my way to give something back to the next person looking to make a small dream come true.
I'm not too sure on where to exactly start so i'll try to summarize what i think is each aspect of this suit and build. Along with the reasons I did certain things. Here we go!
The
The Skills:
What do you need to do this? How hard is 3D printing? Do you need to know how to design? Draft? Paint? Wire? What does into this? To be honest you don't really need to know much of anything to start. While certain skills obviously put you ahead in some aspects nothing i've needed to do through this was something that took months or years to learn. I've grown up with a heavy background in the car world. I'm very familiar with 12v electronics, painting and bodywork. I've also been building Gundam Models for YEARS so working with plastic and small details is second nature. But again, this only gives me a head start, not an advantage in any way.
Now, being comfortable using a computer and possibly have a slight mechanical inclination will pay out in spades but this all boils down to commitment level. It's not CAN you do this but how much do you WANT to do this. Once you take the dive and start; that's it. Game on!
The Printer:
3D printing technology has made a quantum leap in the past few years. It's cheap! With an quality printer being less that $200! And yes! People make entire suits with that single small printer! Now, i wouldn't recommend that however. While you CAN do it, you will drastically increase the amount of prints, the amount of parts you need to fuse back together, the amount of time spent printing and much more. It's not impossible but not very practical. I HIGHLY suggest a printer around 300X300X400 build volume. I personally went with the Creality CR-10S but other similar volumes exist across Creality and other brands like Artillery, Tevo, and Sunlu. Do your research!
But please do not fall into the trap that so many others do! This is still a growing hobby! These are ENTRY level hobby printers! No, they don't need to be 100% assembled like the Anet A8 (nor do they catch fire like the A8) they still have a learning curve that some aren't ready for. They aren't an appliance like a microwave or a tool like a power drill. They don't always "just work" they take some time to understand and learn. But by no means are they HARD to learn; again it boils down to commitment and drive. And let me tell you about the 3D Printing community; it's HUGE! So many people are willing to help and talk and guide you through nearly anything. Dozens of facebook groups and forums to browse to help you get ready before you even make the purchase.
If you would like a quick summation of what goes INTO 3D Printing you can watch this video i made : How to 3D Print!
But don't stop there! Check out more resources like The 3D Printing Nerd and Makers Muse!
My top 2 current recommendations for printing a Cosplay armour that still remains beginner friendly are:
Creality CR-10 V2
Creality Ender-5 PLUS
The Programs:
How much are the programs? Are they expensive? Nope! They're free! Well most of them are. And actually? They're VERY easy to use! I went with an awesome program called Ultimaker Cura. Very user friendly. COUNTLESS tutorials for it and frequent updates. But what does this program do? Well to take a 3D file and make it into a 3D print you need to convert it into G-Code. This is a long written code that tells the printer exactly what to do not unlike a CNC. It traces out the path the printer must follow in order to properly build the 3D part in the real. If you want to see a little preview of how Cura works check out this video! You can also look into other programs like Simplify3d and Prusa Slicer
But you may need another type of software as well. Some 3D files are obviously too large to fit on a printer. You need a Cutting program! Now i vary between 2 different ones. The first is Slic3r. This is a very basic program and actually is the same type of program as Cura except doesn't work as well. What it DOES do well is let you view the 3D parts in a faster more open space and make "plane cuts" or straight cuts in the XYZ positions to help chop up 3D files! But if you need to get more advanced and accurate you can use Meshmixer! Another free program that is more for organic modeling but holds a great plane cut feature!
You can download Cura, Slic3r and Meshmixer all for free and begin messing with the programs immediately! Head to Thingiverse.com or Cults3D.com to grab free 3D files to play with!
The Files:
Where do you get files from? Are they free? How much? Some 3D files are free, some aren't. A very basic rule of thumb is you get what you pay for. And if you didn't pay for them don't expect too much. Now that's not to say people don't share and post AMAZING files for free but few people release entire armor file sets. Usually you have to pay a little for them which make sense! Someone put a lot of time and effort into them (usually). You can find 3D suits and files scattered all over places like Etsy, CGtrader.com, Patreon.com, DO3D.com, and more! But places like Thingiverse.com and Cults3D.com host many for free!
So wanted the MK85. It was beautiful. From the more muscular shape to the original Ditka armour callbacks i knew it was the one i wanted. I did a lot of searching trying to find the right files and it brought me to DO3D.com. This is where i got my hands on The Mark 85 Armor Files and The MK85 Infinity Gauntlet. And later on in the build after i had printed many versions of the MK85 Helmet trying to find the perfect one (The DO3D one was lacking sadly) i discovered this gem. The beautifully made MK85 by Akira Yumming. It was the most screen accurate model i had found. It's those damn eyes.
But what's included in 3D files? Do they fit them for you? How do you know what size to make them? This leads me to the next topic.
The Filament:
What's it printed in? Plastic? Is it strong? Did you reinforce it? Will it melt in the sun? Much debate exists for the proper filament to use. So many brands with so many variations. The standard most commonly used plastic when printing is PLA plastic. It's cheap. Easy to work with. And actually non-toxic when printing it! Other printable material exist such as ABS, PETG, TPU and more. They all have pros and cons so do your research when hunting! Basically ABS is a much stronger plastic but hard to print (needs a heated enclosed space), PETG is also strong, no enclosure but can be very tricky to print with. And TPU is a flexible rubber type material great for joints. Probably one of the hardest things to print with.
I myself stumbled upon a neat little hidden secret (at the time it was still emerging) call PLA+. Now don't ask me what the difference is because depending on the manufacturer you get different answers. There exist no regulations yet on what material difference needs to be added to standard PLA to give it these properties. Some brands make it have a higher melting temp, others alter it's strength. Whatever the case may be always get some and test it before commiting.
PLA has a very low melting temp and can warp in direct sunlight or in a hot car. But PLA+ has a higher melting temp which can widen that gap. Also let's be practical here; Don't leave your stuff in a hot car. PETG and ABS will pretty much never warp normal hot environments. So pick your poison!
The Scale:
This is the achilles heel of nearly everyone who make their first printed armor. Scaling. Early on i made one big choice. And i stuck with it the entire time. I refused to have my Iron Man costume look like a bobble head. Now i'm not trying to insult or call anyone out and this by no means accounts for everyone. I get it. We aren't built like superheros; especially MCU Iron Man with the impossibly long legs and small waist. But you see it happen. People begin to scale the armour down to fit them more snug but wait. You want the helmet to open and you want electronics for the eyes. You suddenly need to make the helmet bigger to fit everything. You make the arms super skinny because you don't work out like Chris Evans (or at all). You shorten the legs because you're 5ft but you need to be able to walk in the suit properly. And boom. Iron Bobble Head. It's hard to get past without making some major sacrifices.
If i was going to put the time into this; i wanted it to look proper. Luckily DO3D had my back...Kind of.
When you get 3D suit files sometimes nothing makes sense. Nothing is scaled. Everything is scattered. The coordinates in the 3D scape are set to the build plate so you can't even match parts up. But D03D (and some others) actually scaled their parts properly to reference material proportions. Now this automatically means it basically won't fit anyone "out-of-box" but it gives you a baseline to work with. "Oh! That's how that should look!" With these set and scaled properly you can work up from there.
There even exists a wonderful programs called Armor Smith that lets you make a 3D avatar of your own body to help you size and scale 3D parts before you print them. This is an invaluable tool i can't recommend enough!
But alas i didn't take my own advice. I took a different route. I printed everything (except the hands) at 100% scale. Turns out DO3D models the Iron Man files at roughly 6ft tall. But i am no 6ft tall man. I am 5'8" (in the morning) but i AM on the more "fit" side. My plan going into this to avoid that oddly scaled hurdle was to print everything then make MYSELF fit into IT. Instead of the other way around. This required a lot of trimming, sanding, heat warping and some 3" lifter inserts in my 1" heeled boots to get me to the proper height. And it worked!
If you want more explanation on my own method of scaling Watch this video here!
The Welding:
How do you fuse the parts? What glue do you use? You'll also notice i have some very large prints joined together. I originally used a 2 part CA glue until my armor stand fell over one day and broke the chest and abs on my suit. Luckily it was before i painted and it forced me to revise and learn a new method; PLA Welding. Now it wasn't new but it was new to me! I don't use glue. Super GLue, Epoxy, CA Glue; none of that when it can be avoided. I simply use a super cheap $5 soldering iron to fold and melt and interlock the parts. You can even use wasted filament and failed printed as filler material to close gaps and strengthen the joint!
Depending on how comfortable you get at this you can even close up gaps on the OUTSIDE of the prints and smooth over seem lines before you sand and paint! Or i'll use some super cheap Wood Filler to close up the gaps and fill in any holes. Bondo Spot putty is also great but actual 2 part bondo can be problematic and crack if the plastic flexes too much. It's a fast way to ruin a good paint job.
This step is extended greatly when you use a smaller printer. Again, it's possible but you can imagine how many more seams you need to weld and fill.
The Sanding:
How did you get it so smooth? Did it print like that? You must have sanded that for weeks! I've heard it all. And even had arguments about it being called a liar. I don't think something has so much debate in the printing community quite like post-processing or sanding. You don't need to spend days sanding 3D Prints. Aside from an obvious print quality requirement there are a couple ways you can speed up the process of smoothing out a 3D print.
Spray Paint Filler Primer, XTC-3D Smooth-On, Vapor Smoothing (No good for PLA/+) or my personal favorite; Power Tools.
This was something very frowned upon when i started to 3D print. Everywhere i looked for tips on how to sand and smooth my prints everyone said "NEVER USE POWER TOOLS!" so i took that as sage advice. Me, someone who has been working on cars and models and painting for over a decade. Why didn't i just try it? Why did i wait? I shouldn't have. So after getting sick of filler primer ruining my sandpaper i took the risk and tested a theory.
I took a Dual Orbital Palm Sander with 80 gritt sandpaper to an iron man mask. And after that i never looked back. Now this obviously doesn't work on everything but man does it shave DAYS off of sanding large armor parts. I literally sanded my entire suit in about 2 days and went onto priming and painting. It was amazing. I had been sleeping on this method for way to long. But be warned it takes some time to dial in! You CAN melt parts and you CAN ruin a print so always practice!
The Paint:
What color did you use? What's the paint code? Where did you get it? If it's a Metallic Red paint and you can buy it in the UK; I own it. I went through days and days of testing and painting and comparing and clear coating and so many damn plastic spoons trying to dial in the proper colors. But i wanted this to be perfect. It had to be perfect. And why yes; my entire suit is spray painted. It's what i knew and what i was good at. Maybe one day i'll upgrade it.
This is something people often neglect. The amount of messages i received while building this asking what colors i was using and where to get them was insane. Stop asking. No, not because i won't share it; i will! It's because you most likely don't have access to them. Or you live in a different climate. A different environment. Hows the humidity? Temperature? Do you have a paint booth? A cold garage? So many variables play in when painting you NEED to test it for yourself. Find you own colors. Learn what works for you. Because my red and your red may look worlds apart even if they're from the same can. And that's before we even talk about Metallic paint. Many metallic spray paints can't take a lacquer clearcoat; It ruins it! So testing these combinations of paints is CRUCIAL. I ruined the paint job on an entire arm because i got cocky and didn't test my new clear coat on the Gold and Red.
I ended up landing on a combination of a UK specific Rustoleum Automotive line of spraypaint. It was perfect. The 2X red was just a base coat for the Metallic red. And all 3 colors could take a lacquer coat just fine.
After all of the painting and clearcoating was complete i actually went over everything with automotive grade polishing products (Meguiar's sponsor me please!)
This really brought out that deep shine the lacquer had to offer. I started with rubbing compound then moved onto a resin polish. Followed by THE BEST smelling car wax ever; Meguiar's Gold Glass. It also helped add a small small small layer of protection from grime and dirt. Maybe. Probably. But hey isn't it shiny?
The Fitting:
How is everything attached? Can you walk in it? What did you use? Let me start off by saying i messed up big time here. I skipped this step before i painted and i regret it every day. I was too eager to paint my suit and get results i didn't spend enough time right here in this period fitting everything properly. t all "mostly fit" so i went right ahead and painted it. If you take one thing away from this; ANYTHING! Fit the entire suit before you paint a single thing
No, Really. Please. It may seem obvious to some and i know that. You may get confident like i did. But i implore you, just take your time and make sure you are 100% comfortable in the entire suit before you start painting. I had to make many adjustments after the fact but now i had to worry about damaging the paint. It was not worth the headache. But with that said...
I think i did a good job. I spent a lot of time sanding and trimming the edges of the parts with a Dremel to help it wrap around me better. I had made another choice early on; I didn't want gaps. No gaps. No seams. No visible body parts in the Costume (within reason). It was something that always bugged me about Cosplays i saw. But i 100% understand it's a matter of mobility. To increase mobility you NEEDED gaps and openings, i know that. But i sacrificed mobility for accuracy and i'm okay with that. I can still do the typical poses. I can walk. I can move. But sitting? That was never an option. And don't ask me to touch my nose.
What you see here is the very early stages of my strapping system. It was a lot of trial and error (and duct tape) of adding and moving straps. I used very cheap nylon and elastic straps from amazon along with plastic buckles and clips. I then began to incorporate magnets and velcro. I spent months revising and editing and improving the system for comfort. I eventually landed back on much simpler system to the one i started with. It's a lot to cover but here's a basic description.
-Shoes have covers over top
-Shins are free-floating and rest on the shoes
-Thighs are held up by a suspender system over my shoulders.
-Cod Piece is one solid part and wears like underwear (my butt keeps it in place)
-Back is literally a backpack that hooks over my shoulders and the lower back tucks into the cod/butt piece
-Chest has velcro on the shoulders that connects to the "hooks" on the backpack. Then velcro on the sides hook it under my arms and waist.
-Shoulder Pads clip into the shoulder part of the chest and hang free for mobility.
-Biceps clip into the shoulder part of the chest and hang.
-Forearms are free floating similar to the shins. Allowing for more twisting and flexibility
-Gloves are...Gloves
And that's about it! If you want to see more on this you can check out This Video on Strapping and Harnesses
Side note: CA glue works BEAUTIFULLY on elastic and Nylon when fusing it to PLA and PLA+
The Electronics:
I'm proud of this one. I have zero idea how to code and program. And if you start a google search for Iron Man electronics and motorizing an iron man helmet you'll quickly realise a lot of it revolves around Arduinos and Micro-controllers. All of which i have no idea how to operate. And to be honest i had no intention of learning (yet)
But what i do know very well is 12V DC systems from my automotive background. I know relays and triggers and LEDs and parallel circuits. This i could do. This i was good at. So i started in on it with a goal...
100% Analog Iron Man Suit
And i know that seems silly; just learn to code! But it became a goal. Could i motorize a helmet with no arduino? Could i wire up the entire body light system? Could i incorporate finger controls?
Yes, yes i could. I also decided to do this for another reason; Programming is intimidating. And i know for a fact that it can scare a lot of people away from things like this. It's scary! So if i could at the very least make a method that would get people in the door; why not? Help get their feet wet and dabble into electronics. They could then grow into it and expand. That's also what i plan to do.
The systems are actually very basic. And the fact that i found a 12V USB pack still blows my mind but it works! And that's exclusively to power the 12V COB LEDs i use. One day i'll downgrade them back to 5v Piranha LEDS but MAN are they bright. Oddly enough i actually use some Arduino based sensors and triggers except i'm just hijacking the signals for relays.
The other challenge was getting an iron man helmet to open and close with no programming. Enter The Hotwired Micro Servo. Now i was by no means the one to invent this but the tutorials for it were bad. Like next level bad. Basically i'm turning a Micro-Servo into a DC motor. Now, why not just USE a DC motor? Because that same reason of upgrading. I always planned to move onto arduinos and if the system i install with hinges and brackets already used a servo then it's an easy swap!
I went through a lot of testing and methods from Reed Switches to DPDT switches but if you want to see how it all comes together and can be applied watch this: Motorizing an Iron Man Helmet
The systems and features in my suit include:
-13x 12v COD LEDS (White) wired in Parallel to a 12V USB pack
- 2x 12V COD LEDs (White) in the palms that turn on when a trigger in my wrist it activated by tilting my hand back.
-6 Colored 12v SMD lights (Infinity Stones) Wired in Parallel to a 12V USB Pack
-2 Clear Acrylic LED Cosplay Eyes powered by a 5v USB pack that turn on when the mask closes automatically.
-2 Reed switches in the left hand to control the open/close of the helmet limited by triggers on the faceplate
-2 hotwired micro-servos controlling the facemask powered by a 5V usb pack
-1 Reed switch in the right pointer to control a Flip-Flop relay that turns the LED eyes on/off
-1 Reed switch in the right middle finger to control a Flip-Flop relay that turns the Infinity Stones on/off (like a snap)
-1 Thermal distribution system interlaced throughout the suits exterior for high-altitude flight in opposition to cold temperatures and icing
The Extras:
The Infinity Stones
Few words can describe just how proud of this thing I am. It was the focal point. The centerpiece. The main attraction.
The process and idea was actually pretty straight forward. I saw people who had just 3D printed colored stones. Or people who printed stones in clear PLA plastic and backlit them with LEDS. Well the Infinity stones aren't clear. I wanted them to look nice on and off.
Step 1: Print the plastic masters of the stones to proper scale and make resin-safe silicone moulds for them.
Step 2: Buy way to much resin dye and spend a few days testing different colors and combinations. Find the best 6
Step 3: Mix some clear resin with the resin dye and pour into the moulds. Let sit for 6 days because you didn't use enough hardener.
Step 4: Pop them out and let them sit even longer because damn; you really should've used more hardener.
Step 5: Install and backlight the Resin Stones with color specific super bright 12V SMD lights so you can down passing aircraft from the ground.
Step 6: Don't Snap. Ever.
Could the Mind stone be a little more yellow? Could the Soul Stone be a bit more orange? Yeah. But i'll live. I'l still super proud every time i look at them.
The Arc Reactor
Okay i lied. THIS was the centerpiece (literally). One of the most recognizable features on any iron man suit and i wanted it to have depth. So i took a similar approach to the Infinity Stones plus some extra layers. I first took the master print of the reactor cover and resin cast it. But as you can see it came out hazy as all hell. So i utilized the same methods used when restoring and cleaning the headlights of a car! Lots and lots of wetsanding. Plus some extra buffing for clarity. It worked like a charm and gave me a beautiful near-glass like reactor cover that fit like a glove
Next was the depth. I found a free file on Thingiverse (it's gone now; sorry :/ ) and printed out the inner detail part of the reactor. Then i trimmed it to fit better inside the chest. After that i printed a small triangle shape on a HUGE raft in clear PLA plastic to mimic the reactors nano-texture. Then finally i suspended 3 12v COD LED boards behind it about an inch from the clear PLA to help diffuse the light and bam; Arc reactor!
I feel this adds such a nice little detail to the suit. It's not just a frosted lense with a light. Or hazy plastic. I'm really proud of it.
The Rest:
Resources and Tutorials
There is so much more i didn't cover. Things i've already forgotten i did and methods i've always improved upon but i hope this was an good summation of the process.
If you really want to watch the entire journey and see basically everything i've talked about in real time I invite you to watch my progress in the following series. I promise, make it through the first few videos; My production quality goes up.
Becoming Iron Man - A 3D Printed Cosplay Armor
I started documenting this process when i was bright eyes and bushy tailed. I was naive and had no idea where this would take me. I found this insane and wonderful new hobby that puts the things of legend and fantasy at our fingertips. 3D Printing has literally changed my life and i'm trying to do my best to give back to the community that recieved me so openly. It will in no way ever make up for everything that has happened and the benefits or rewards i've received but i promise i'll continue to try.If you've made it this far down i appreciate it more than you know. Thank you so much for reading and i truly hope this helps you or anyone get started on a 3D printed or ANY cosplay for that matter.
If you really like my cosplay and want to see some more of it i invite you to view this video.
Oh yeah! My Cosplay also just recently wont Comic-Con @ Home's Online Masquerade! So that was pretty cool!
Thank you!
Below is a TL;DR version of the post with the resources laid out a bit better. Enjoy!
3D Printing Information
Helmet Files: Akira Yumming MK85 (A much more movie accurate file over the one provided with the suit files)
Suit Files: DO3D Mark 85 Armor (The stock files are roughly 6ft at 100% scale; also, be very very skinny!)
Gauntlet Files: DO3D Mark 85 Infinity Gauntlet ( I had to scale the gaunlet down to about 90%~ to match the suit scale)
Printers: Creality CR-10s - 300x300x400mm build volume (2 printers used) (This is the minimum build size i would recommend or else you'll be cutting a LOT)
Material: SUNLU PLA+ Black Filament (Approx 15 rolls (1kg each) Including waste, failures, and re-prints)
Printer Software: Cura 4.0 w/ Creawsome Mod, Slic3r, Meshmixer (New Cura 4.7 has Creawsome built in! Works great!)
Settings: 215/50 nozzle/bed, 0.6mm nozzle w/ .3mm layer height, 60mm/s, 5% infill, Rafts, Tree Supports Time: Approx 1200 hours of printing total
Scaling: 100% scale (Scaling can be super tricky, I explain in this video how i went about it (or didn't) but for a great scaling resource try The Armored Garage!)
Post-Processing Information
Sanding: I used 80 Gritt sandpaper on an Electric Dual Orbital Palm Sander. Followed by 200 gritt by hand (For more Info. Click!)
Fusing: To join printed parts back together that i cut, i use a soldering iron while adding lost material from wasted prints. (For more Info, Click)
Priming: I used standard spray paint primer. Black, grey, red. Whatever was cheapest. You can try filler primer but i'm not a fan. (For more info, Click!)
Painting: Rustoleum Automotive Line Spraypaint ( Metallic Red, Metallic Gold (Dull), and Sky Grey) (For more info, Click!)
Clearcoat: Rustoleum Automotive Line Spraypaint Clearcoat Lacquer
Post-Work: I wetsanded my paint after the final color coat with 1500. Then again after the final clearcoat with 3000. After that i used Meguiars Automotive Rubbing Compound, Polish, and Gold Class Wax to protect and shine the paint.
Electronics and Extras
LED Cosplay Eyes: I used pre-made see-through LED Acrylic Cosplay eyes from Ebay! Click for more!
Infinity Stones: I 3D Printed the stones then made silicone moulds and cast them in Color Resin
Infinity Stone LEDs: My resin cast Infinity Stones are backlit with Pre-Wired LEDS from Oznium.com!
Servos for Helmet: I repurposed Micro Servos to run with no coding or Arduinos! Click here!
Hinges for Helmet: The MK85 is difficult to motorize. I got creative and used these hinges to do so!
Body LEDs: I used standard 12v COB SMD boards from eBay. But i recommend a 5v LED system
Cosplay Wearables: I used a variety of Nylon/Elastic straps, plastic buckles, and magnets to wear. (Click here for more!)