Let's see your scratchbuilt sabers!

cayman shen

Master Member
Anyone want to show off scratchbuilt (not machined) screen-accurate lightsabers (and possibly progress pics)? I'm thinking of trying a few and approaching them as scratchbuilt models, display only, and I need some inspiration/tips!
 
While not all that screen accurate, here is a blast from the Ol' past.

DSS100.jpg


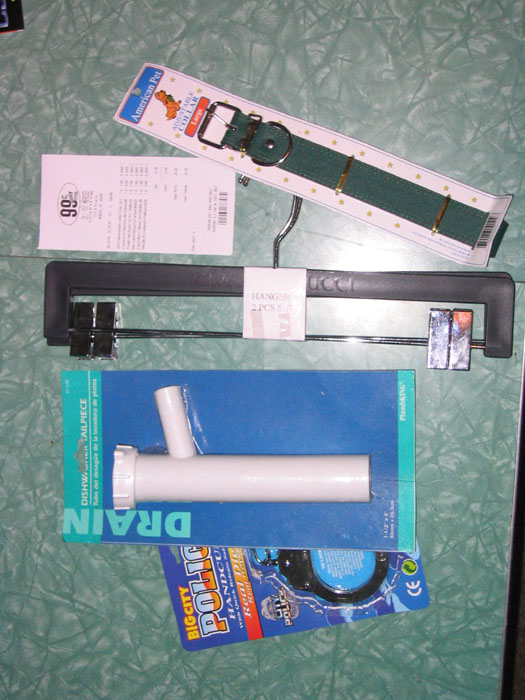
My Dollar Store Saber scratch build, all parts from this saber were purchased were $1 per part from the Dollar Stores here in CA. This is from an old RPF contest we had some time ago to build the best saber from old parts you could buy at a Dollar Store, or 99 Cent store.

See this link for all the pics, with build pics and store receipts.

http://www.elvistrooper.com/dds.htm


128_2847.jpg
 
Although it is definately not screen accurate

picture025pi6.jpg


I only built it because a friend of mine said it could not be made from hardware. That a Luke ver2 had to be machined and only machined. Well, I made one from washers and other assorted metal things on a threaded rod. But it really would look a little better with a real graflex clamp and a machined pommell, ah well....
 
Here's mine. Since my hard drive crashed, I no longer have most of the photos I took of these a few years ago.

vadersaber.jpg


lukesaber.jpg


obi.jpg


quigon.jpg


dooku.jpg


maul.jpg
 
Ah Playskool, I've long lusted for your skills! That Dooku makes me drool! How did you get the brushed finish on the OWK TPM?
 
Only the red anodized buttons are machined. The brushed finish on the Obi was done by putting each hand cut aluminum part on the end of my power drill, wrapping a sanding sponge around it, then turing on the drill.

Also, the shroud on the ROTJ Vader is a resin one I bought on the boards. Just about everything else is scratch built from the grips on the vader to the graflex clamp lever on the Obi v2. It was all done will hand tools, files, and a dremel. I had a lot of patience when I built these a few years ago. I doubt I could pull off something like that now. The hardest thing to do out of all the sabers was the big pointed fin on the Dooku. I hand cut that out of a sheet of 1/4" Aluminum. Just a dremel and needle files. I tried to use as much metal as I could on these sabers. Most of them are no longer in my possesion.

Wow amazing work :thumbsup
 
obiwan.jpg

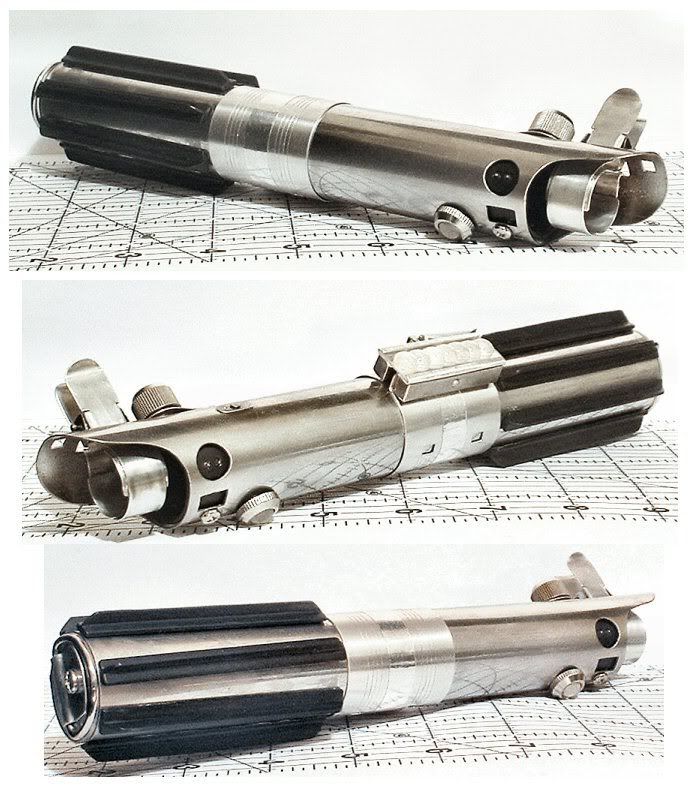
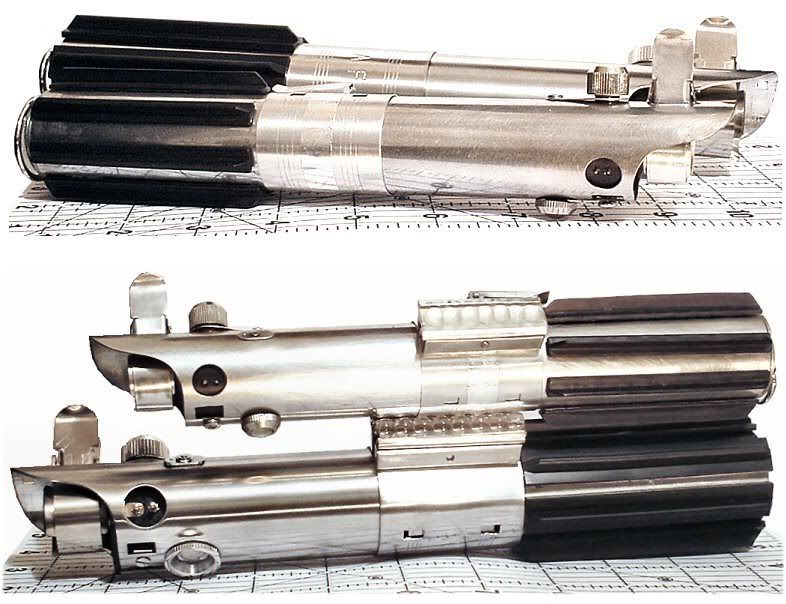
I scratch-built this one completely by hand completely from aluminum. There is no stack of steel washers, no putty and no plastic in this saber. The "O-ring" was made from Sculpey, though (never cracks).
The only power tool used was a dremel. The most time-consuming part was the grips, where I did the detail work with needle files. The sleeve around the grip was ground down by hand in the middle to a smaller diameter.
The conical parts of the pommel consists of 10 pieces of tube mostly force-fitted together using heat, cold and a mallet, then ground by hand. The angled, holed cubes are held by interlock - no glue. A couple of them rattle, though.
It is built around a single 1 1/4" tube with lots of room inside, so that I would be able to put electronics in if I wanted to. The central shaft fits four AA or nine AAA batteries. There is even space in the pommel for a small speaker.
Because the saber is hollow, it weight very little.
I got the measurements from scaling photos. The inaccuracies were mostly due was tubes available, and to fit electronics. The "head" has a slightly smaller diameter, but its length was made shorter to compensate.
(Edit: I know about the grip cutout being too short, but I can not decide between cutting it at the front or cutting it at the back and adding a thicker tube over the thick part behind the grip)

The bought parts were Roman's latest red button (thanks to lgtsbr!), a real bicycle valve adapter with a real amethyst, real bezels, real LEDs and an anodized "covertec" button (Parks' or Luuke's, I don't remember which - it has a M3 hole).

The black parts have paint on them now, but I had kept the metal bare for a couple of years in the hopes of getting hold of some Aluminum Black. Unfortunately, it is rare among local gun shops, and considered a hazardous substance which makes it difficult to get one shipped to me.
 
Last edited:
Um, oh my god? Can you elaborate in some more detail on how you did that pommel section?

Also, I have a tube cutter that wanders so it often cuts a spiral in my tube..anyone have any thoughts on that? It's helped me a lot in the past, but now that I can't always get a clean cut... :(
 
This one is too small (in diameter) but that was my fault..
Weatheredvader1.jpg

It's made from PVC pipe, aluminum tape, Rubber grips, and some thumbscrews and such from the hardware store.

Vader ROTJ (in no way accurate...)
Weatheredvader.jpg

made from a cut-down sink pipe and just about anything I could find. the shroud was a resin bit that came with half a graflex that I bought on ebay.

This one has bits from several places.. sink drain pipe, metal shroud from ebay, parts from yodas house..
Weatheredanakin.jpg


and this one is my favorite
Weatheredmelissa.jpg

sink drain pipe, part of a mop, spare t-grips, aluminum tape, and a couple bits from the 1/350th Enterprise model.

(more)
http://s120.photobucket.com/albums/o176/d_jedi1/Star Wars/

(edit) oops, guess I didnt read that very carefully... well, the first three are ok :p the other one is a custom one.
 
Last edited:
Here's one of mine - 85% scale Luke ANH:

LukeANH32mmTubeJ1.jpg

32mm steel vac tube, thin aluminium sheet (K&S) for the clamp / clamp lever / beer tab / switcch / ears & emitter / D-ring holder, a co-axial aerial plug for button and strips cut from a plastic coat hanger for the grips.
Clamp bubbles made from a strip of clear CD case, and rubber 'feet'.

Pic with replica (full size) Graflex:
LukeANH32mmTubeJ2.jpg


As many here, I used a Dremel and metal files! Also epoxy adhesive, screws and small nails. A piece of black plastic tubing is fixed with screws and gold pins snipped from ear studs were glued in.

I used the template available here, but adapted as I went along (I made the ears & emitter from one piece of ally, as with the clamp band):
http://www.hu.u-net.com/graflica/home.htm
http://www.tk560.com/jegner/Graflex-replica.pdf

Made this before I had the replica Graflex to work from!

C.
 
Last edited:
Keep 'em coming! I think I'm gonna attempt the Secura promo-pic saber. Seems like the easiest to attempt for a first go. Any thoughts on the pommel or the emitter "retainer ring?" I've seen deadbolt parts that look close, but...that would be a part that's be worth machining in bulk for the various TPM sabers that use it!
 
Can you elaborate in some more detail on how you did that pommel section?
I made it from tubes in sizes 25, 28, 31, 34, 37 and 40 mm, each being 1.5 mm thick, but they had not been manufactured with good tolerances. The pairs of 25/28 and 31/34 slid together effortlessly and just needed glue, but the other pairs had to be combined using heat, cold and force.
You can combine up to three tubes together with force, but parts will start to shift when you force in the fourth one. The rule is that the largest and the smallest tube are added to the one in the middle.
One good thing with aluminum is that if you file hard over an edge where two pieces meet closely, the metal kind of frays hiding the seamline!

I had these pics on my harddrive, showing more of the pommel pieces. The first pic shows the second step right above the "cubes". The "cubes" go in-between the notches. Each notch fits under the edge of the lower conical part.
saberpart.jpg
wip_pommel.jpg


The tube used for the neck (25 mm) is the same that goes inside the handgrip.
The endcap was made from a 25 mm cylinder, where the end was slightly rounded and then cut off. There exists a type of bolt where the head has this exact shape, but I don't know the English word for it.

Each pommel cube was first drilled. Then I finished the edges and cut a notch so that it would fit over the edge of the lower conical part. Only after a "cube" was finished was it cut off from the bar.
I did not have a drill press, so I held a water-compass against the dremel to keep it drilling straight. A number of holes were off-center misses.

I think I'm gonna attempt the Secura promo-pic saber. Seems like the easiest to attempt for a first go. Any thoughts on the pommel or the emitter "retainer ring?" I've seen deadbolt parts that look close, but...that would be a part that's be worth machining in bulk for the various TPM sabers that use it!
Oh, I forgot, I have built that one too. :D
AaylaSecuraLightsaber.jpg

The pommel was made in the same technique mentioned above.
The emitter cup was made from a keyhole ring and a washer. I found that keyhole at a flea market, but I have never found a second one. :(
I drilled the pommel disc (not very well...) and put a sewing pin in the middle.

I had engraved most of the grooves and recesses on the hilt, which was tedious work. I recommend that you instead use a thinner inner tube and mount pieces made from the outer tube as panels onto that. Then most of the grooves would consist of space between pieces. I think that you would also get a better result making the rectanglar recesses using a drill and a needle file than with an engraving bit.
Also, the LED bezels and bar should be slightly recessed - and I think it would work best to have them just sit on the inner tube.

For reference, I had used a scan from the Visual Dictionary with an overlaid grid. Each square is 5x5 mm (1/5 of an inch).
 
That OB pommel beveled piece, did you bevel that by hand?!?!?!

Can I PM you with some questions on the sabers? I really love the Secura one.
 
Back
Top