Stachenscarfen
New Member
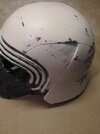
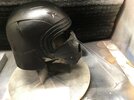
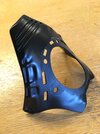
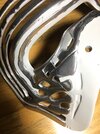
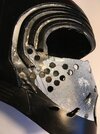
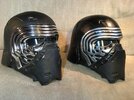
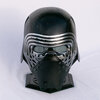
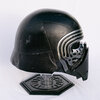
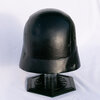
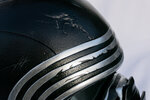
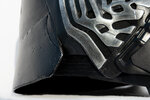
This is my Kylo Ren helmet based entirely on Disney Store's mask, i.e. it's not the popular fusion of the Black Series helmet and Disney's mask.


Links:
DeviantArt (helmet and lightsaber)
RPF post on my modded Disney Store lightsaber
TL;DR
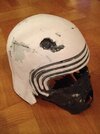
In short the mask has been made into a whole helmet with a fiberglass dome, the chrome "greeblies" have been improved with finer and "sharper" details, the opening for the visor has been sculpted to make it narrower and more accurate and everything has been repainted.
A quick search shows than no one on RPF has done this before, but if you know someone who has, I would like to know!
About the tutorial
It's long! Every little step required a lot of thought and planning, and doing some things differently or in a different order would have made things more difficult. So there were a lot of details I felt I had to include. However, I still can't cover every decision or insight here. I've learned a few things and some insights are specific to the project while others are more general about material use etc. So I'll be happy if this happens to be of use or inspiration to someone. Of course, I will happily answer any questions.
I've tried to highlight the most important parts in bold for faster reading.
Also, I might not describe every step in the exact chronological order. Some steps can be done independently of others, while some details had to be made in correlation and tried out along the way so they would fit together precisely in the end.
This has been a long-term project with a friend, so I will use "we" in the description even if some steps were done individually.
Important advice
1. Protect your lungs from fumes and dust! When sanding, a dust mask/filter mask works fine. Resins and bondo emit vapors and spray paints emit vapors and particles. So for these I suggest a respirator mask with a combined A2P2 filter. A=protection against vapors, P=particles. Higher number=higher protection.
2. Think carefully, plan several steps ahead and try out new methods and materials before using them on the real prop.
3. When modifying an existing plastic product, you should always sand any surfaces before applying glue, resin or paint to make it stick. Even if the plastic has a matte finish it might stick for a while, but when things eventually start to come off it's too late. It's an important note but I won't repeat it in the description because we did it all the time.
Terminology
The helmet is made up of a few main parts, so here is my terminology for them:
Helmet base: The base part of the helmet consisting of Disney's mask base, and later the added helmet dome.
Greeblies: The part around the eyes that is mainly chrome (or will be).
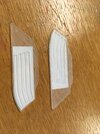
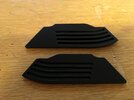
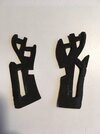
Inner and outer mouth plates: Go in the front of the helmet.
Materials and tools (the ones I can remember)
Materials:
Polyester bondo (body filler)
Epoxy putty (Apoxie sculpt or Milliput etc.)
Epoxy glue (2 component)
Contact glue
Newspapers and wallpaper glue (for papier-mâché)
Polyester resin (for boat hulls etc.) and fiberglass sheet
Spray bondo
Acrylic plastic 1,5 mm (for laser cutting)
EVA foam 2 mm and 3 mm
Stretchy black fabric
Foam rubber and velcro (for inside padding)
Paints:
Montana spray paints: primer, black paint ("GOLD" class) and matte varnish
Molotow liquid chrome marker
Liquitex high gloss varnish
Black acrylic paint, matte and glossy
Permanent silver marker
Tools:
Respirator mask - very important, see advice above
Dust mask/filter mask (when sanding)
Screwdrivers (for initial disassembly)
Masking tape
Sandpaper 150 and 400 grit
A set of small files
Various sculpting and spackling tools (toothpicks, plastic lids, popsicle sticks etc.)
Hasbro Black Series Kylo Ren helmet (yep, as a template for the helmet dome)
Cheap paintbrushes (for resin work)
Finer paintbrushes
Disposable nitrile gloves (resin might dissolve vinyl gloves)
Mixing-/measuring cups
Pieces of sponge
Laser cutter
Dremel style rotary tool - very useful for cutting or sanding small details with different accessories; a flexible extension shaft is highly recommended for easier handling
Process
Greeblies + helmet base
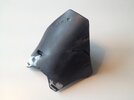
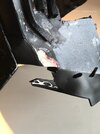
Unscrewed and disassembled the Disney Store mask. Getting ther greeblies off can be hard but not impossible.
Cut off part of the back of the helmet base, including the "ear flaps", with a rotary tool.
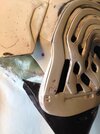
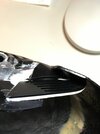
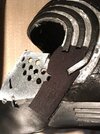
Sanded the holes in the greeblies from behind to get a thinner profile. Used the rotary tool with a spheric pin for this.
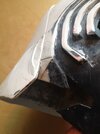
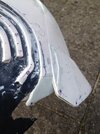
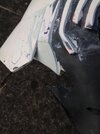
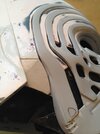
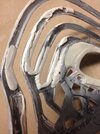
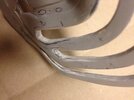
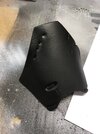
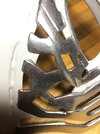
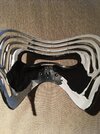
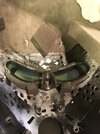
Sculpted the edges of the greeblies with epoxy putty to sharpen the edges between the chrome part and the black part.
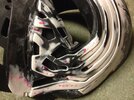
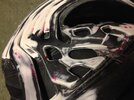
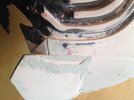
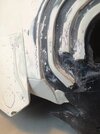
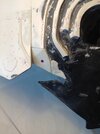
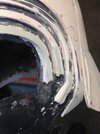
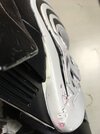
The forehead ribs on the greeblies and the corresponding part on the helmet base were kind of rounded in profile, so we sanded them and covered them in bondo with the parts mounted together, then removed the greeblies before the bondo hardened. Then we reattached the greeblies and sanded the surface. This process was repeated to make the ribs and helmet base blend together and get a flat surface.
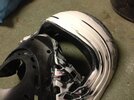
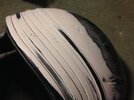
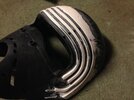
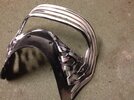
Cut the forehead ribs in half, shortened them a bit and glued them together to make them fit more tightly to the helmet base.
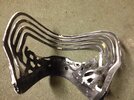
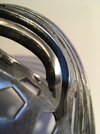
The process of making the greeblies fit tightly on the base was an evolving process throughout the project and required a lot of work and fine tuning. E.g. backing the ribs with putty in the right places to make them sink deep enough but not too deeply, making them wide enough to not have gaps between the ribs and helmet base, but not making them too wide etc.
Sculpting the eye opening
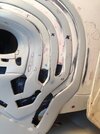
While the proportions of the Disney mask is quite accurate, the eye opening is bigger, just as if a bigger hole has been cut out.
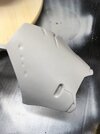
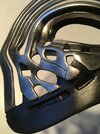
Therefore, we cut out the socket for the visor from the helmet base and glued it onto the greeblies part. This would be a base onto which we would sculpt the part that is "missing" from Disney's mask. However, the lower part of the socket was in the way of some details and eventually had to be removed, with the sculpted parts then being able to hold up itself.
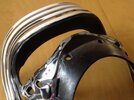
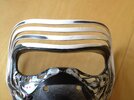
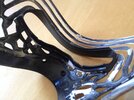
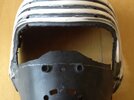
We sculpted the eye opening with epoxy putty in several steps. When sculpting with putty it's hard to make smooth and accurate surfaces right away, so sanding and additional bondo/putty is often necessary. So we would shape and sand each "layer" accurately before building on top of it, to have full control. Building it in one go would have made some surfaces hard to reach for sanding.
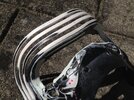
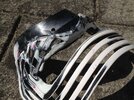
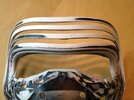
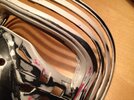
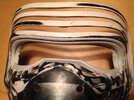
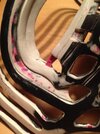
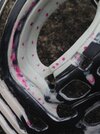
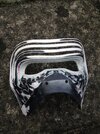
Filled in scratches with a layer of spray bondo.
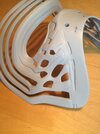
Building the helmet dome
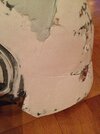
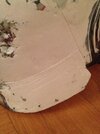
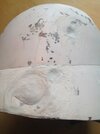
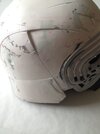
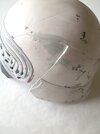
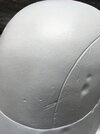
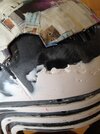
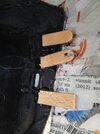
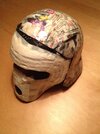
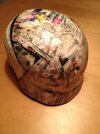
Used my Black Series helmet as a template to build a shell out of papier-mâché (strips of newspaper dipped in wallpaper glue). We protected the BS helmet with plastic wrap.
First did 4 layers of paper.
Shrunk the shell a bit by cutting out a ~3 cm wide wedge from the top of the head to the base of the neck and taped the edges together.
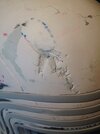
Then four more layers of paper. Using tape was a mistake because the glue didn't stick to the tape, which created air pockets that we had to remove later (see below).
Trimmed the edges of the shell. The last layer of paper wrapped around the edges to keep the layers together.
All the helmet's bumps and the 90° indents on the sides were added to the shell. (Would be hard to cut out later.) The surface would eventually be smoothed but if the whole shell is askew it can't be fixed later.
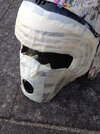
Glued the shell onto the helmet base and masked it inside and out (against resin).
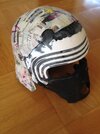
Reinforcing the dome
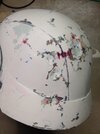
Next, we reinforced the shell with resin and fiberglass on the inside. It's good to go through the process in your head so you have all the necessary things at hand, know how to mix resin and hardener, won't spill chemicals etc. Some things to have at hand:
Respirator mask
Protective eyewear
Gloves (e.g. nitrile gloves) and mixing cups that won't be dissolved by the resin
Measuring cups
Popsicle sticks etc. for mixing
Pre-cut strips of fiberglass
Newspapers etc. for covering your workspace
Paper towels
Cheap paintbrushes
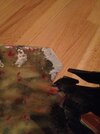
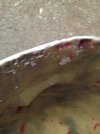
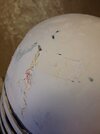
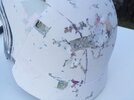
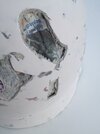
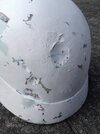
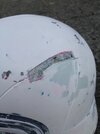
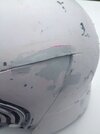
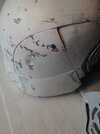
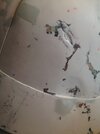
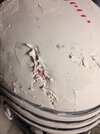
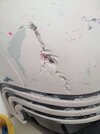
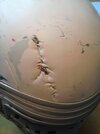
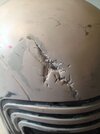
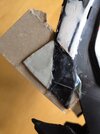
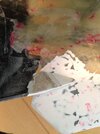
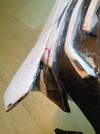
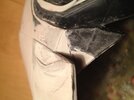
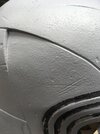
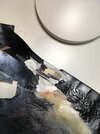
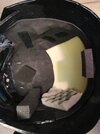
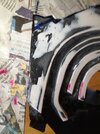
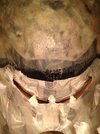
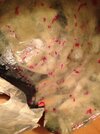
We brushed resin onto the shell, inside and outside. Then we laid fiberglass strips in place and soaked them with the brush. Some overlap is good. It's easiest to do one layer and let it harden, then go for another layer at a later time. We did 2 or 3 layers, with an extra layer of resin with no fiberglass. We left a 5 mm distance between the fiberglass and the edge of the shell to avoid having to trim any protruding fiberglass (I've heard bad things about fiberglass dust). There were still many sharp fibers sticking out (red marker) but the inside would be covered with foam anyway.
To be continued...


Links:
DeviantArt (helmet and lightsaber)
RPF post on my modded Disney Store lightsaber
TL;DR
In short the mask has been made into a whole helmet with a fiberglass dome, the chrome "greeblies" have been improved with finer and "sharper" details, the opening for the visor has been sculpted to make it narrower and more accurate and everything has been repainted.
A quick search shows than no one on RPF has done this before, but if you know someone who has, I would like to know!
About the tutorial
It's long! Every little step required a lot of thought and planning, and doing some things differently or in a different order would have made things more difficult. So there were a lot of details I felt I had to include. However, I still can't cover every decision or insight here. I've learned a few things and some insights are specific to the project while others are more general about material use etc. So I'll be happy if this happens to be of use or inspiration to someone. Of course, I will happily answer any questions.
I've tried to highlight the most important parts in bold for faster reading.
Also, I might not describe every step in the exact chronological order. Some steps can be done independently of others, while some details had to be made in correlation and tried out along the way so they would fit together precisely in the end.
This has been a long-term project with a friend, so I will use "we" in the description even if some steps were done individually.
Important advice
1. Protect your lungs from fumes and dust! When sanding, a dust mask/filter mask works fine. Resins and bondo emit vapors and spray paints emit vapors and particles. So for these I suggest a respirator mask with a combined A2P2 filter. A=protection against vapors, P=particles. Higher number=higher protection.
2. Think carefully, plan several steps ahead and try out new methods and materials before using them on the real prop.
3. When modifying an existing plastic product, you should always sand any surfaces before applying glue, resin or paint to make it stick. Even if the plastic has a matte finish it might stick for a while, but when things eventually start to come off it's too late. It's an important note but I won't repeat it in the description because we did it all the time.
Terminology
The helmet is made up of a few main parts, so here is my terminology for them:
Helmet base: The base part of the helmet consisting of Disney's mask base, and later the added helmet dome.
Greeblies: The part around the eyes that is mainly chrome (or will be).
Inner and outer mouth plates: Go in the front of the helmet.
Materials and tools (the ones I can remember)
Materials:
Polyester bondo (body filler)
Epoxy putty (Apoxie sculpt or Milliput etc.)
Epoxy glue (2 component)
Contact glue
Newspapers and wallpaper glue (for papier-mâché)
Polyester resin (for boat hulls etc.) and fiberglass sheet
Spray bondo
Acrylic plastic 1,5 mm (for laser cutting)
EVA foam 2 mm and 3 mm
Stretchy black fabric
Foam rubber and velcro (for inside padding)
Paints:
Montana spray paints: primer, black paint ("GOLD" class) and matte varnish
Molotow liquid chrome marker
Liquitex high gloss varnish
Black acrylic paint, matte and glossy
Permanent silver marker
Tools:
Respirator mask - very important, see advice above
Dust mask/filter mask (when sanding)
Screwdrivers (for initial disassembly)
Masking tape
Sandpaper 150 and 400 grit
A set of small files
Various sculpting and spackling tools (toothpicks, plastic lids, popsicle sticks etc.)
Hasbro Black Series Kylo Ren helmet (yep, as a template for the helmet dome)
Cheap paintbrushes (for resin work)
Finer paintbrushes
Disposable nitrile gloves (resin might dissolve vinyl gloves)
Mixing-/measuring cups
Pieces of sponge
Laser cutter
Dremel style rotary tool - very useful for cutting or sanding small details with different accessories; a flexible extension shaft is highly recommended for easier handling
Process
Greeblies + helmet base
Unscrewed and disassembled the Disney Store mask. Getting ther greeblies off can be hard but not impossible.
Cut off part of the back of the helmet base, including the "ear flaps", with a rotary tool.
Sanded the holes in the greeblies from behind to get a thinner profile. Used the rotary tool with a spheric pin for this.
Sculpted the edges of the greeblies with epoxy putty to sharpen the edges between the chrome part and the black part.


The forehead ribs on the greeblies and the corresponding part on the helmet base were kind of rounded in profile, so we sanded them and covered them in bondo with the parts mounted together, then removed the greeblies before the bondo hardened. Then we reattached the greeblies and sanded the surface. This process was repeated to make the ribs and helmet base blend together and get a flat surface.


Cut the forehead ribs in half, shortened them a bit and glued them together to make them fit more tightly to the helmet base.

The process of making the greeblies fit tightly on the base was an evolving process throughout the project and required a lot of work and fine tuning. E.g. backing the ribs with putty in the right places to make them sink deep enough but not too deeply, making them wide enough to not have gaps between the ribs and helmet base, but not making them too wide etc.
Sculpting the eye opening
While the proportions of the Disney mask is quite accurate, the eye opening is bigger, just as if a bigger hole has been cut out.
Therefore, we cut out the socket for the visor from the helmet base and glued it onto the greeblies part. This would be a base onto which we would sculpt the part that is "missing" from Disney's mask. However, the lower part of the socket was in the way of some details and eventually had to be removed, with the sculpted parts then being able to hold up itself.


We sculpted the eye opening with epoxy putty in several steps. When sculpting with putty it's hard to make smooth and accurate surfaces right away, so sanding and additional bondo/putty is often necessary. So we would shape and sand each "layer" accurately before building on top of it, to have full control. Building it in one go would have made some surfaces hard to reach for sanding.


Filled in scratches with a layer of spray bondo.

Building the helmet dome
Used my Black Series helmet as a template to build a shell out of papier-mâché (strips of newspaper dipped in wallpaper glue). We protected the BS helmet with plastic wrap.
First did 4 layers of paper.
Shrunk the shell a bit by cutting out a ~3 cm wide wedge from the top of the head to the base of the neck and taped the edges together.
Then four more layers of paper. Using tape was a mistake because the glue didn't stick to the tape, which created air pockets that we had to remove later (see below).
Trimmed the edges of the shell. The last layer of paper wrapped around the edges to keep the layers together.
All the helmet's bumps and the 90° indents on the sides were added to the shell. (Would be hard to cut out later.) The surface would eventually be smoothed but if the whole shell is askew it can't be fixed later.
Glued the shell onto the helmet base and masked it inside and out (against resin).


Reinforcing the dome
Next, we reinforced the shell with resin and fiberglass on the inside. It's good to go through the process in your head so you have all the necessary things at hand, know how to mix resin and hardener, won't spill chemicals etc. Some things to have at hand:
Respirator mask
Protective eyewear
Gloves (e.g. nitrile gloves) and mixing cups that won't be dissolved by the resin
Measuring cups
Popsicle sticks etc. for mixing
Pre-cut strips of fiberglass
Newspapers etc. for covering your workspace
Paper towels
Cheap paintbrushes
We brushed resin onto the shell, inside and outside. Then we laid fiberglass strips in place and soaked them with the brush. Some overlap is good. It's easiest to do one layer and let it harden, then go for another layer at a later time. We did 2 or 3 layers, with an extra layer of resin with no fiberglass. We left a 5 mm distance between the fiberglass and the edge of the shell to avoid having to trim any protruding fiberglass (I've heard bad things about fiberglass dust). There were still many sharp fibers sticking out (red marker) but the inside would be covered with foam anyway.


To be continued...
Last edited:

