Darthmagpie
Sr Member
Hello,
I know I'm late to the game on a Kylo helmet build and I haven't posted in many years, but Halliwax seems to enjoy the Kylo builds so I thought, what the heck. My wife bout me a GECprops kit a couple years ago, and I had some free time this summer, so I went for it. I didn't do any cleanup to the parts I received (slight oversight) other than scrapping any leftover mold release and a rubbing Alcohol wipe down. Started with the daunting task of masking off the silver areas. Ordered some different thickness fineline tape. This took HOURS and I had a tough time determining where the separation between the black and silver should be with that little recess between the two. Still not sure I got it right.


Next I realized I had no forethought about what I was going to do in the inside, so I sprayed the inside with Krylon gloss black, figuring it was a good base for whatever I was going to do, as well as the inner mouthpiece. I wasn't worried about any overspray at this point.

Moving to the outside of the helmet, and the outer mouthpiece. I used the Raptor truck bed liner spray can that was suggested in another Kylo helmet thread. It has that nice textured finish and is epoxy based so it is supper tough. I don't know what they used on the original but something like this does make sense. You only have 1 hour to use this stuff once you release the epoxy into the can and you have to do about 3 coats, 15 minutes apart, so make sure no one is going to interrupt you for the next hour. Make sure you spray from about 18 inches away or the texture will clump.


At this point I got a concern in my heard that since the paint was epoxy based, if I let it dry on the helmet and the masking tape, would it be strong enough to pull it off the helmet when I pull off the tape or do I take the tape off now and possibly have semi-cured epoxy stringers as I pull the tape? I don't know why I thought these things might happen, but I anguished over it for about an hour. Then I decided to pull it off after hour of drying and If I started to see any issues I would stop. Easier to let it dry more.
IS THERE ANYTHING BETTER THAN PULLING THE MASKING OFF OF A PAINT JOB?!

I added some black paint to the silver bands but didn't want to do too much.

On to the "soot" on the cheeks. I got a tube each of yellow, brown, and black acrylic paint. Using a makeup sponge, I sponged on the yellow, added some brown to the yellow paint and sponged that on, added more brown, sponged that on and so on until i got to all brown and did the same by adding black to the brown. Not sure about accuracy but I like the way it looks.

Next I epoxied on the 2 mouth pieces. I did do a brown was to the inner mouthpiece because why do the cheeks have "soot" on them and the piece an inch away is clean? I epoxied on the rubber side pieces, used chip clips to hold them in place and let dry for a couple days. The inside of the helmet on the bottom quarter inch it has a very rough, dremeled finish. Since I didn't do any clean up, I decided to cover it up with some weather stripping.

With trial an error I made a template for the eye and cheek mesh out of a paper bag. I cut the mesh to the template and epoxied it in. I also picked up a fairly inexpensive helmet pad replacement kit and velcroed them in.

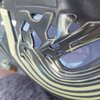
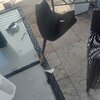
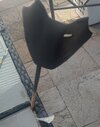
After that I wanted to do something in the mouth area for esthetics. I made a piece that would fit in the mouth area out of thin plastic and painted it black. I bought the 38 flak model kit because the ROTS Vader used some of those pieces on the reveal in the mouth section and I thought it would be a nice ohmage. I used the pieces in the kit to make this crazy thing.

Then epoxied it in,

I then added some silver to the dents on the outside of the helmet. I was really worried about over doing it, so maybe I under did it, but honestly, I didn't see much in the screen grabs. Thats it...I think. Finished shots.


I know I'm late to the game on a Kylo helmet build and I haven't posted in many years, but Halliwax seems to enjoy the Kylo builds so I thought, what the heck. My wife bout me a GECprops kit a couple years ago, and I had some free time this summer, so I went for it. I didn't do any cleanup to the parts I received (slight oversight) other than scrapping any leftover mold release and a rubbing Alcohol wipe down. Started with the daunting task of masking off the silver areas. Ordered some different thickness fineline tape. This took HOURS and I had a tough time determining where the separation between the black and silver should be with that little recess between the two. Still not sure I got it right.
Next I realized I had no forethought about what I was going to do in the inside, so I sprayed the inside with Krylon gloss black, figuring it was a good base for whatever I was going to do, as well as the inner mouthpiece. I wasn't worried about any overspray at this point.
Moving to the outside of the helmet, and the outer mouthpiece. I used the Raptor truck bed liner spray can that was suggested in another Kylo helmet thread. It has that nice textured finish and is epoxy based so it is supper tough. I don't know what they used on the original but something like this does make sense. You only have 1 hour to use this stuff once you release the epoxy into the can and you have to do about 3 coats, 15 minutes apart, so make sure no one is going to interrupt you for the next hour. Make sure you spray from about 18 inches away or the texture will clump.
At this point I got a concern in my heard that since the paint was epoxy based, if I let it dry on the helmet and the masking tape, would it be strong enough to pull it off the helmet when I pull off the tape or do I take the tape off now and possibly have semi-cured epoxy stringers as I pull the tape? I don't know why I thought these things might happen, but I anguished over it for about an hour. Then I decided to pull it off after hour of drying and If I started to see any issues I would stop. Easier to let it dry more.
IS THERE ANYTHING BETTER THAN PULLING THE MASKING OFF OF A PAINT JOB?!
I added some black paint to the silver bands but didn't want to do too much.
On to the "soot" on the cheeks. I got a tube each of yellow, brown, and black acrylic paint. Using a makeup sponge, I sponged on the yellow, added some brown to the yellow paint and sponged that on, added more brown, sponged that on and so on until i got to all brown and did the same by adding black to the brown. Not sure about accuracy but I like the way it looks.
Next I epoxied on the 2 mouth pieces. I did do a brown was to the inner mouthpiece because why do the cheeks have "soot" on them and the piece an inch away is clean? I epoxied on the rubber side pieces, used chip clips to hold them in place and let dry for a couple days. The inside of the helmet on the bottom quarter inch it has a very rough, dremeled finish. Since I didn't do any clean up, I decided to cover it up with some weather stripping.
With trial an error I made a template for the eye and cheek mesh out of a paper bag. I cut the mesh to the template and epoxied it in. I also picked up a fairly inexpensive helmet pad replacement kit and velcroed them in.
After that I wanted to do something in the mouth area for esthetics. I made a piece that would fit in the mouth area out of thin plastic and painted it black. I bought the 38 flak model kit because the ROTS Vader used some of those pieces on the reveal in the mouth section and I thought it would be a nice ohmage. I used the pieces in the kit to make this crazy thing.
Then epoxied it in,
I then added some silver to the dents on the outside of the helmet. I was really worried about over doing it, so maybe I under did it, but honestly, I didn't see much in the screen grabs. Thats it...I think. Finished shots.