You are using an out of date browser. It may not display this or other websites correctly.
You should upgrade or use an alternative browser.
You should upgrade or use an alternative browser.
Jedi General Rahm Kota
- Thread starter Koda Vonnor
- Start date
Koda Vonnor
Well-Known Member
Thanks Spoox!
I copied the progress list so I can keep track of everything.
- finish chest plate sculpt
- seal/wall/mold chest plate
- cast chest plate
- shape/smooth chest plate
- paint/weather chest plate
- make silicone/plaster shell mold for shoulders
- cast shoulders
- shape/smooth shoulders
- paint/weather shoulders
- attach inner form padding to shoulders
- re-form bracers
- fill/shape/smooth bracers
- paint/weather bracers
- build/paint neoprene wrist seals
- modify gloves
- build undertunic
- build outer tunic
- build tabards/capes
- build armor harness
- attach velcro to armor/harness/tunic/gloves
- design/fit bandoleer
- shape/smooth bando buckle and belly-box
- greeblify bando buckle and belly-box
- paint/weather buckle and box
Won't be long now.
~ Vonnor
Last edited by a moderator:
Koda Vonnor
Well-Known Member
Boots are on the way!
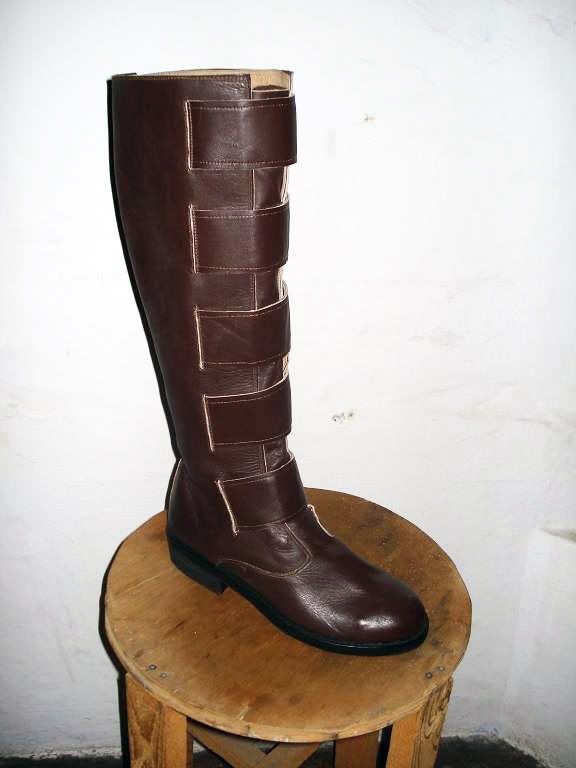
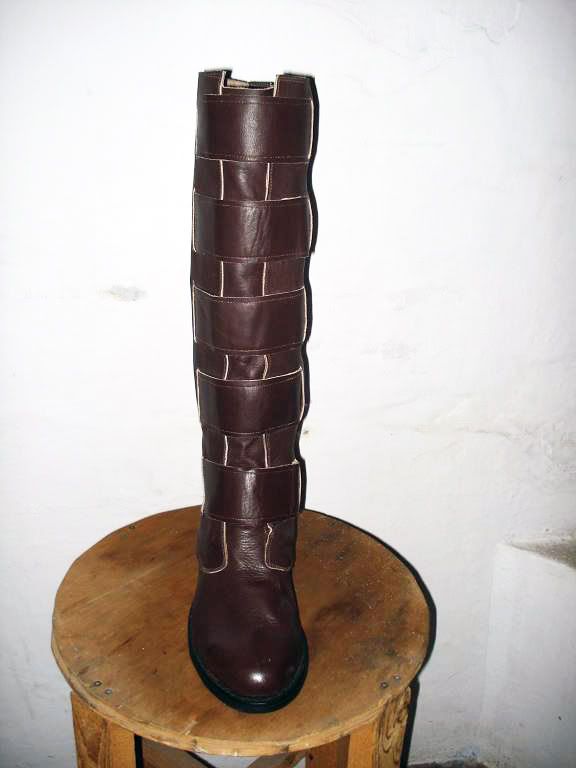
...my boi Carlos may be slow (*cough*orderedinfebruary*cough*), but he's gooooood. :cool
~ KV
...my boi Carlos may be slow (*cough*orderedinfebruary*cough*), but he's gooooood. :cool
~ KV
Koda Vonnor
Well-Known Member
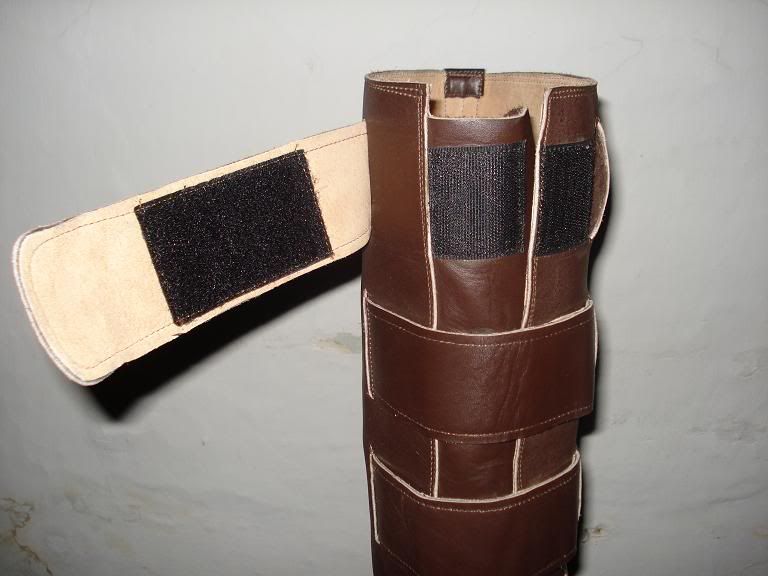
Yes, it's gonna pain me terribly to hit the toes with the sandpaper.:cry
Koda Vonnor
Well-Known Member
yessir....Btw, are you going to D'Con?
Bringing this mug plus a generic jedi get-up.
General Kota won't have canon hair though, but he'll still kick some imp booty.
:cool
Koda Vonnor
Well-Known Member
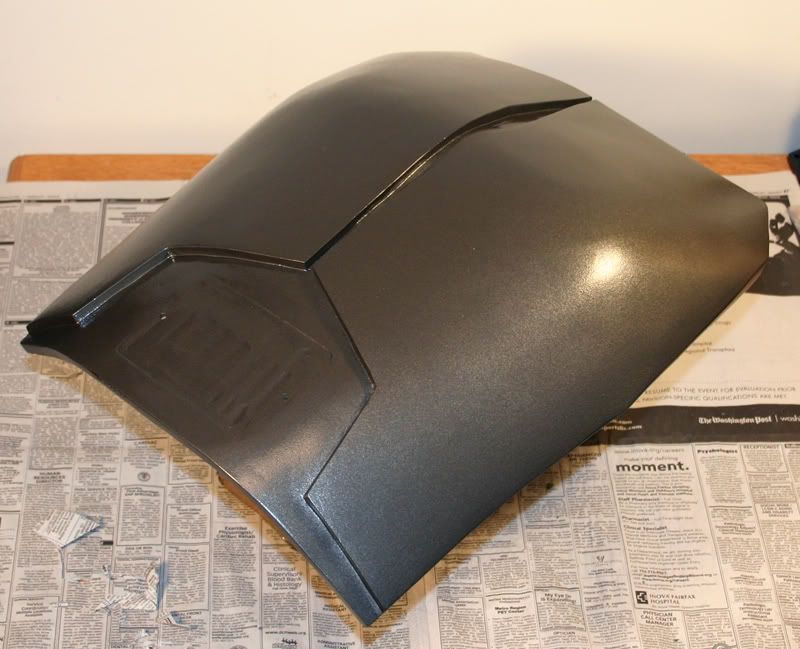
Here's the chest plate ready for painting (almost). I still have to do some final touch-ups with the emery boards. I wanted to show it 'cuz of those two images that somehow got in the casting when I sanded in the final contours.
I'm calling them "Demon" the Hutt (on your left) and "LAUGH-LAC" the duck (on your right). I thought they were funny, and since I'll always know they're in there, now everybody else will too... hehehe
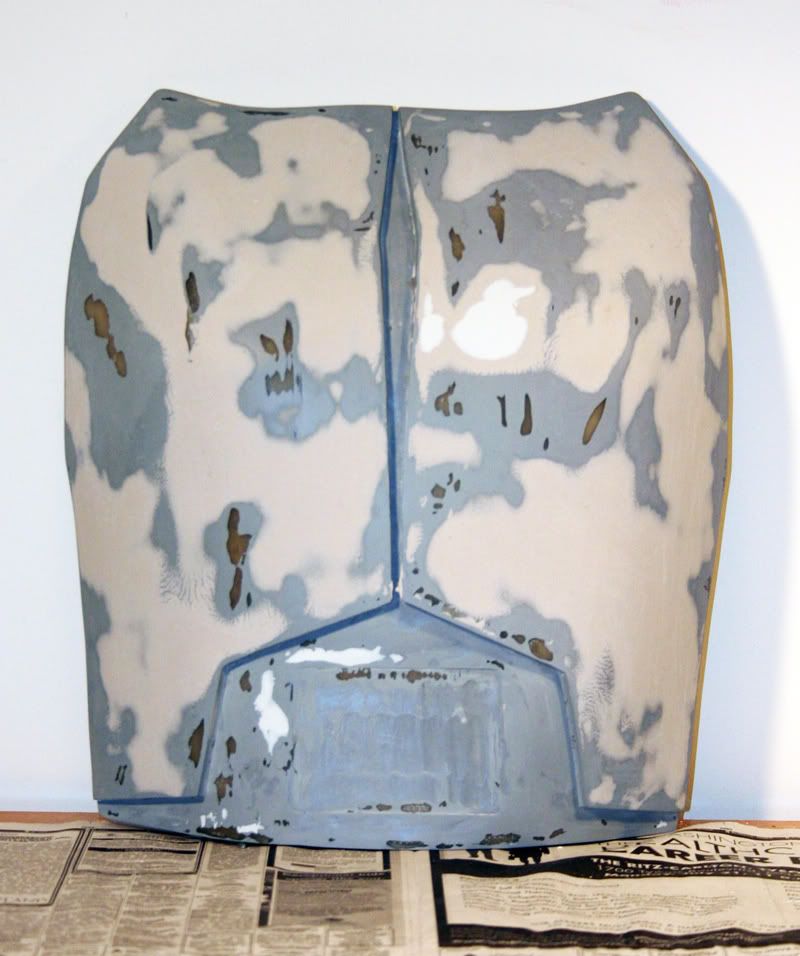
I know it don't look like much, but check it out tomorrow. :cool
~ Vonnor
I'm calling them "Demon" the Hutt (on your left) and "LAUGH-LAC" the duck (on your right).
I thought they were funny, and since I'll always know they're in there, now everybody else will too... hehehe
I know it don't look like much, but check it out tomorrow. :cool
~ Vonnor
Koda Vonnor
Well-Known Member
Weekend Update part 2:
So I'm out in my front yard this morning painting this mug, and my neighbor comes by walking his dog. He stops to watch me for a minute, then says, "Tony Stark?"
I said, "close." :cool
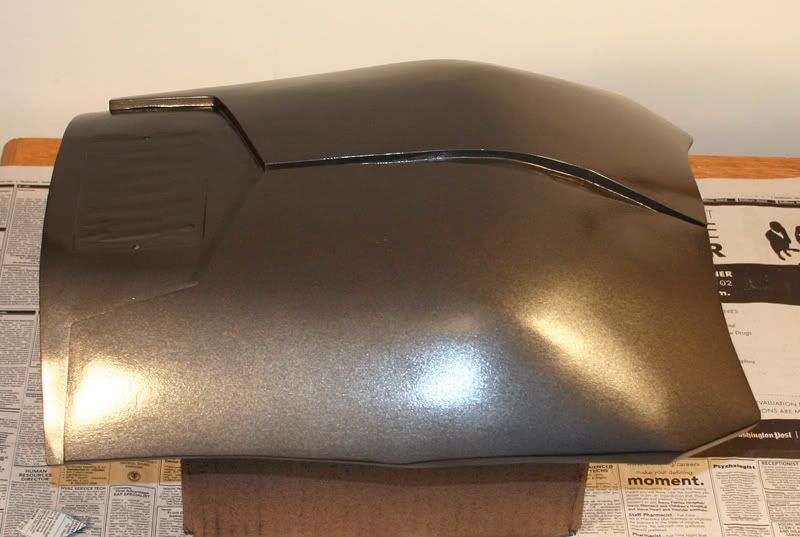
I'm not really likin' the overall contours. I really borked it up doing the final shaping. I went by touch mostly and not enough by sight, and the symmetry is horrendous. It's really noticeable at about 3 metres or farther. I will matte it down as much as possible in the weathering so it doesn't show so bad.
I also wanted to show the attachment system for the bells. I don't see too many crafters showing the mechanical guts of their stuff. Maybe it'll give someone else some ideas.
There's a short (10cm) strap that attaches to the top velcro strip and to the reinforced yoke of the shirt. The bell hangs from that, and the non-stretch canvas yoke in the shirt keeps the bells from sagging. They sorta pull against each other's weight.
The lower contraption has two raised plastic strips with slot openings in the sides, and soft neoprene padding. The padding cradles the upper arm and keeps the bell in position laterally. There's an elastic strap that runs around the underarm and threads through those slots to stick on that center velcro pad. The slots transfer the velcro's sticky force from tensile to shear and it holds much better.
For now, I'll run the strap over the shirt, as it is almost an exact color match to the shirt. Eventually I will put big button-holes in the sleeves and run the anchor strap through the holes so it doesn't show and doesn't scrunch up the sleeve.
Next week: full costume pix.
~ Vonnor
So I'm out in my front yard this morning painting this mug, and my neighbor comes by walking his dog. He stops to watch me for a minute, then says, "Tony Stark?"
I said, "close." :cool
I'm not really likin' the overall contours. I really borked it up doing the final shaping. I went by touch mostly and not enough by sight, and the symmetry is horrendous. It's really noticeable at about 3 metres or farther. I will matte it down as much as possible in the weathering so it doesn't show so bad.
I also wanted to show the attachment system for the bells. I don't see too many crafters showing the mechanical guts of their stuff. Maybe it'll give someone else some ideas.
There's a short (10cm) strap that attaches to the top velcro strip and to the reinforced yoke of the shirt. The bell hangs from that, and the non-stretch canvas yoke in the shirt keeps the bells from sagging. They sorta pull against each other's weight.
The lower contraption has two raised plastic strips with slot openings in the sides, and soft neoprene padding. The padding cradles the upper arm and keeps the bell in position laterally. There's an elastic strap that runs around the underarm and threads through those slots to stick on that center velcro pad. The slots transfer the velcro's sticky force from tensile to shear and it holds much better.
For now, I'll run the strap over the shirt, as it is almost an exact color match to the shirt. Eventually I will put big button-holes in the sleeves and run the anchor strap through the holes so it doesn't show and doesn't scrunch up the sleeve.
Next week: full costume pix.
~ Vonnor
Koda Vonnor
Well-Known Member
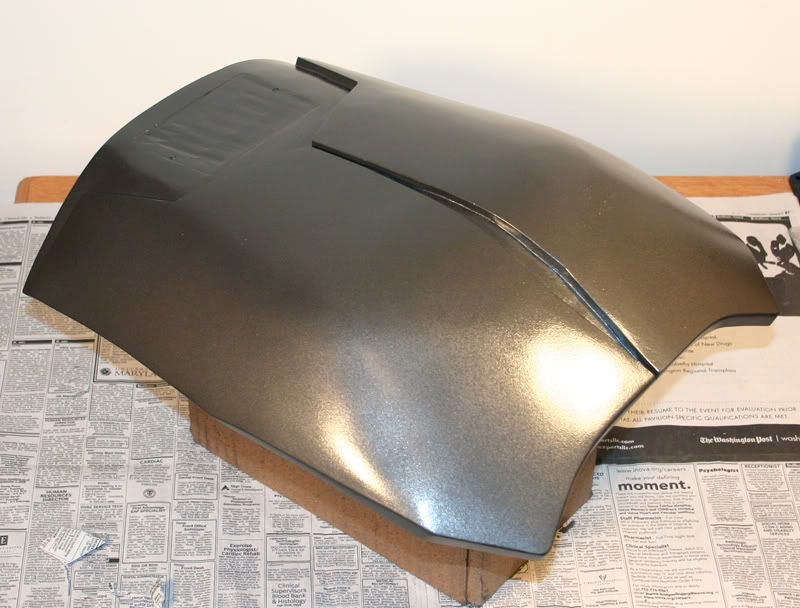
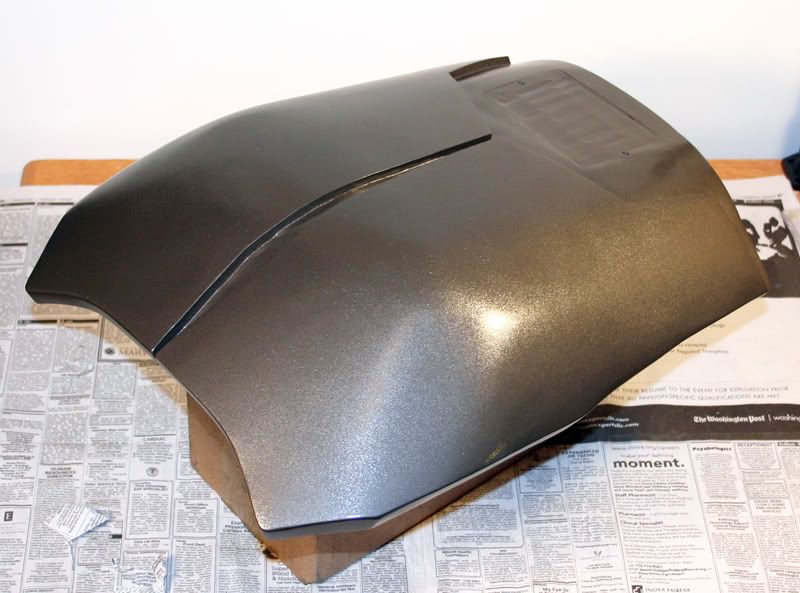
I got some good news and some bad news...
The bad news is I had a major glitch in the shoulder bell anchor system. The way I had the top strap holding the weight made it impossible for the bell to sit straight on the shoulder. I'm going to have to redo the attachment system.
The good news is I picked up my scraper this afternoon and just started scraping and scratching at the BP. Before I knew what was happening, I had finished the stupid thing.
I can't do a full costume pic. I forgot the belt is still in Colorado with the bando (plus I got one bell all taken apart :confused).
Here's a little teaser I threw together with what I have (sorry for the graininess, the setting and lighting weren't too good):
Only things left are the boots, the bando, and the hair.
~ BC
desolate
Sr Member
I got some good news and some bad news...
The bad news is I had a major glitch in the shoulder bell anchor system. The way I had the top strap holding the weight made it impossible for the bell to sit straight on the shoulder. I'm going to have to redo the attachment system.
The good news is I picked up my scraper this afternoon and just started scraping and scratching at the BP. Before I knew what was happening, I had finished the stupid thing.
I can't do a full costume pic. I forgot the belt is still in Colorado with the bando (plus I got one bell all taken apart :confused).
Here's a little teaser I threw together with what I have (sorry for the graininess, the setting and lighting weren't too good):
Only things left are the boots, the bando, and the hair.
~ BC
that is very impressive i really like how accurate this costume is becoming.. great work man.
Koda Vonnor
Well-Known Member
Thanks Deso.
I just noticed ... we have the same sword hilts.
:cool
I just noticed ... we have the same sword hilts.
:cool
Darth Mule
Sr Member
Great stuff bro. I've been watching this thread for awhile now. Can't wait to see this finished. I'll be looking for you at D*Con. So when either Dracula, Cade Skywalker, or Generic Pirate approach you and congratulate you on your costume, that me.
Last edited:
Koda Vonnor
Well-Known Member
Thanks guys!
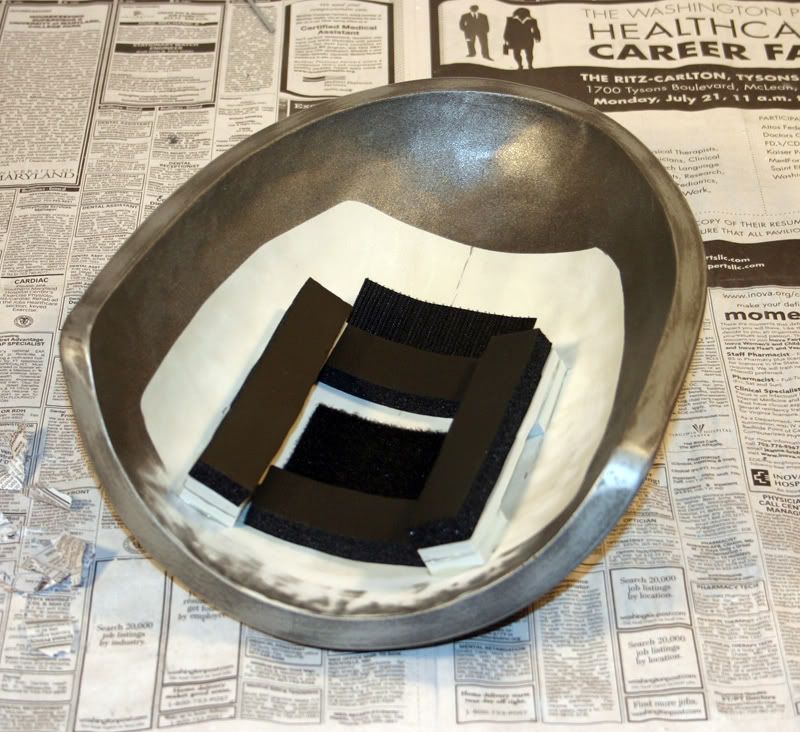
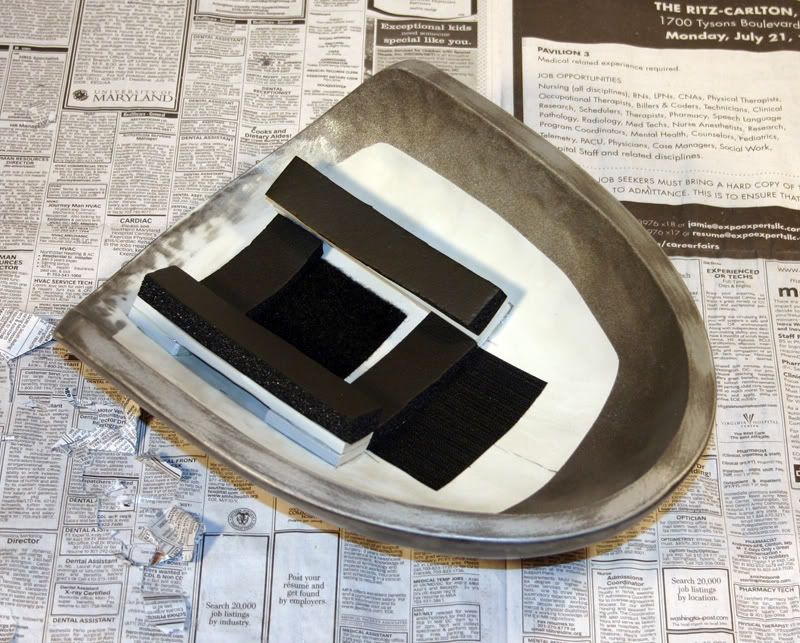
I fixed the shoulder bells this evening. I found an old pair of cheap poly-foam knee pads. The stuff that's not quite Styrofoam and not quite sponge rubber? I trimmed them down a bit and hot-glued them inside the bells, with just a bit of sintra strips framework to help support the curve of the kneepads. This time I also hot-glued the top straps right to the inside curve of the kneepads, and made small cuts in the poly-foam for the arm straps.
When I tried them on with the shirt I was heartbroken. Even with the weight-bearing straps attached to the innards so that they lay flat against my shoulder, the things were so heavy they pulled the shirt neckline all out of whack. I could jockey them into position and they'd stay OK, but the minute I'd move my arms they'd be all messed up again.
It was then that I kicked myself. :confused
Thats what the armor harness is for!
I put on the harness (shown a couple pages back), attached to the shirt at the shoulders and to the belt in front and back. The harness held the shirt in place across the shoulders and lo and behold, the bells snapped into position and stuck there like glue! :thumbsup
I put on the breastplate and capes and jumped up and down, swung my arms around and still the bells refused to shift (well actually if I make huge arm circles repeatedly, they want to shift a tad to the rear). The curve of the foam kneepad sits against my shoulder like a cup and rotates like my shoulder does. It's pretty slick (not to mention the thick pad inserts make the bells sit wider apart - really beefs up the delts).
Just need to add a tiny bit of padding at the bottoms where it rests against my upper arm, and they'll be good to go.
Now I'm really itching to get the bandoleer and the boots! :cool
Last edited:
Koda Vonnor
Well-Known Member
Koda Vonnor
Well-Known Member
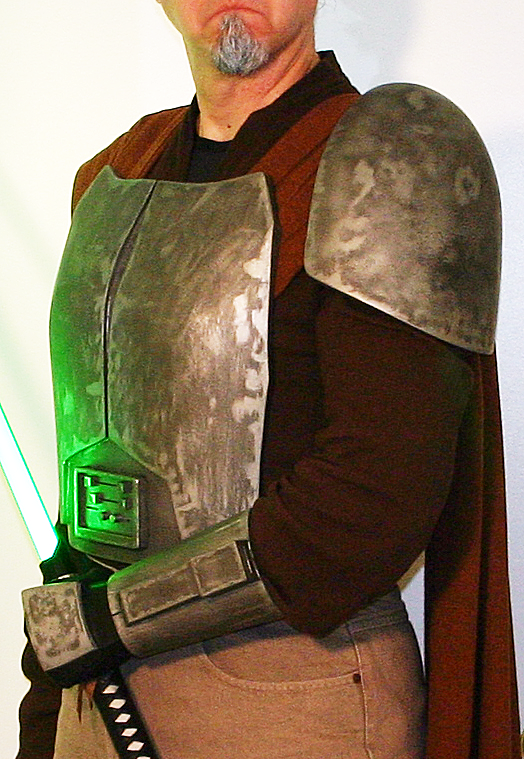
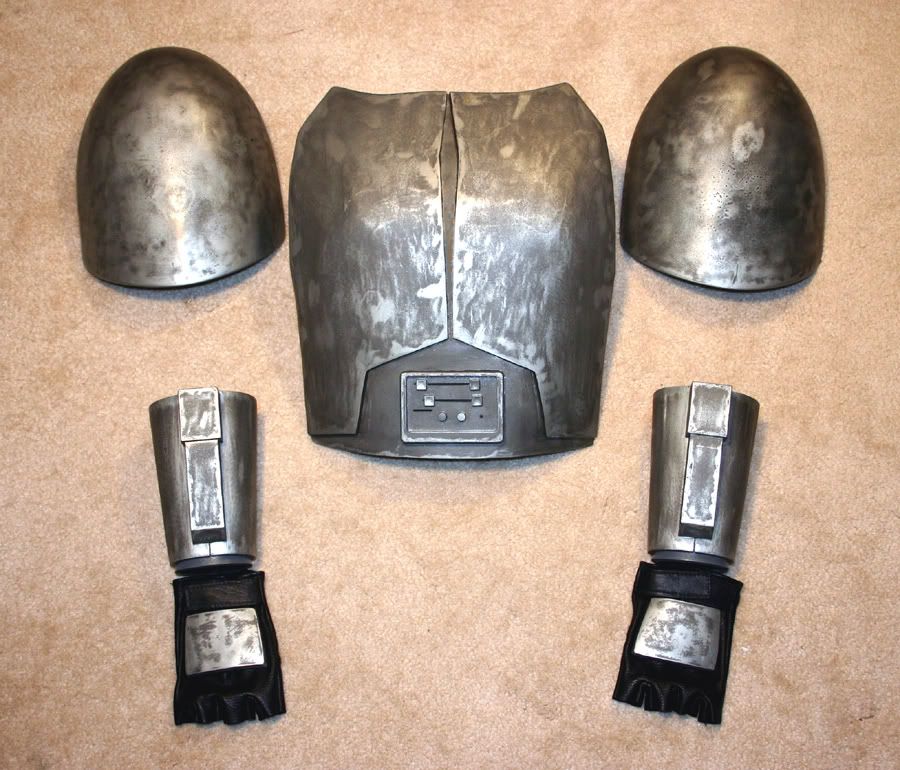
I lined up all the hard parts and took a photo for posterity. After tweaking the shoulder bell anchor system and adding strategic Velcro to the BP, almost nine months to the day after I began this project, I am officially finished with the Rahm Kota armor version 1.0
Now I'm just waiting on the bandoleer and the boots.
~ Vonnor

Now I'm just waiting on the bandoleer and the boots.
~ Vonnor
Similar threads
- Replies
- 4
- Views
- 451
- Replies
- 15
- Views
- 2,477
- Replies
- 11
- Views
- 1,435
- Replies
- 3
- Views
- 1,645