You are using an out of date browser. It may not display this or other websites correctly.
You should upgrade or use an alternative browser.
You should upgrade or use an alternative browser.
Jedi General Rahm Kota
- Thread starter Koda Vonnor
- Start date
ItsThatGuy
Sr Member
Wow, It's looks amazing so far - can't wait to see the finished project! :thumbsup
Koda Vonnor
Well-Known Member
Thanks for the kind words, guys. ")
I copied the "to do" list from page 2:
- finish chest plate sculpt
- seal/wall/mold chest plate
- cast chest plate
- shape/smooth chest plate
- paint/weather chest plate
- make silicone/plaster shell mold for shoulders
- cast shoulders
- shape/smooth shoulders
- paint/weather shoulders
- attach inner form padding to shoulders
- re-form bracers
- fill/shape/smooth bracers
- paint/weather bracers
- build/paint neoprene wrist seals
- modify gloves
- build undertunic
- build outer tunic
- build tabards/capes
- build armor harness
- attach velcro to armor/harness/tunic/gloves
- design/fit bandoleer
- shape/smooth bando buckle and belly-box
- greeblify bando buckle and belly-box
- paint/weather buckle and box
Things are starting to disappear. They'll disappear faster now, I'm doing all the soft parts next.
~ Vonnor
Last edited by a moderator:
Koda Vonnor
Well-Known Member
Here's a weekend update:
I didn't do much 'cause I had family in from out of town, but here's all the stuff you won't see once the armor gets on there.
One thing though, these pants are 37" waist and were very tight when I started this project (Nov). I have dropped a bit of weight and these are just too baggy around the middle. I will now have to buy another pair in a 36" or 35" and doctor them up (removing the back pockets was a bich - had to pick at each needle hole to blend it in). :wacko
Also, these are not the Rahm Kota boots. I have yet to receive those.
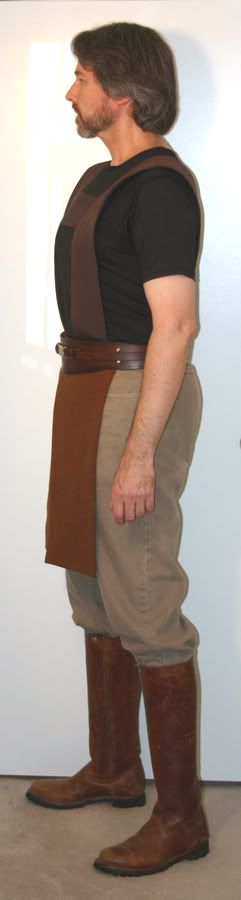
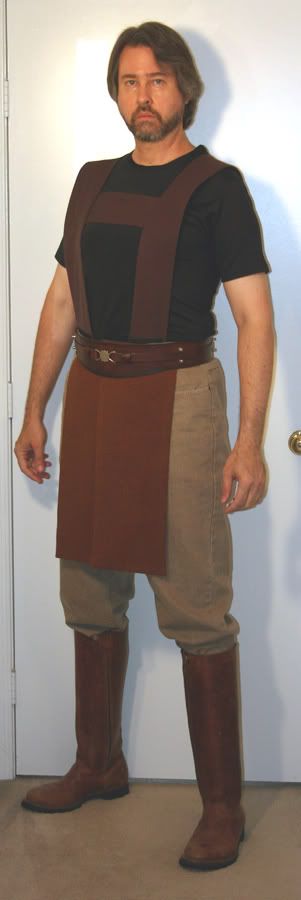
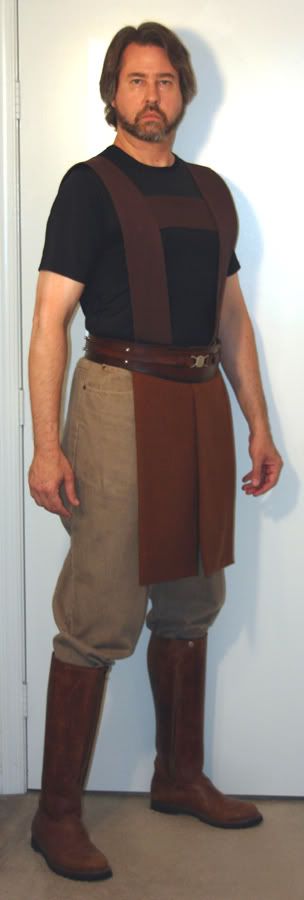
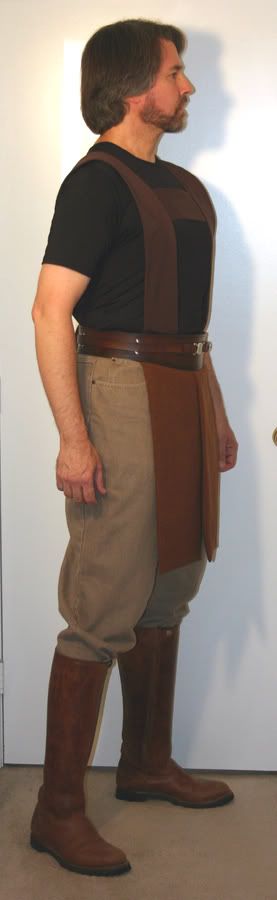
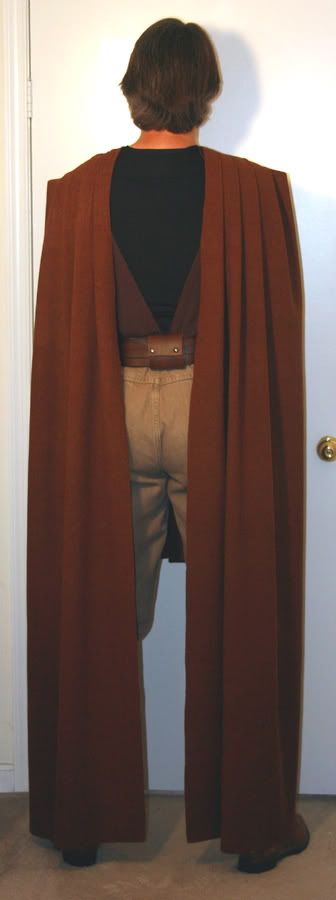
~ Koda
I didn't do much 'cause I had family in from out of town, but here's all the stuff you won't see once the armor gets on there.
One thing though, these pants are 37" waist and were very tight when I started this project (Nov). I have dropped a bit of weight and these are just too baggy around the middle. I will now have to buy another pair in a 36" or 35" and doctor them up (removing the back pockets was a bich - had to pick at each needle hole to blend it in). :wacko
Also, these are not the Rahm Kota boots. I have yet to receive those.
~ Koda
Koda Vonnor
Well-Known Member
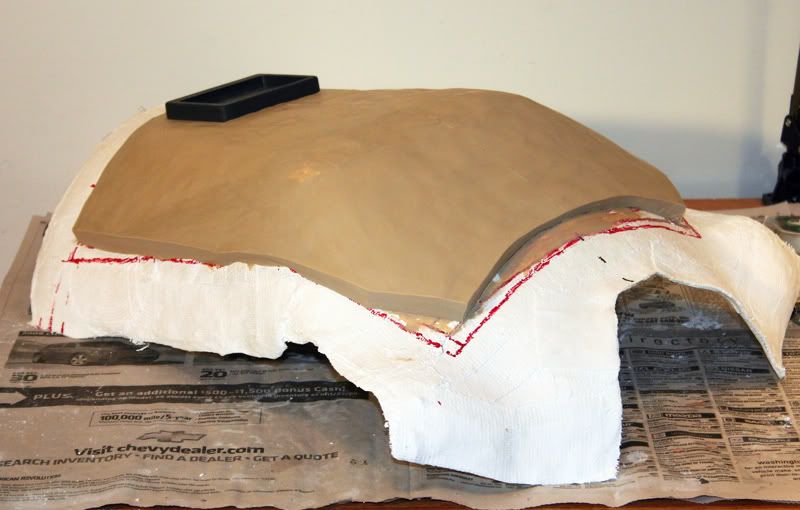
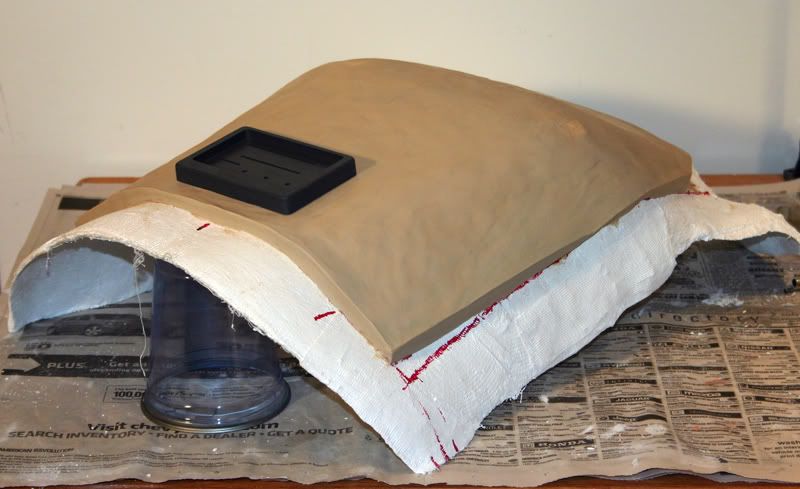
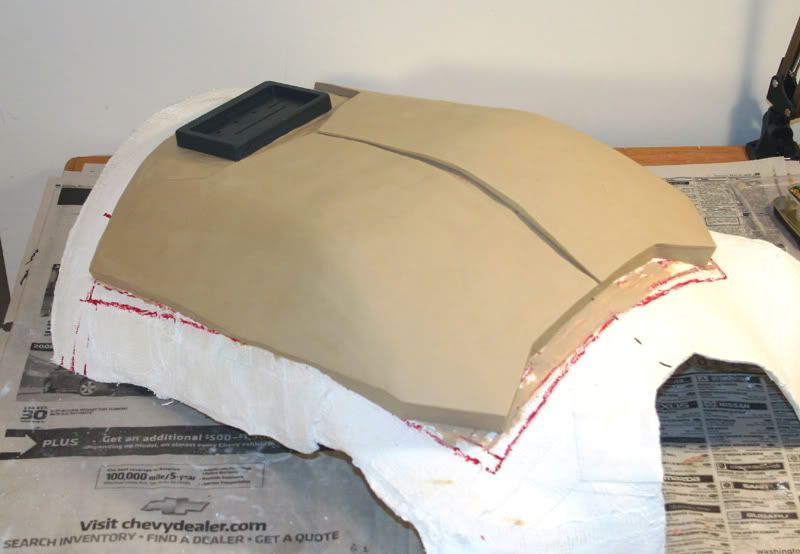
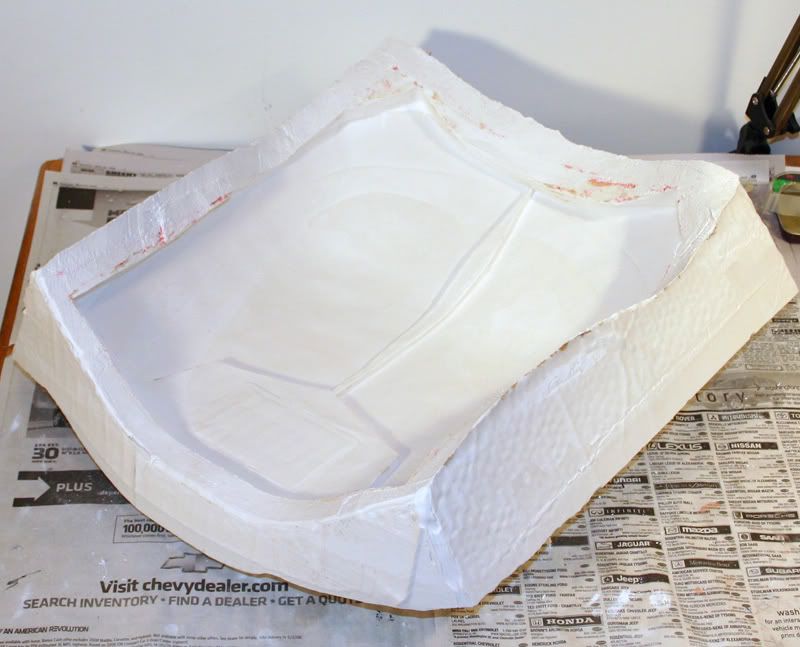
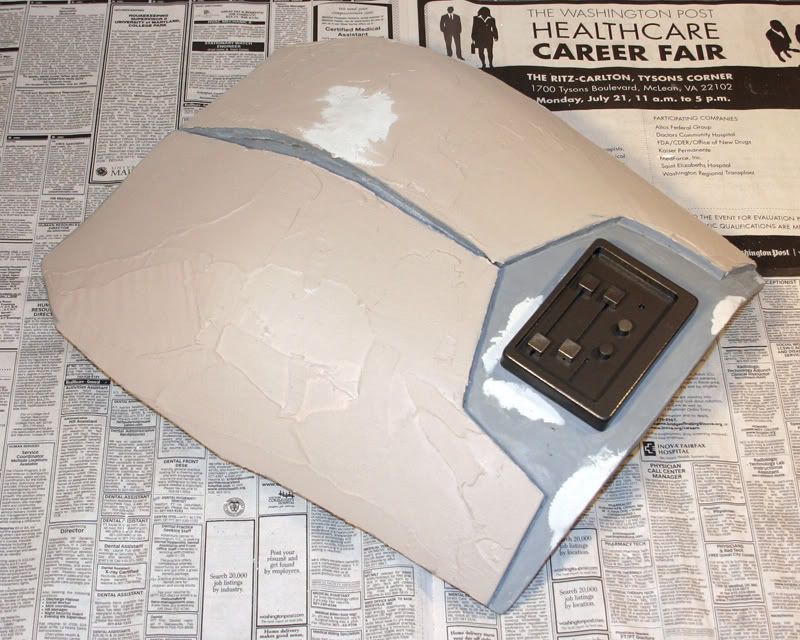
Small update...
Just have to tweak the edges a bit and smooth it all out, then lay on the left and right slabs. The belly box is just for reference, I'll take the mold without it and attach it after casting.
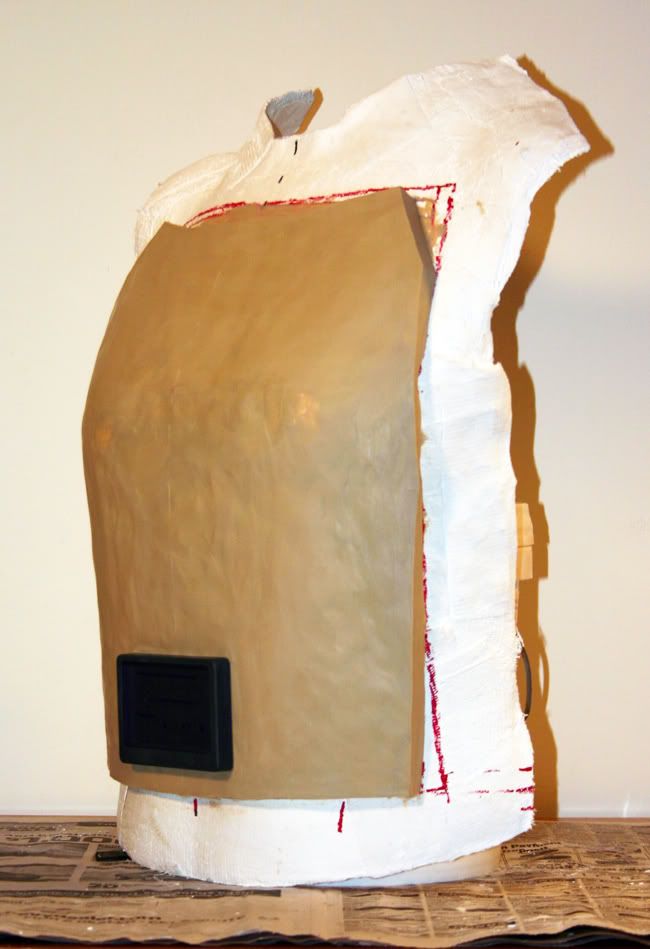
~ Vonnor
Just have to tweak the edges a bit and smooth it all out, then lay on the left and right slabs. The belly box is just for reference, I'll take the mold without it and attach it after casting.
~ Vonnor
ItsThatGuy
Sr Member
Bill!?!? I had no idea that was you! lol - This is Tony from Garrison Tyranus (short stormtrooper!) :lol
Man, that is looking sharp! I am really impressed!
Man, that is looking sharp! I am really impressed!
Koda Vonnor
Well-Known Member
Yeah for some reason I knew "It's That Guy" was you. I thought you knew I was Koda_Vonnor (code of honor). :lol
Yeah since you guys killed Katarn last December I had to find a tougher character to play.
I'll be showing this as a WIP at D*Con, and hopefully as a finished product at the Ukrops Parade.
~ BC
Yeah since you guys killed Katarn last December I had to find a tougher character to play.
I'll be showing this as a WIP at D*Con, and hopefully as a finished product at the Ukrops Parade.
~ BC
Last edited:
ItsThatGuy
Sr Member
Haha - yep - Total brain fart! :lol Koda Vonnor looked fimilar, just thought it was an EU character.
Well, I look foward to seeing more of your progress - I am really excited to get to see it in person too - can't wait!
Well, I look foward to seeing more of your progress - I am really excited to get to see it in person too - can't wait!
Koda Vonnor
Well-Known Member
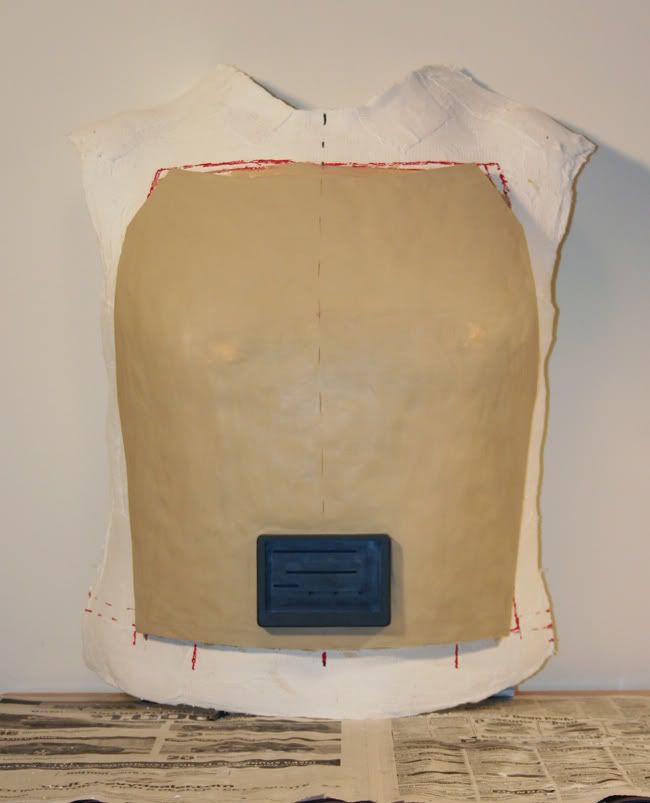
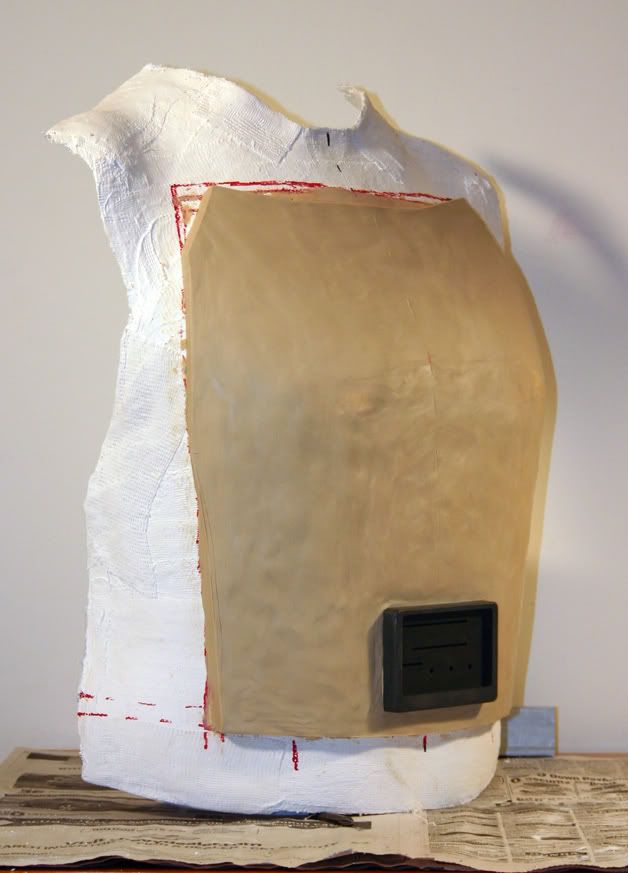
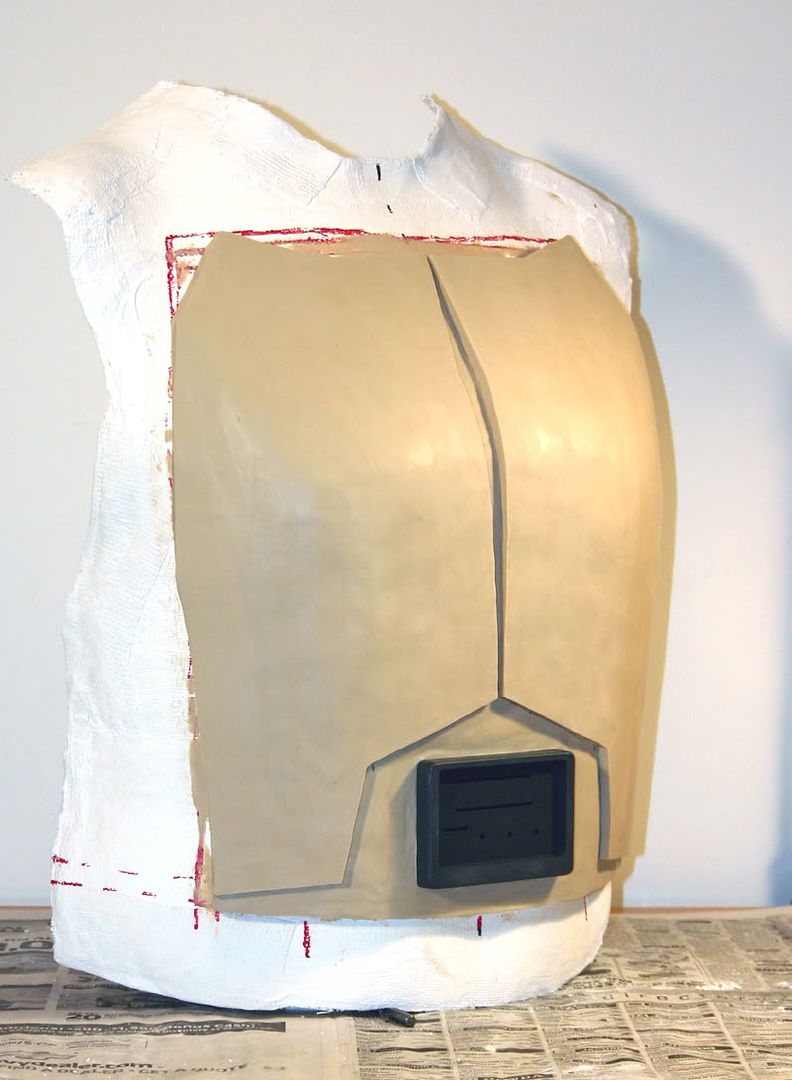
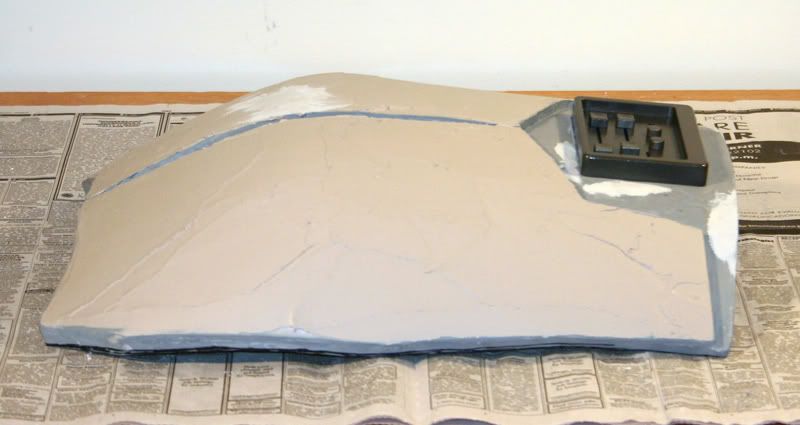
I laid on the left and right sides today. Rolled out little tiles of clay to 6mm thickness and cut them to shape, then sort of built a jigsaw puzzle and smoothed all the joints. The upper half was looking a bit bloated on the sides so I did some major reshaping. It's not perfect, but then my body ain't at all like that CG dude either.
Almost ready to take a mold. Couple more rounds of smoothing and microscopic inspection and it'll be good to go.
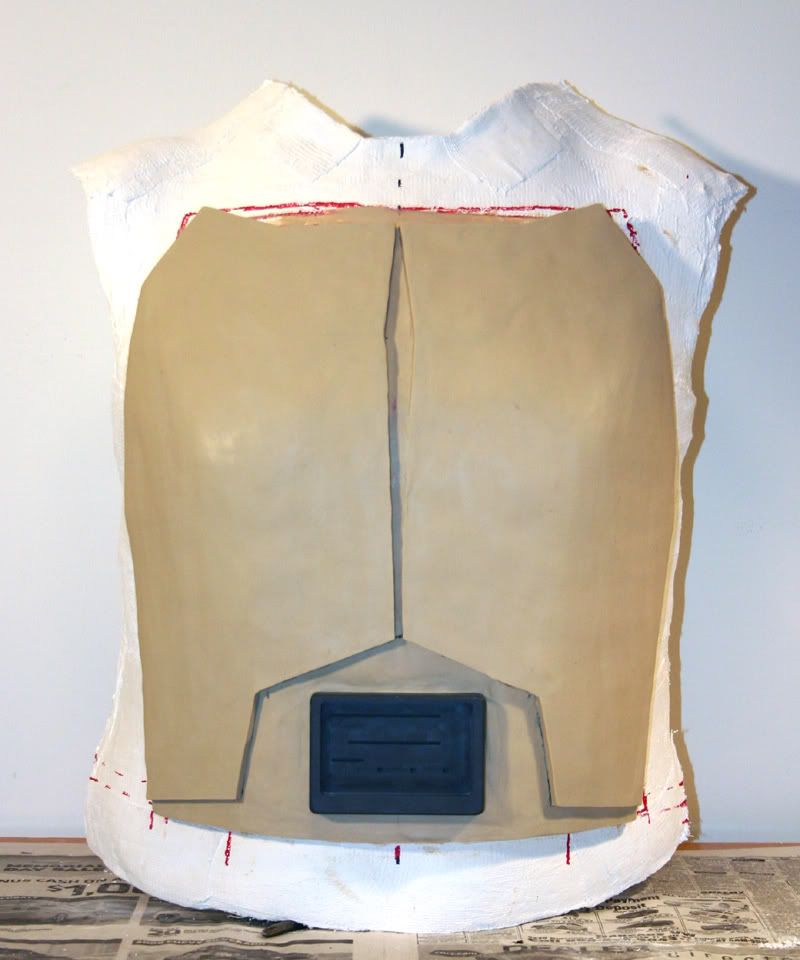
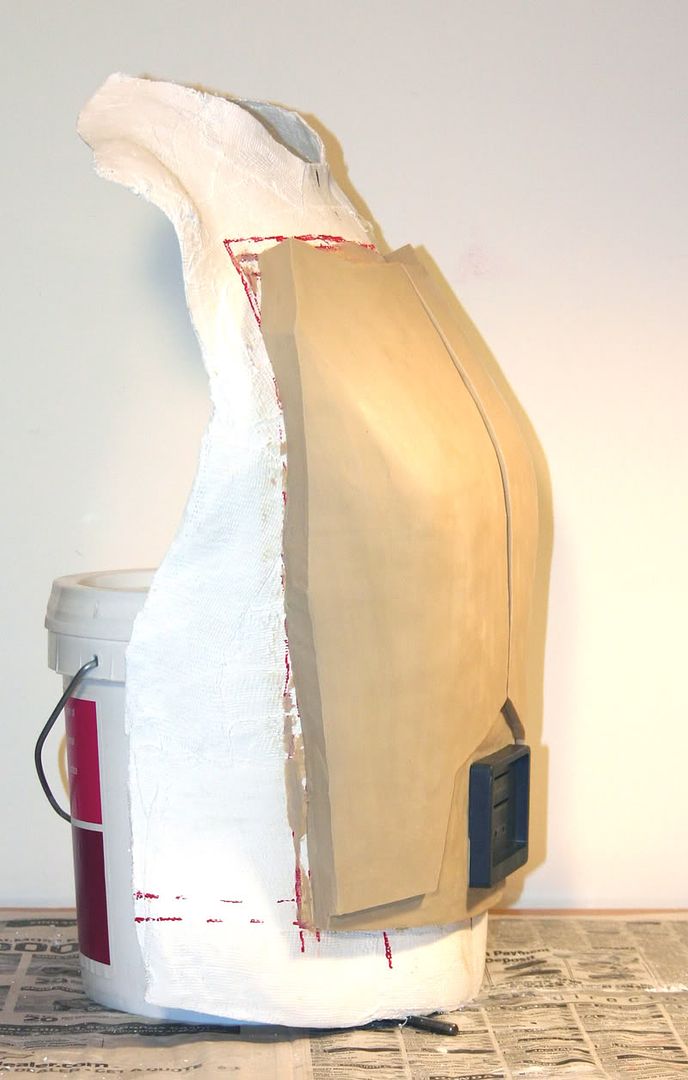
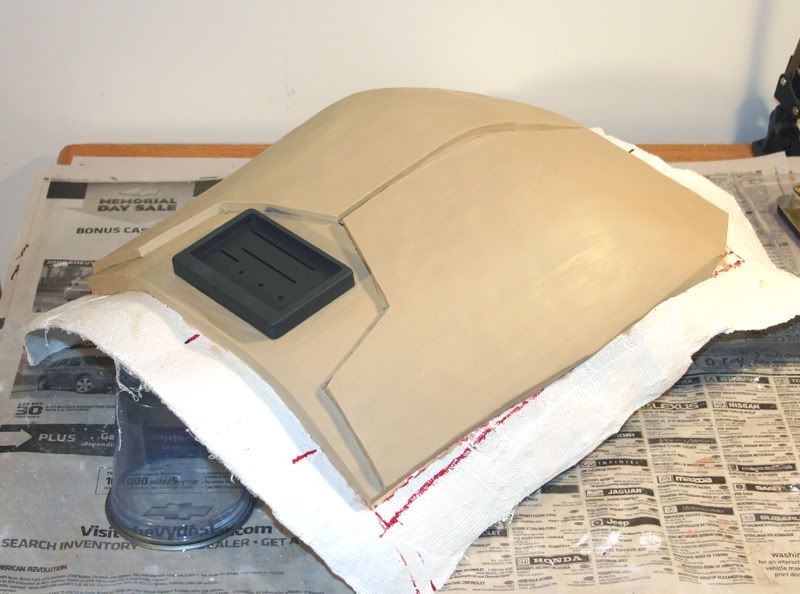
~ Koda
Almost ready to take a mold. Couple more rounds of smoothing and microscopic inspection and it'll be good to go.
~ Koda
Koda Vonnor
Well-Known Member
So instead of stressing over whether I'll be able to get this done before D*Con, and if Diaz will deliver my boots in time, I decided to play around with the face. Here is the first cut...


Still got some tweaking to do of course.
Still got some tweaking to do of course.
Koda Vonnor
Well-Known Member
Thanks Bryan! I appreciate that very much.
Koda Vonnor
Well-Known Member
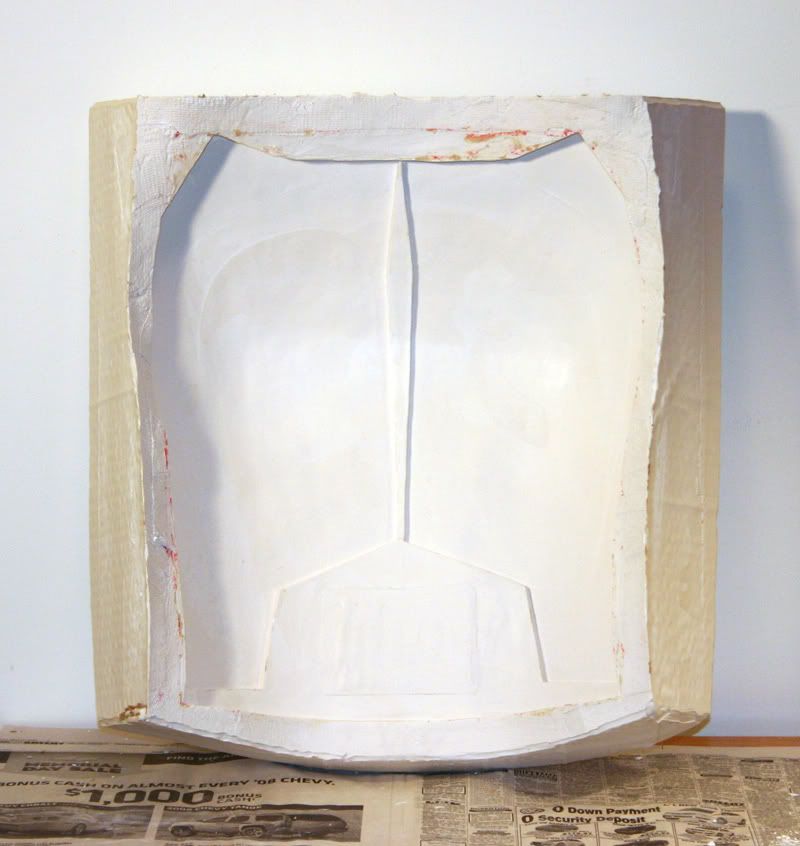
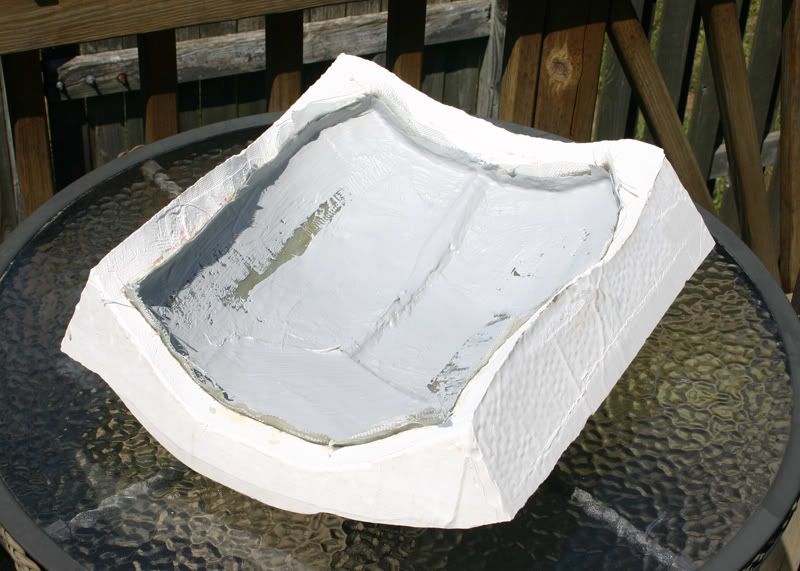
Weekend Update:
I took a plaster mold of the BP today. Had to layer on the plaster, and as such I got some striation lines in the mold. I don't think they will cause much trouble though, I can sand them smooth after the casting.
The weather report looks good for laying the fiberglass next Saturday.
I also made the template for the bandoleer today, and drew up a bunch of sketches and notes for Mel Mattson, and adjusted the saber hilt to better represent the CG images.
Tomorrow I will heat-form the sintra saber holster and box everything up to send to Mel.
See ya's next week.
~ Koda
Koda Vonnor
Well-Known Member
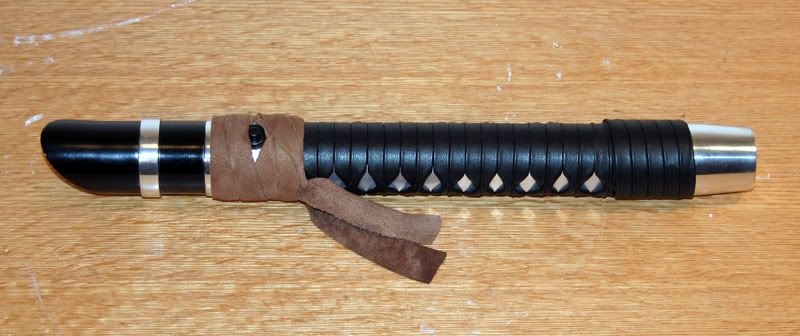
Weekend Update part two:
Here is the rough saber holster made from heat-formed sintra 3mm. It will attach to the bandoleer with two Chicago screws and have a leather strap going 'round the middle. I had to make it this morning to send to my leather crafter tomorrow so she can make the bando.
It's shown here laying on the bandoleer cut-out template.


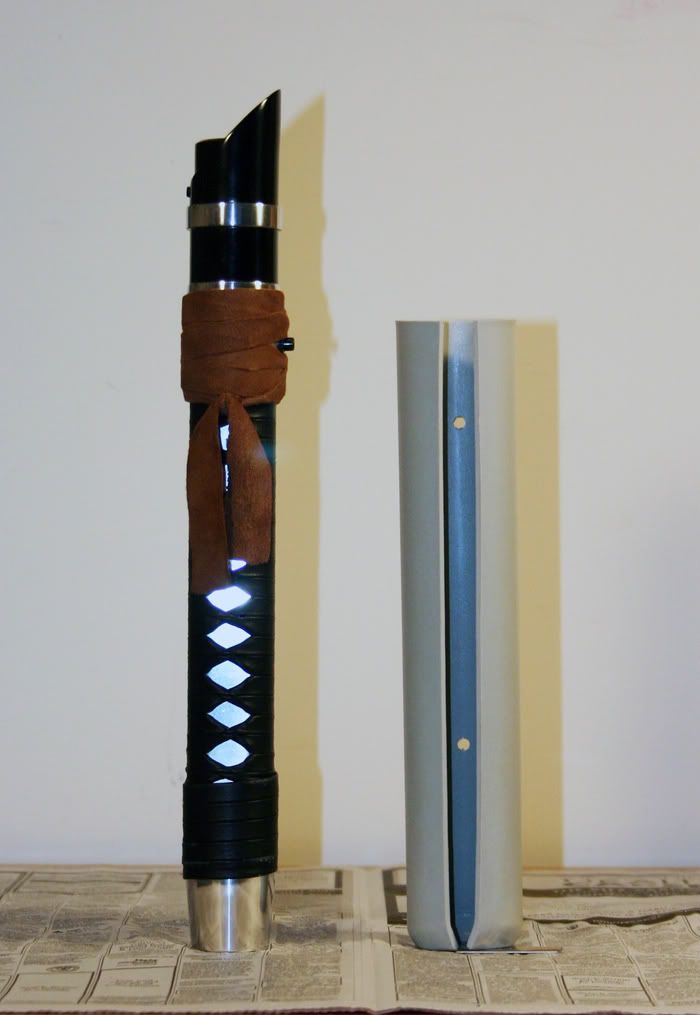
~ Vonnor
Here is the rough saber holster made from heat-formed sintra 3mm. It will attach to the bandoleer with two Chicago screws and have a leather strap going 'round the middle. I had to make it this morning to send to my leather crafter tomorrow so she can make the bando.
It's shown here laying on the bandoleer cut-out template.
~ Vonnor
Koda Vonnor
Well-Known Member
Neither can I, guys.Looking great! I can't wait to see it finished!
Koda Vonnor
Well-Known Member
This morning I laid up the fiberglass on the chest plate. I had some difficulty. I poured in a gray gel-coat first, keeping it as thin as possible, but because it was a very warm day, and I waited too long before starting the resin/fiberglass, the gel-coat hardened and shrunk away from the mold. :confused I suspect there will be several ripples in the surface, some quite large.
I also ran out of resin after only 3.5 layers of fiberglass or so. Due to the heat, the stuff I mixed up went solid WAY too fast and I ended up wasting half the resin. I also wasn't able to add fiberglass along the center ridge, so I put on a few heavy layers of resin and finished the whole thing with a bondo/gel-coat reinforcement along all the edges and the center ridge. No doubt I still have to fill in those wavy ripples mentioned earlier.
When I discovered the ripples it was too late to do anything about them. It was either keep going or scrap the whole BP back to the body cast. :redface
I'll pop it out of the mold tonight and see how bad it is. If I can fill in the ripples with bondo and smooth it all out then I'll wear this one. If not, I may have to use it as a hard model and take another mold.
I really wish the polyester resin wasn't such a pain in the a$$.
Koda Vonnor
Well-Known Member
OK guys, that's it.
I'm giving up on this costume.
I've found a MUCH cooler character to portray! :cool
JEDI UMPIRE!!

I'm giving up on this costume.
I've found a MUCH cooler character to portray! :cool
JEDI UMPIRE!!
Last edited by a moderator:
Koda Vonnor
Well-Known Member
To cure all the nasty surface waves, I added a bondo icing and a little epoxy patchwork. Almost looks good enough to eat. I'll sand all that down to shape.
Also thanks to my brother for coming up with the killer solution to harnessing the shoulder bells. Worked like a charm. I'll explain how I did it later with the full costume pix.
See ya's next week.
~ Vonnor
I'll sand all that down to shape.Also thanks to my brother for coming up with the killer solution to harnessing the shoulder bells. Worked like a charm. I'll explain how I did it later with the full costume pix.
See ya's next week.
~ Vonnor
Similar threads
- Replies
- 4
- Views
- 451
- Replies
- 15
- Views
- 2,475
- Replies
- 11
- Views
- 1,432
- Replies
- 3
- Views
- 1,640