HASBRO PROTON PACK 10/27

I don’t quite understand how this holds it onto the pack, with the holes big enough for the nuts to sit recessed into the plate, can’t it just slide off the heads of those nuts?
The back plate is held onto the main body with the bolts and it clicks into the outer section of the Ion Arm, but the two aren't screwed together anymore. The Ion Arm is held on the same way as ever, with the two pegs on the main body which push into the holes in the back of it. So yes you could pull it apart, but you could before I made the mod.

Has anyone replaced the 'copper' wires yet? They're one of the last things I really don't like, and I think make it look too toyish plus the positioning of the terminals and where the wires route isn't the same. The reference photos of the screen-used packs looks like they should be brown wire, weathered with black paint in places, with the ring terminals wrapped in copper foil, and intermittent hose clamps.
 
Last edited:
The back plate is held onto the main body with the bolts and it clicks into the outer section of the Ion Arm, but the two aren't screwed together anymore. The Ion Arm is held on the same way as ever, with the two pegs on the main body which push into the holes in the back of it. So yes you could pull it apart, but you could before I made the mod.

Has anyone replaced the 'copper' wires yet? They're one of the last things I really don't like, and I think make it look too toyish plus the positioning of the terminals and where the wires route isn't the same. The reference photos of the screen-used packs looks like they should be brown wire, weathered with black paint in places, with the ring terminals wrapped in copper foil, and intermittent hose clamps.
I'm currently in the process of removing the copper wires to install real ones. I'm trying to heat the fake plastic wires and see if I can loosen the glue that's holding them in place as I don't want to cut them off. I'll post my progress here when I get around to switching them out.
 
I'm currently in the process of removing the copper wires to install real ones. I'm trying to heat the fake plastic wires and see if I can loosen the glue that's holding them in place as I don't want to cut them off. I'll post my progress here when I get around to switching them out.
Fantastic! I wish they were all push fit like the ones on the side of the booster tube, but I guess that means we can fix the positioning of them. I'll definitely be watching out for your post - good luck!
 
Bit of an upgrade with painting the wires, some rub n' buff, electrical tape and a screen accurate hose. Might have a go at the electronics next!

IMG_6807.jpeg


IMG_6808.jpeg


IMG_6809.jpeg
 
So, Long story short, my pack was sent back, by FedEx. I called last wednesday. They said they would send
another, but no tracking info has been sent. I called Monday, and I have still not heard anything. Has anyone
else had this problem?
 
Had a go a diffusing the cyclotron - once I was brave enough to open 'er up I put in a couple of sheets of red tissue paper inbetween the white plastic diffuser already part of the pack and the red lenses. Hard to give it justice on camera but really happy with how it turned out!

IMG_6827.jpeg


IMG_6828.jpeg
 
Had a go a diffusing the cyclotron - once I was brave enough to open 'er up I put in a couple of sheets of red tissue paper inbetween the white plastic diffuser already part of the pack and the red lenses. Hard to give it justice on camera but really happy with how it turned out!

View attachment 1662912

View attachment 1662913
Nice job! I replaced the red lenses on mine with black ones and took out the white plastic diffuser. I'm experimenting with different materials for the diffuser. So far I've tried copy paper and white plastic bag. I will try the red tissue paper for sure, as well as parchment and tracing paper to see what gets the best result.
 
Is anyone else missing a screw behind the V-hook? It should be the same type of screw as the ones on the bottom of the pack and on the sides of the bumper. It seems Hasbro drilled the hole for it but didn't include the screw on mine.

IMG20230127193224.jpg
 
Dollar Tree sells some pretty blurry clear plastic binders that would work well, in both clear red and blue. But for an afterliec pack i believe both the red and blue lights are supposed to look quite dark when not on.
 
Is anyone else missing a screw behind the V-hook? It should be the same type of screw as the ones on the bottom of the pack and on the sides of the bumper. It seems Hasbro drilled the hole for it but didn't include the screw on mine.

View attachment 1662918
I think theyre all like this,mine also didnt have a screw. I put one there though with a brass washer when i replaced some of the other screws.
 
Here's where I am with mods on mine. The first thing I did was replace the yellow sheath with the correct one. However I cut it to make it more accurate length and it ended up coming undone on one end, so now I'm waiting on a replacement. I also added electrical tape over all the molded tape on the cables.

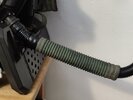
Dislodged the breather hose and moved it down a few inches. Painted it moss green and lightly weathered. I plan on replacing part of the loom with the correct breather hose, fuel hose segment, and Neutrik connector soon.
IMG20230127200150.jpg

1 inch insulation pipe foam and 6mm wetsuit neoprene, lightly weathered with brown paint. I cut the length to 10 inches. Painted the brackets and screws for the ALICE frame flat black. Lightly weathered and sanded the shoulder pads as well.
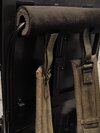
IMG20230127200033.jpg

Replaced the fake, plastic cable clamp with a real 1.5" P-clamp. I attached it using the molded plastic screw from the fake clamp instead of using a real M5 screw and washer. I cut it and trimmed it down and painted the screw in the center black.
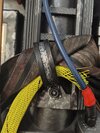
IMG20230127195631.jpg

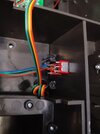
Added the correct clamps to the red cable. I still need to trim off the excess material from it. I painted the head of the copper wires silver and lightly weathered. I still need to add copper tape to the wires, followed by heavier weathering. To get the mini clamps on the copper wires, I cut the wire underneath where the clamp is supposed to go. I then slide the clamps on and super glued it back together.
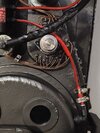
IMG20230127195621.jpg

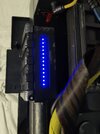
Removed the white diffuser for the power cell lights and replaced it with a black Hobart welding face shield. I kept the clear plastic in the front. Using a black lens seems the most accurate for Afterlife. I'm not using any diffuser for the blue lights.
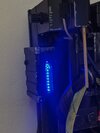
IMG20230127195331.jpg

Added blue electrical tape to the cable on the left. It's supposed to be blue, not black. Also painted the screws on the bumper and the bottom of the pack flat black.
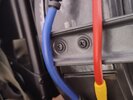
IMG20230127192010.jpg

Replaced the red lenses on the cyclotron with black Hobart face shield. Removed the white diffuser and replaced it with a sheet of paper behind the lenses. It was not fun having to pry apart the cyclotron lid. It requires breaking off several pins that were permanently glued. I don't know why Hasbro made this the one part of the pack that is inaccessible.
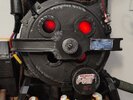
IMG20230127195054.jpg
 
Finally got my pack and it's incredibly made for the cost/accuracy.

However, i have the dreaded activation switch/power off issue as well. Got a solid connection to the wand but the 3rd activation toggle on the wand immediately kills the pack/wand. My D cells each have about 1.45v volts (which might not be enough voltage).

Aside from getting new batteries, has anyone else experienced this and found a solution?

Given my bs experience with Hasbro CS, I don't want to resort to sending this back if I don't have to.
 
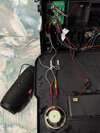
I'm adding a second and optional third speakers to the pack. I took it off an old Aker 1506, often used by cosplayers as a voice amplifier. It's twice as loud as the pack speaker. It's mounted where one of the backpack straps was, just waiting on E6000 to cure. It's the only spot where it fits perfectly. My soldering is inexperienced and sloppy, so I used Posi-lock connectors. Really all you have to do is wire it directly to the pack speaker.

You can also connect any speaker with an audio jack. Simply take an aux cord, cut and strip the wires, and attach them the same way. Here is a test video with a JBL Charge 3. The JBL is at max volume while the pack is at minimum volume. I don't plan on leaving the Bluetooth speaker attached at all times. I'll just leave the aux cable outside the pack. I can just insert the cable deeper into the pack when not in use.

IMG20230128082622.jpg

 
Last edited:
Couple more mods. I'm done for now until I replace part of the wand loom with the accurate hoses and connector.

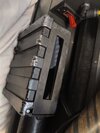
I've taped PVC mesh to protect the second speaker I installed. The aux cord sits Velcro'd on the back when not hooked up to a portable speaker.

IMG_20230128_175405.jpg

I've removed the clear lens from the power cell and added a second layer of the black face shield. Dimming the LEDs with the second layer of black looks much better. The inaccuracy of the clear lens is that it sits flush with the front of the pack, while on the screen used pack the lens is deeper inside.

IMG_20230128_174439.jpgIMG_20230128_134423.jpg

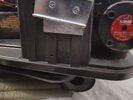
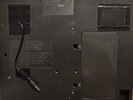
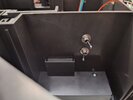
I moved the the switches from the cyclotron to the hidden compartment. This doesn't require any rewiring at all. Just drill the hole in the back wall and thread on the switches. You can also move the 1984-Afterlife mode switch to the empty dummy switch on the front of the pack. It just fits right in there. However, the vibration switch will not fit there, as it is a larger size.

IMG_20230128_161257.jpgIMG20230128170200.jpg
 
This seems like a small problem compared to all the mods everyone is doing, but has anyone else had connection issues with the hose and the whole pack shutting down? I saw some foks used tin foil on the connectors to create a more solid connection. Anyone successfully get Hasbro to send a replacement hose?
 
This seems like a small problem compared to all the mods everyone is doing, but has anyone else had connection issues with the hose and the whole pack shutting down? I saw some foks used tin foil on the connectors to create a more solid connection. Anyone successfully get Hasbro to send a replacement hose?
A few have mentioned this is some of the Hasbro Pack FB groups - some have suggested a piece of electrical tape around the internal hose fitting on the pack seems to solve it. For some there is just a bit too much play which can cause the pack to shut down if the hose is wiggled. There's a video here with someone showing the fix - give it a go and hopefully sorts it. I've seen Hasbro has sent out a few replacement hoses to people as well so worth reaching out to them.
 

Your message may be considered spam for the following reasons:

If you wish to reply despite these issues, check the box below before replying.
Be aware that malicious compliance may result in more severe penalties.
Back
Top