TerranCmdr
Well-Known Member
I honestly wasn't sure where this thread belonged but I figured since most of the stuff I'm making is to be worn, it is indeed costuming.
My yearly Halloween build for 2024 ended up being Ghostbusters themed. I've been wanting to do this one for a while but wanted to wait until my son could come up with the idea "on his own." I may or may not have put "The Real Ghostbusters" on our media server for him to find.
I'll detail the initial build below but I've kept on going down the rabbit hole since then, so this will be an ongoing thread for updates.
Here's us on Halloween, featuring the crappiest rendition of an RTV you've ever seen.

The initial research into these costumes bolstered me with confidence. "Oh, it's just a flight suit and a backpack, doesn't seem too hard!" Somehow I fall into that same trap every year...
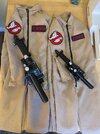
Well I've gotten pretty good at making custom-sized flight suits over the years so at least that portion was pretty straightforward. I sourced patches online: iron-ons for the "no ghost" arm patches and velcro for the nametags. I also sourced a few other items early on: the pistol belt and elbow pads for myself, a cheap set of ecto-goggles, and webbing for the boys' belts.
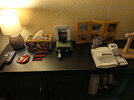

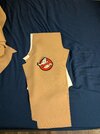
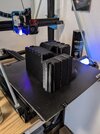
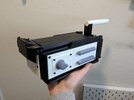
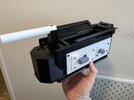
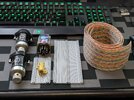
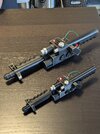
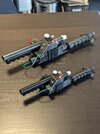
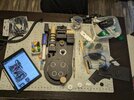
Once I was satisfied with the suits I decided to move on to the proton packs. I started with the neutrona wands as I kind of wanted those to be the showpieces. I found some 3d files online that were super accurate but that wasn't really what I was going for so I used some blueprints to model the wand myself. I designed them to house electronics for some play features for the boys. The first one was 50% scale and turned out so cute. I add one mini SPST switch and an LED that can be turned on or off with the switch. I integrated magnets into the slot underneath for an easy way to store it on the pack and used m3 heat inserts to make the bottom accessible for battery changes. The second one was printed at 80% and designed to use PVC tube as the handle and emitter. The electronics in that one are slightly more sophisticated - one SPST turns the red LED on and the momentary switch activates a UV LED in the emitter end. I sprayed them flat black, masked and sprayed the silver parts, and finished with some silver sharpie for weathering and a few wires for the details.
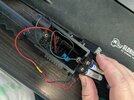
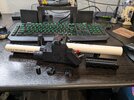
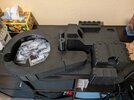
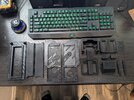
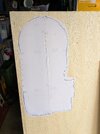
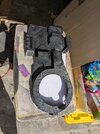
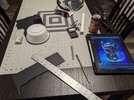
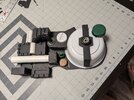
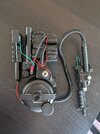
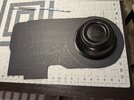
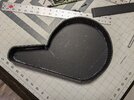
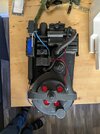
For the packs, instead of modeling and printing them I decided to do some good old fashioned scratch building - both to save time but also to save weight. I used the Q-Pack template for the motherboards, scaled to 50% and 80% respectively, and cut them out of black foam core. I then rummaged through my junk and found a couple of ramen bowls that were just about the perfect size for cyclotrons. The rest of the packs were mainly built from hand-cut foam core and assembled with hot glue. PVC and other caps and things helped me round out the builds. For the 80% pack for my older son, I spent a bit more time to carefully score and bend the foam core around to create the bottom of the cyclotron and I'm happy with how that turned out. I spent a bit more time on the 80% pack as I had more room to work with. I had some retro-reflective tape that I added to the circles of the cyclotron and for the blue LED strip I used a bit of cereal box cut to shape. I weathered both packs with silver sharpie and hot glued some straps on to the backs to finish them off. Very happy with how these look, especially the larger one.
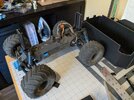
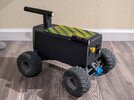
For my own costume, I was able to find a proper flight suit at a local surplus store. I also picked up the military backpack that I will eventually attach my own proton pack to. I got some black gloves to stick in the belt and we already had a PKE meter we found at a thrift store. Ordered some Spengler style costume glasses and I think they actually look pretty good on me. I painted my elbow pads, dyed my belt, and that's as far as I got on mine for Halloween. On Halloween day I somehow got the notion I wanted to make a rudimentary RTV so I took my Arrma Gorgon, printed body posts and constructed the simplest faccimile of a ghost trap to slap on top. Very quickly painted some yellow stripes on that were still wet when we went out. It was great fun ripping it down the street though, got lots of compliments on it.

So Halloween was fun but that was just the start! More coming in the next post.
My yearly Halloween build for 2024 ended up being Ghostbusters themed. I've been wanting to do this one for a while but wanted to wait until my son could come up with the idea "on his own." I may or may not have put "The Real Ghostbusters" on our media server for him to find.
I'll detail the initial build below but I've kept on going down the rabbit hole since then, so this will be an ongoing thread for updates.
Here's us on Halloween, featuring the crappiest rendition of an RTV you've ever seen.
The initial research into these costumes bolstered me with confidence. "Oh, it's just a flight suit and a backpack, doesn't seem too hard!" Somehow I fall into that same trap every year...
Well I've gotten pretty good at making custom-sized flight suits over the years so at least that portion was pretty straightforward. I sourced patches online: iron-ons for the "no ghost" arm patches and velcro for the nametags. I also sourced a few other items early on: the pistol belt and elbow pads for myself, a cheap set of ecto-goggles, and webbing for the boys' belts.


Once I was satisfied with the suits I decided to move on to the proton packs. I started with the neutrona wands as I kind of wanted those to be the showpieces. I found some 3d files online that were super accurate but that wasn't really what I was going for so I used some blueprints to model the wand myself. I designed them to house electronics for some play features for the boys. The first one was 50% scale and turned out so cute. I add one mini SPST switch and an LED that can be turned on or off with the switch. I integrated magnets into the slot underneath for an easy way to store it on the pack and used m3 heat inserts to make the bottom accessible for battery changes. The second one was printed at 80% and designed to use PVC tube as the handle and emitter. The electronics in that one are slightly more sophisticated - one SPST turns the red LED on and the momentary switch activates a UV LED in the emitter end. I sprayed them flat black, masked and sprayed the silver parts, and finished with some silver sharpie for weathering and a few wires for the details.


For the packs, instead of modeling and printing them I decided to do some good old fashioned scratch building - both to save time but also to save weight. I used the Q-Pack template for the motherboards, scaled to 50% and 80% respectively, and cut them out of black foam core. I then rummaged through my junk and found a couple of ramen bowls that were just about the perfect size for cyclotrons. The rest of the packs were mainly built from hand-cut foam core and assembled with hot glue. PVC and other caps and things helped me round out the builds. For the 80% pack for my older son, I spent a bit more time to carefully score and bend the foam core around to create the bottom of the cyclotron and I'm happy with how that turned out. I spent a bit more time on the 80% pack as I had more room to work with. I had some retro-reflective tape that I added to the circles of the cyclotron and for the blue LED strip I used a bit of cereal box cut to shape. I weathered both packs with silver sharpie and hot glued some straps on to the backs to finish them off. Very happy with how these look, especially the larger one.


For my own costume, I was able to find a proper flight suit at a local surplus store. I also picked up the military backpack that I will eventually attach my own proton pack to. I got some black gloves to stick in the belt and we already had a PKE meter we found at a thrift store. Ordered some Spengler style costume glasses and I think they actually look pretty good on me. I painted my elbow pads, dyed my belt, and that's as far as I got on mine for Halloween. On Halloween day I somehow got the notion I wanted to make a rudimentary RTV so I took my Arrma Gorgon, printed body posts and constructed the simplest faccimile of a ghost trap to slap on top. Very quickly painted some yellow stripes on that were still wet when we went out. It was great fun ripping it down the street though, got lots of compliments on it.


So Halloween was fun but that was just the start! More coming in the next post.

