HASBRO PROTON PACK 10/27

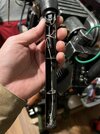
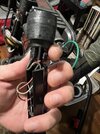
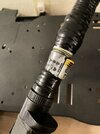
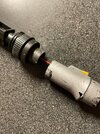
Another great option for a keep alive mod comes from Patrick Conlon over on the Haslab Proton Pack Modders Facebook group. These are his instructions on how to do it, and its cheap! Along with a photo of the components he used.
FB_IMG_1676047456785_2.jpg

FB_IMG_1676047460855.jpg


He's done some test and its apparently kept the pack running for 12 hours non stop!
 
Scariest mod I’ve done so far. I took the old battery sled, cut it down a bit so the female portion of the connector could sit inside the handle. I had to chop off the mounting bits from the connector and grind the diameter down a bit so it just pressure fits into the wand handle. I’ll eventually drill and tap the connector into the handle and retain it using some set screws. I attached a wire to the negative terminal and to the remainder of the positive terminal in the battery sled and basically just jammed it in there. Fortunately the male side of the neutrik allows you to screw the wires into place so I’ll be able to upgrade the loom and such once those materials arrive.
 

Attachments

  • D419B101-B9E5-4CD9-8379-F65F5D1FC82E.jpeg
    D419B101-B9E5-4CD9-8379-F65F5D1FC82E.jpeg
    1.3 MB · Views: 233
  • 00BF3078-21B3-489D-AC6B-B593D1335179.jpeg
    00BF3078-21B3-489D-AC6B-B593D1335179.jpeg
    1,019.4 KB · Views: 156
  • IMG_7149.MOV
    60.7 MB
Scariest mod I’ve done so far. I took the old battery sled, cut it down a bit so the female portion of the connector could sit inside the handle. I had to chop off the mounting bits from the connector and grind the diameter down a bit so it just pressure fits into the wand handle. I’ll eventually drill and tap the connector into the handle and retain it using some set screws. I attached a wire to the negative terminal and to the remainder of the positive terminal in the battery sled and basically just jammed it in there. Fortunately the male side of the neutrik allows you to screw the wires into place so I’ll be able to upgrade the loom and such once those materials arrive.
Do you happen to have a link for the Neutrik connector you used? I've been searching for one but it looks like the NAC3FX-W connector used in the film has been discontinued and is impossible to find at the moment.
 
Do you happen to have a link for the Neutrik connector you used? I've been searching for one but it looks like the NAC3FX-W connector used in the film has been discontinued and is impossible to find at the moment.
 
Last edited:
this Neutrik Afterlife prop video is not for the Haslab pack and wand
but I think will give you an idea how to take apart the Neutrik pieces. And maybe the attachment methods can also be used onto the Haslab pack/wand

 
I just gutted mine and basically made it a hollow plastic tube to just run the original wired through. When you remove the loom from the wand insert, the connector fit right into the same slot.
 
Awesome! So you are able to connect those two together? it looks like the first link connector is for a female end.
 
Yeah if you use some glue. I used the female end linked above, once toj wrap the ends on tape, they look almost identical to the male version
 

Attachments

  • EA3CD9CE-F4AD-4690-8A99-7550962AEE5B.jpeg
    EA3CD9CE-F4AD-4690-8A99-7550962AEE5B.jpeg
    1.8 MB · Views: 107
  • D744CEB9-C646-4B42-8A01-D83703D94D61.jpeg
    D744CEB9-C646-4B42-8A01-D83703D94D61.jpeg
    778.7 KB · Views: 105
Yeah if you use some glue. I used the female end linked above, once toj wrap the ends on tape, they look almost identical to the male version
In benhs1898 video, it looks like they are able to connect the female end into the wand handle and still supply power.

ApplicationFrameHost_w6PwP1YwKm.png
ApplicationFrameHost_BQJarwWa7R.png


My question is, is it possible to fit the female end into the other female end to supply power to the wand. Or was there a certain level of moding done to achieve that?
 
I am so sorry, I totally linked the wrong connector.

 
Oof, that's a shame, I already placed my order :lol: but thank you for clarifying. I was pretty confused on how you got that to work.
 
Started working on some 3d printed cosmetic mods for parts of the back, like the missing base for the filler tube and beam line.
PXL_20230301_002411904.MP.jpg

PXL_20230301_002433113.MP.jpg


Also working on a digital file for a custom aluminum motherboard. I have a family friend cutting one out for me now, hopefully I got the measurements correct :lol:

Fusion360_FYHllSugoJ.png
 
So I'm still in the process of moding my pack into a proper looking Afterlife pack, this means switching out almost all the hoses, fittings, resistors and strain relief with actual real world parts and a full re-paint/re-texture.
PXL_20230315_032953979.MP.jpg

PXL_20230315_034011725.MP.jpg

PXL_20230318_044635580.MP.jpg

PXL_20230320_043549554.MP.jpg

PXL_20230321_031609419.MP.jpg

PXL_20230322_010610956.MP.jpg

PXL_20230325_171400424.MP.jpg


I wasn't able to finish my mods in time for Wondercon so I decided to rock it in a sort of bare 84 configuration. Now that I'm back from the con I plan on finishing it up. For what is technically considered a toy, this thing cleans up really nice, and makes a very respectable replica!
 
Anyone heard of shopcross? I ordered an R-701 clippard valve from them for under $60 shipped. Should be here today! They are unfortunately out of stock on the R-331 though.
 
Latest mods, the blue lense and real Clippard to the pack. With quite a few mods, this is looking very nice, I am happy to wear this as much as my 84 screen accurate pack.
 

Attachments

  • IMG_9849.JPG
    IMG_9849.JPG
    4.9 MB · Views: 110
  • IMG_9851.JPG
    IMG_9851.JPG
    1.8 MB · Views: 106
  • IMG_9852.JPG
    IMG_9852.JPG
    1.6 MB · Views: 110
  • IMG_9853.JPG
    IMG_9853.JPG
    1.7 MB · Views: 108
Back
Top