Re: HALO Master Chief Costume Progress Thread
I'm way overdue for an update here...
After I got off of the ship it took me a bit longer than I'd hoped to build up steam. Progress has been pretty slow on this project. I've barely had a chance to wind down from my routine at sea, It's been a bit chilly outside, and I've had trouble getting motivated to do much more than read and drink as much hot coffee as I can get.
That said, there's really no excuse for all of the delay in getting this stuff knocked out. The other day I figured out that my thigh prototypes have consumed as many hours of work to complete as my helmet and chest prototypes combined. Not cool.
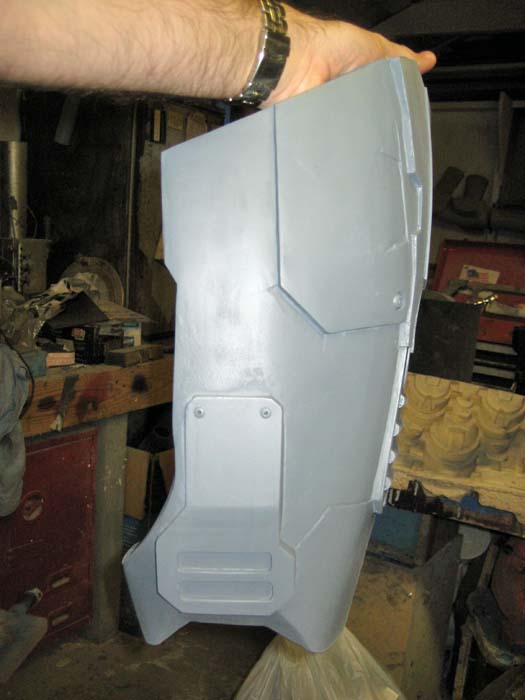
When I got back to the workshop a couple of weeks ago, they look like so:
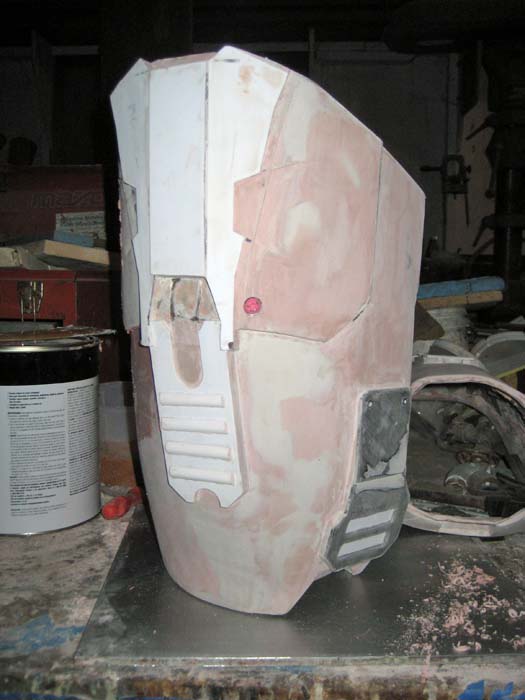
The biggest problem is that I'd now spent enough time away from the shop and studying reference materials that I've noticed oodles and gobs of little details that needed to be fixed or added. Here's another shot of the thigh details as they looked on one side:
On the other side I still needed to add in the two little latches and then I need to score the seam lines near the knee. With that done, I decided I needed to stop making improvements since these parts had reached the zit stage (that's where you just need to leave it alone because messing with it any more will only make it worse).
Part of being away from the shop for way too long meant that my mind was already wandering all over other project ideas. One quick one I cranked out was a little statue of Cthulhu in the pose of Rodin's famous sculpture of "The Thinker"
Then I made a quick mold and started cranking out copies so I could sell them on
my ebay page.
Hopefully these guys will help offset the costs of some of the tools and materials I've dumped into the armor project.
But I digress...
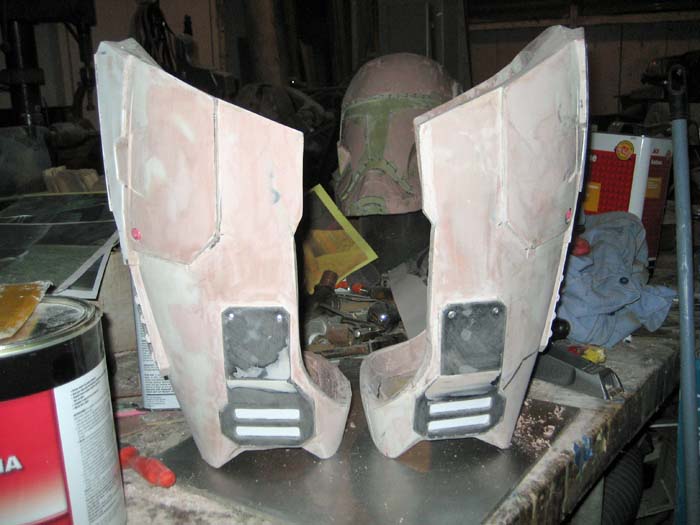
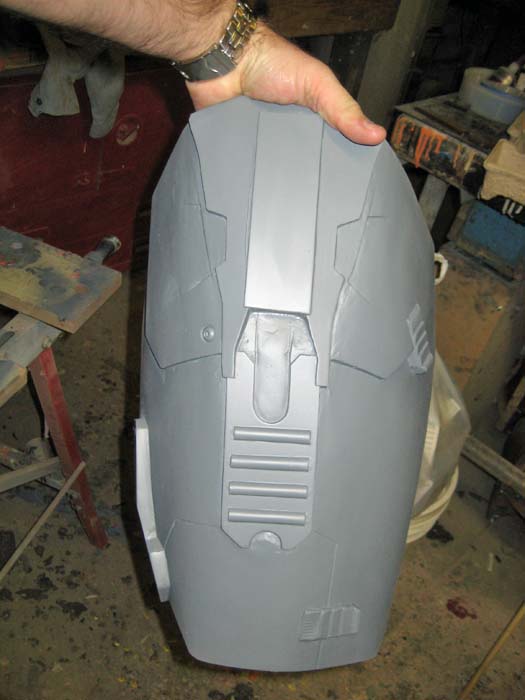
Here's the left thigh once it was smoothed out, detailed, and primed:
The last thing I allowed myself to add were these little bits at the back of the knees:
Once that was attached, I told myself that I have to stop looking at the reference images or I'd never actually produce any castings of these parts. Once I'd primed them I made myself busy on a few other projects for a while before test fitting:
I plan on making the castings rigid, so it's important that there's enough of a gap at the knee to be able to kneel, sit, run, dance, do jumping jacks, or whatever. I used to not mind giving up comfort or mobility to make a costume look right, but I was spoiled by
my last Spartan costume. Now they have to look right and be comfortable.
They'll fit great for anyone taller than me (I'm 5'7" tall) since this just means a bigger gap at the knees and hips. Once I've started pulling castings out of the molds, I might need to shave half an inch off the top of my pair in order to optimize the fit.
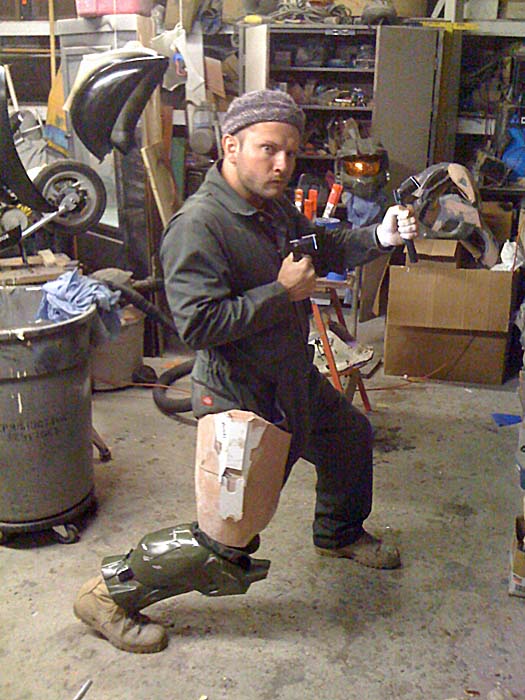
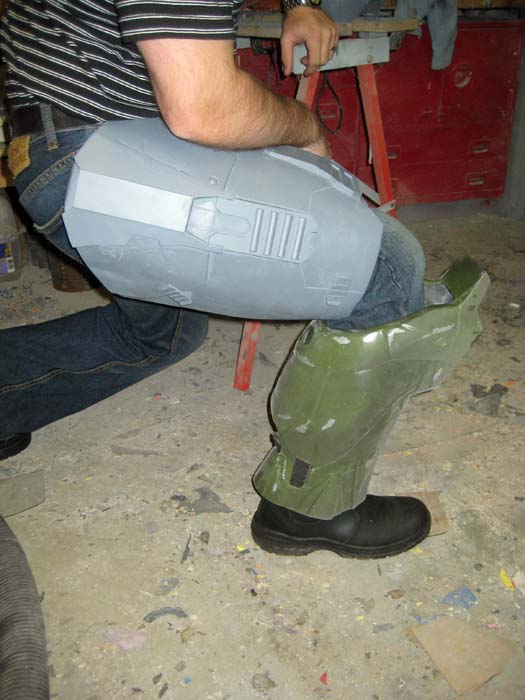
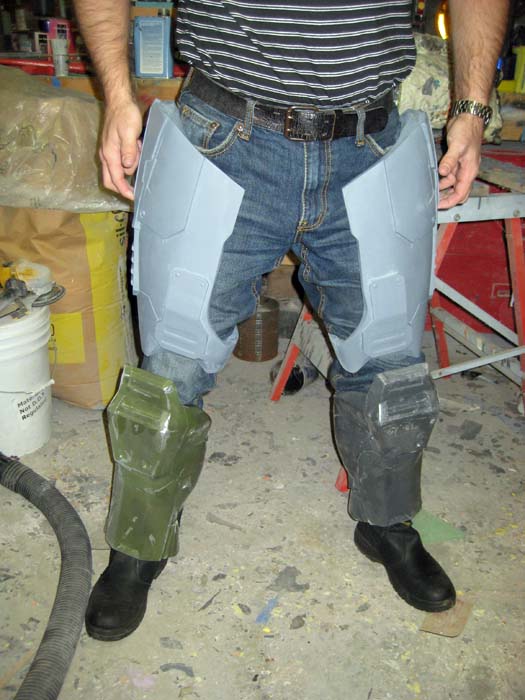
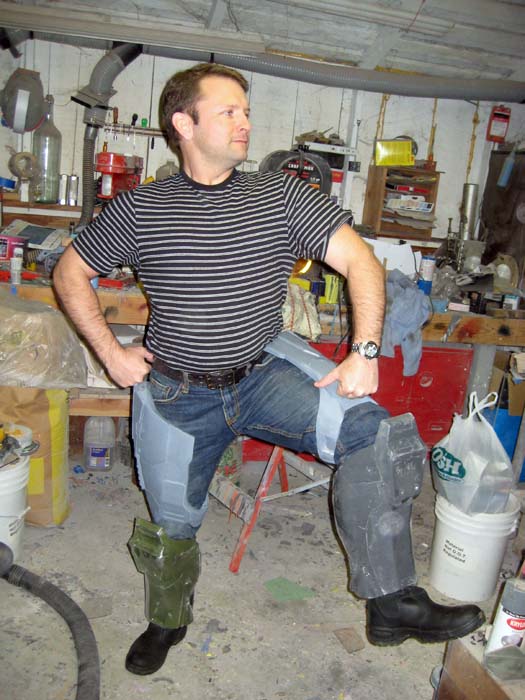
Of course I couldn't be sure until I tried them both on:
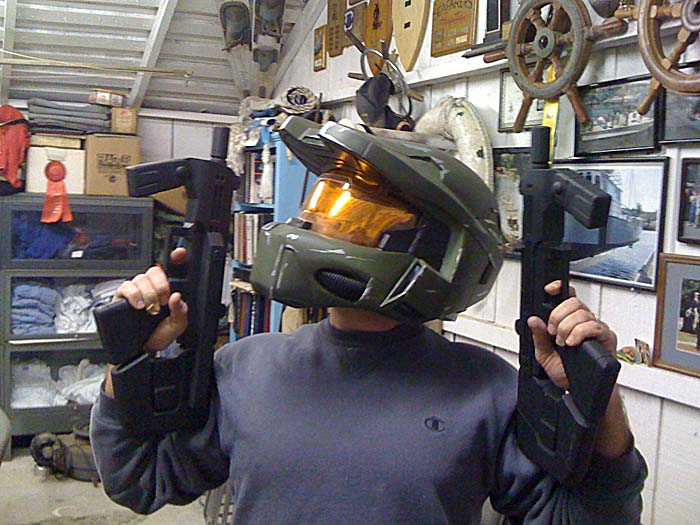
And verified my ability to strike iconic poses:
The inner thighs (which I still haven't prototyped yet) will be made of the same foam rubber and fabric combination as the rest of the undersuit. Hopefully they'll help to keep the thighs in place and prevent them from rolling around. I'm still working out the strapping system that will hold them to the belt.
While I was working on the thigh molds I finally got around to coming up with a way to attach the front and back half of the torso armor together. It's not especially ingenious, but I've had enough people ask me how to do it that I figured I should post it here. First, I've fitted dowels and picture hangers to the back armor:
The same sort of arrangement is installed at the bottom ends as well (the parts that will sit under the arms).
Then I drilled holes in the chest armor so that the dowels protruding from the back piece can slot into the chest piece. Then I fitted some picture hanger hooks to the chest piece and used a small length of bungee cord tied to the back and hooked to the front. At each of the four attachment points it looks like so:
Now it stays together:
Somewhere along the way I prepped the thigh armor for molding:
The cardboard is added on to build a sort of flange that will make the jacket mold a bit bigger than the thigh armor itself. The little pegs are added at this stage so that when the rubber jacket mold is layered on there will be holes in it. Then, once the rubber has cured, the pegs are pulled out and the mother mold is built. The voids left behind by the pegs will be filled in with the mothermold material, creating convenient hold-downs to keep everything lined up once the master is removed from the mold.
After plenty of mixing, brushing, troweling and so on; I had built up the jacket molds:
So as of yesterday, I've made significant progress on the mother molds for the thighs:
At this point, it started to get cold and I got sick of playing with plasti-paste. Since the shop still isn't heated, the weather gets to decide when I'm done for the day.
While I was tinkering with those, I also finished the mothermold for my new and improved ab plate. Before I decided I was too chilly to keep working, I made my first pull from the mold:
The idea behind the ab plate is to have a sort of one-size version that will work for the next size up in torso armor (which I'm slowly working on):
The same ab plate will also work with the medium-size torso armor:
In this shot you can also see one of my new and improved undersuit parts. This is one of several cloth-backed, custom cast, foam rubber detail pieces that will be attached to the undersuit. I had been experimenting with urethane rubber for these parts, but the castings were too stiff and prone to tearing. So far I've been pretty pleased with the results using foam rubber.
I'll try to get better pictures of these parts tomorrow. Today I didn't have anyone to snap pictures for me while I was in the shop.
Stay tuned...

") You have a lot of dedication to the craft my friend!
You have a lot of dedication to the craft my friend!