HALO Master Chief Costume Progress Thread (helmet rebuild begins on p.19)

Re: HALO Master Chief Costume Progress Thread

My ship's in drydock, so now I've got a couple of weeks at home to tinker in the shop (turns out they don't need a navigator when the ship is up on blocks). While I was out I didn't get quite as much free time on board as I'd hoped. I did manage to pep one unrelated helmet:
4196996386_5ef5816b42_o.jpg

Unfortunately, it was squished during the flight from Singapore to San Francisco via Tokyo.

Now that I'm back for a bit, I should be finishing my thigh prototypes at the very least. I'm also hoping to redesign my boot molds to make them faster to build. While this is going on, I'll be getting a good head start on the Republic Commando armor.

In other news, I've got one of Mjolnir Armor's ARs to work on and a pair of LeeKeegan's superb SMGs to put together and paint.

So basically, tune in here for a wealth of updates over the next couple of weeks...
 
Last edited:
Re: HALO Master Chief Costume Progress Thread

Then I use mustard to mask off all of the areas where I want to have scratches showing bare metal.....

Were you implying to the condiment? If so I'll be using that to make my boba fett helmet.
 
Re: HALO Master Chief Costume Progress Thread

My ship's in drydock, so now I've got a couple of weeks at home to tinker in the shop (turns out they don't need a navigator when the ship is up on blocks). While I was out I didn't get quite as much free time on board as I'd hoped. I did manage to pep one unrelated helmet:
4196996386_5ef5816b42_o.jpg

Unfortunately, it was squished during the flight from Singapore to San Francisco via Tokyo.

Now that I'm back for a bit, I should be finishing my thigh prototypes at the very least. I'm also hoping to redesign my boot molds to make them faster to build. While this is going on, I'll be getting a good head start on the Republic Commando armor.

In other news, I've got one of Mjolnir Armor's ARs to work on and a pair of LeeKeegan's superb SMGs to put together and paint.

So basically, tune in here for a wealth of updates over the next couple of weeks...
If that thing will fit my big honkin skull, I am all over it. (7 7/8 hat size...sometimes an 8)
 
Re: HALO Master Chief Costume Progress Thread

I see all of the little numbers near the dome and it makes me shudder :) You have a lot of dedication to the craft my friend!
 
Re: HALO Master Chief Costume Progress Thread

I see all of the little numbers near the dome and it makes me shudder :) You have a lot of dedication to the craft my friend!

.

I thought I was going to go insane just building the HD pep of one forearm :confused
 
Re: HALO Master Chief Costume Progress Thread

Reading through the progress on this. Great job, its nice to see the progress from start to finish! Also nice to see a fellow Petaluman on this board. :lol
 
Re: HALO Master Chief Costume Progress Thread

...nice to see a fellow Petaluman on this board. :lol

Thee and me are not the only Petaluma folks to be found here.

UPDATE:

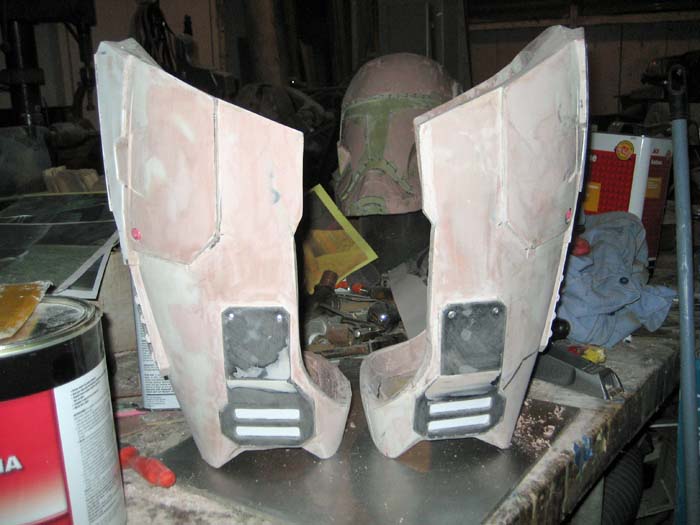
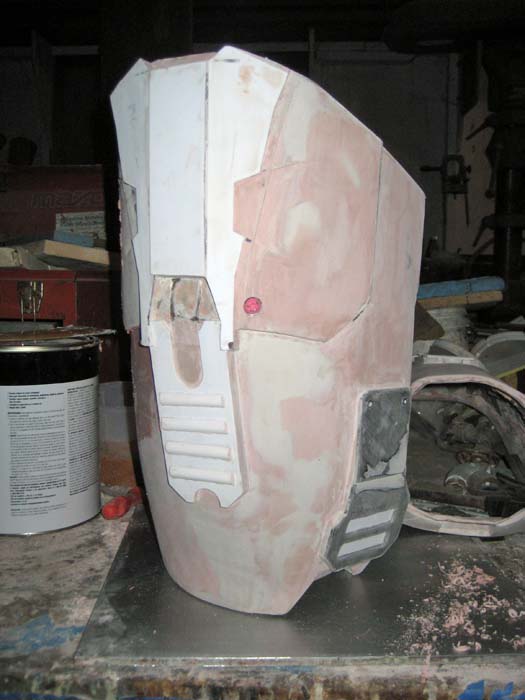
Progress has been a bit slower than I'd hoped. Primarily, I've been digging through my shop and storage spaces trying to figure out where I left everything. In the midst of all that, I've done a bit more work on my thigh prototypes:
4255416451_a8c0eb120d_o.jpg

The rough shapes are mostly there, but I still have to add the light housings above the knee and a bunch of little buckles and whatnot. Then all I'll have to do is a bit more smoothing, some fine detail work (seams and rivets mostly), and then paint them up to prep for molding. Maybe sometime next week I'll have castings.

In other news, I've assembled the two SMGs I picked up from LeeKeegan:
4256179430_62f01858b5_o.jpg


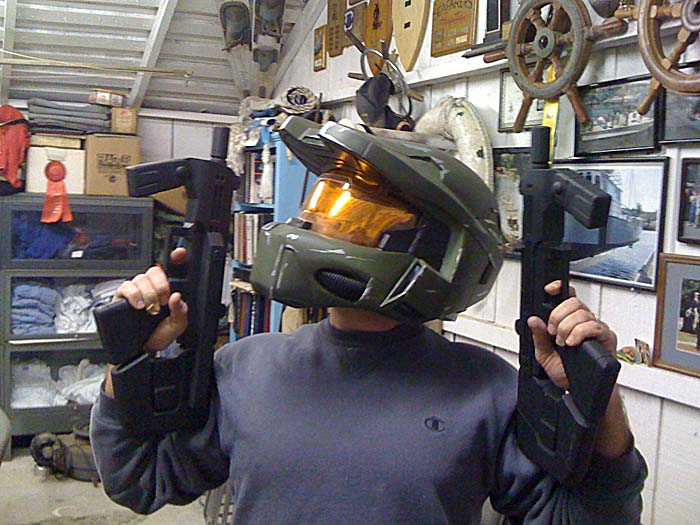
Once the epoxy cured, I gave them a few coats of black primer and then satin black enamel. I'll be painting on some wear and tear as well as rubberizing the grips and part of the butt, but first I had to try them on:
4256179612_8f33afa391_o.jpg


I also shaped some more visor blanks today, but I think I'm better off focusing on the development of a new vacforming rig rather than wasting more material on the process I've been tinkering with:
4256179502_e3eb0c78b9_o.jpg


Apologies for the crappy cellphone pics. My small digital camera seems to have escaped.

Stay tuned for more updates...
 
Re: HALO Master Chief Costume Progress Thread

Top notch work!

Is it weird to think you started all of this almost exactly 2 years ago? Did you know then it would take this long?
 
Re: HALO Master Chief Costume Progress Thread

I really love the progress and results that have been made:cool
 
Re: HALO Master Chief Costume Progress Thread

Thorssoli, when you are putting the pep together, do you cut everything out all at once or do you work in sections?

Also, what kind of adhesive do you use when you are putting it together? I have been using hot glue but I love how clean yours turn out!

Sean
 
Re: HALO Master Chief Costume Progress Thread

Top notch work!

Is it weird to think you started all of this almost exactly 2 years ago? Did you know then it would take this long?

I started the research for this project right after Halloween 2007 (when I did my other Spartan costume). I really didn't start making any of the parts until early 2008. The plan was to put together a group of folks to dress up as the characters from Red vs. Blue for HALOween 2008. I probably could've done it too, if it weren't for the fact that I got to go for my extended vacation in Afghanistan. Such is life. That pushed the deadline back to HALOween 2009, but then I had to go back out to sea. Now I can finish up at a nice, liesurely pace in time for HALOween 2010.

In answer to your question: No. I never in my life would've guessed this was going to take me so damned long. At this point, this project has really been haunting me and I can't wait to finish, if only to finally be able to think about anything else at all.

Thorssoli, when you are putting the pep together, do you cut everything out all at once or do you work in sections?

Also, what kind of adhesive do you use when you are putting it together? I have been using hot glue but I love how clean yours turn out!

Sean

I work in sections and cut out only a handful of pieces at a time. Pep is enough of a headache without turning it into a jigsaw puzzle. I like keeping everything on the printed sheets and keeping the printed sheets in order (I usually number them). That way I can sit and watch a movie with whatever model I'm working on opened up in Pepakura on my laptop so I can use it to help me find parts I'm looking for.

I'm pretty sure I've mentioned it before, but I use a CA adhesive (such as Super glue or Zap-A-Gap) which is easy to find at your local hobby store.

MINOR UPDATE:

I've installed headlights in my helmet. Apologies again for the crappy phone camera pics. I'm still without my small digital camera:
4271483866_f1a0dc70b5_o.jpg

These are actually Luxeon LEDs and reflectors snagged from some flashlights I found at Costco. They were made by Stanley and came in a pack of three with a neat little tripod that they all slotted into. CLICK HERE FOR A LINK TO THESE LIGHTS.[/url] When they're turned off (above) they are a bit brighter than I'd've liked. But when they're turned on (below) they're awesome:
4271484014_be1f161bc4_o.jpg

They're so bright that it's actually difficult to photograph them. Here's the best I could do with my cellphone:
4270738825_72a115a321_o.jpg

Otherwise, after a long day of driving all over the San Francisco Bay Area, I didn't get much time to do anything today. What little time I did get in the shop was mostly spent screwing around:
4271483916_6f7b4879b6_o.jpg

Stay tuned...
 
Re: HALO Master Chief Costume Progress Thread

HOLY MOLLY XD wow what an awesome progress thread some very useful info here and your doing such an excellent job on the master chief suit building cannot wait to see more good luck with it :D
 
Re: HALO Master Chief Costume Progress Thread

Absolutely amazing work Thorssoli! I've been following your progress for quite some time. Let me say on behalf of all the lurkers out there, very inspirational!
 
Re: HALO Master Chief Costume Progress Thread

Thanks for the kind words again guys.

Unfortunately, it's time for another delay. I'll be going back out to sea tonight and out of touch for the next three weeks or so.

Hopefully I'll be able to do some work on a couple of pep models or something while I'm out this time. We'll see.
 
Re: HALO Master Chief Costume Progress Thread

if your in Petaluma you must know who Primus is!!!!!!!! Fantastic work on this stuff
 
Re: HALO Master Chief Costume Progress Thread

It's really incredible this is all done with pepakura, some of the finest work I've seen done with it.
 
Re: HALO Master Chief Costume Progress Thread

I'm way overdue for an update here...

After I got off of the ship it took me a bit longer than I'd hoped to build up steam. Progress has been pretty slow on this project. I've barely had a chance to wind down from my routine at sea, It's been a bit chilly outside, and I've had trouble getting motivated to do much more than read and drink as much hot coffee as I can get.

That said, there's really no excuse for all of the delay in getting this stuff knocked out. The other day I figured out that my thigh prototypes have consumed as many hours of work to complete as my helmet and chest prototypes combined. Not cool.

When I got back to the workshop a couple of weeks ago, they look like so:
4408803064_a39e4f1d4b_o.jpg


The biggest problem is that I'd now spent enough time away from the shop and studying reference materials that I've noticed oodles and gobs of little details that needed to be fixed or added. Here's another shot of the thigh details as they looked on one side:
4408802998_72367521b6_o.jpg


On the other side I still needed to add in the two little latches and then I need to score the seam lines near the knee. With that done, I decided I needed to stop making improvements since these parts had reached the zit stage (that's where you just need to leave it alone because messing with it any more will only make it worse).

Part of being away from the shop for way too long meant that my mind was already wandering all over other project ideas. One quick one I cranked out was a little statue of Cthulhu in the pose of Rodin's famous sculpture of "The Thinker"
4408036911_2a1caf2cdd_o.jpg


Then I made a quick mold and started cranking out copies so I could sell them on my ebay page.
4408037113_c092838640_o.jpg


Hopefully these guys will help offset the costs of some of the tools and materials I've dumped into the armor project.

But I digress...

Here's the left thigh once it was smoothed out, detailed, and primed:
4411737272_894daee30f_o.jpg
4410970035_4e38e643d5_o.jpg

4411737420_3ae72cd97f_o.jpg
4410970257_3dfb271988_o.jpg


The last thing I allowed myself to add were these little bits at the back of the knees:
4411737596_5dd022ffa2_o.jpg


Once that was attached, I told myself that I have to stop looking at the reference images or I'd never actually produce any castings of these parts. Once I'd primed them I made myself busy on a few other projects for a while before test fitting:
4410970463_9802bd70f7_o.jpg


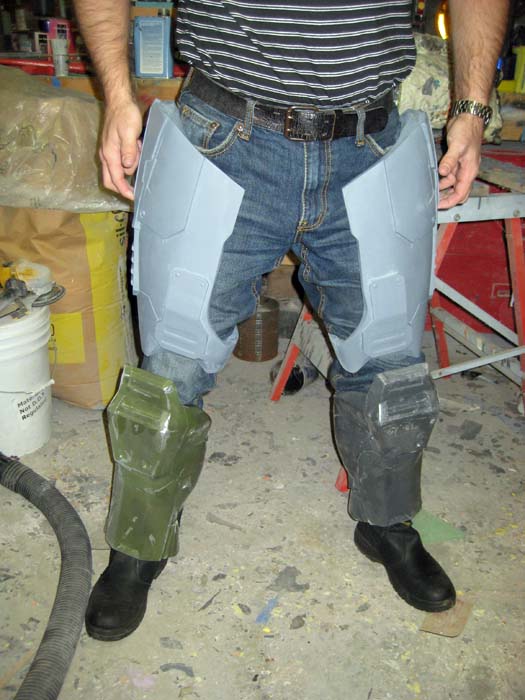
I plan on making the castings rigid, so it's important that there's enough of a gap at the knee to be able to kneel, sit, run, dance, do jumping jacks, or whatever. I used to not mind giving up comfort or mobility to make a costume look right, but I was spoiled by my last Spartan costume. Now they have to look right and be comfortable.

They'll fit great for anyone taller than me (I'm 5'7" tall) since this just means a bigger gap at the knees and hips. Once I've started pulling castings out of the molds, I might need to shave half an inch off the top of my pair in order to optimize the fit.

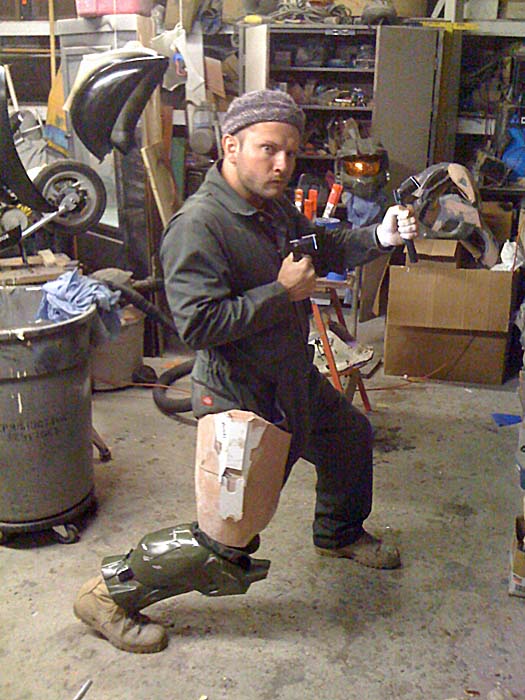
Of course I couldn't be sure until I tried them both on:
4411737806_1642814514_o.jpg


And verified my ability to strike iconic poses:
4411737162_2deeb485ee_o.jpg


The inner thighs (which I still haven't prototyped yet) will be made of the same foam rubber and fabric combination as the rest of the undersuit. Hopefully they'll help to keep the thighs in place and prevent them from rolling around. I'm still working out the strapping system that will hold them to the belt.

While I was working on the thigh molds I finally got around to coming up with a way to attach the front and back half of the torso armor together. It's not especially ingenious, but I've had enough people ask me how to do it that I figured I should post it here. First, I've fitted dowels and picture hangers to the back armor:
4424048865_0ba98351f2_o.jpg

The same sort of arrangement is installed at the bottom ends as well (the parts that will sit under the arms).

Then I drilled holes in the chest armor so that the dowels protruding from the back piece can slot into the chest piece. Then I fitted some picture hanger hooks to the chest piece and used a small length of bungee cord tied to the back and hooked to the front. At each of the four attachment points it looks like so:

4424034563_9ed9a020aa_o.jpg


Now it stays together:
4424034459_d07186167e_o.jpg


Somewhere along the way I prepped the thigh armor for molding:
4424799000_df3b1565b3_o.jpg

The cardboard is added on to build a sort of flange that will make the jacket mold a bit bigger than the thigh armor itself. The little pegs are added at this stage so that when the rubber jacket mold is layered on there will be holes in it. Then, once the rubber has cured, the pegs are pulled out and the mother mold is built. The voids left behind by the pegs will be filled in with the mothermold material, creating convenient hold-downs to keep everything lined up once the master is removed from the mold.

After plenty of mixing, brushing, troweling and so on; I had built up the jacket molds:
4424799038_0bb06b69bc_o.jpg


So as of yesterday, I've made significant progress on the mother molds for the thighs:
4426785766_dfd6e75626_o.jpg

At this point, it started to get cold and I got sick of playing with plasti-paste. Since the shop still isn't heated, the weather gets to decide when I'm done for the day.

While I was tinkering with those, I also finished the mothermold for my new and improved ab plate. Before I decided I was too chilly to keep working, I made my first pull from the mold:
4426785800_15d58a940c_o.jpg


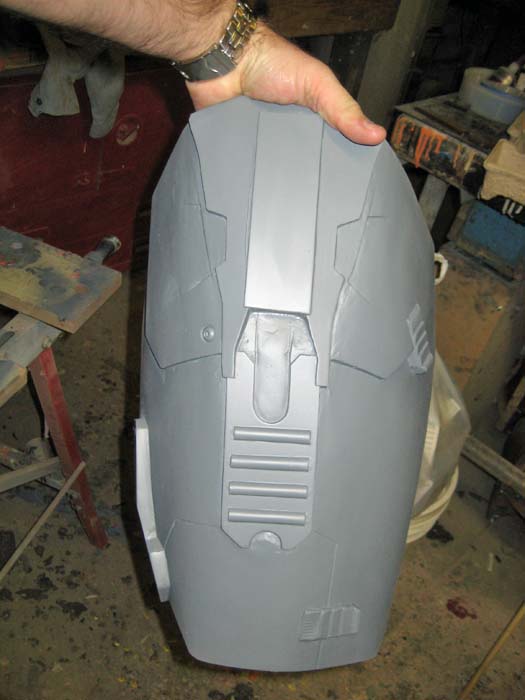
The idea behind the ab plate is to have a sort of one-size version that will work for the next size up in torso armor (which I'm slowly working on):
4426021905_4093c48885_o.jpg


The same ab plate will also work with the medium-size torso armor:
4426021865_5745eb8de1_o.jpg

In this shot you can also see one of my new and improved undersuit parts. This is one of several cloth-backed, custom cast, foam rubber detail pieces that will be attached to the undersuit. I had been experimenting with urethane rubber for these parts, but the castings were too stiff and prone to tearing. So far I've been pretty pleased with the results using foam rubber.

I'll try to get better pictures of these parts tomorrow. Today I didn't have anyone to snap pictures for me while I was in the shop.

Stay tuned...
 
Re: HALO Master Chief Costume Progress Thread

Your dedication to this project is astounding! Always a treat to see your updates. Well done! :thumbsup
 
Back
Top