Death Star 2 Port Attack Diorama

So... for lighting tube drilling test #2. I needed to account for:

- how to cheaply build a jig that doesn't cost more than the tool
- bit walking across curved tube
- chipping/splintering of ABS tube
- smoothness of cut
- straight line down tube
- trying to drill the holes parallel down a curved surface
- trying to drill the holes equidistant down a curved surface
- how to smooth/sand out the holes without deforming them
- how to cut out the oblong ones inbetween

"I'm not afraid... You will be... you will be..."

Test #2 solved all but the last issue (haven't really got to that issue, yet - probably will use a fluted bit on a router table to clean out between the holes).

DS2_Build222f_sm.jpg


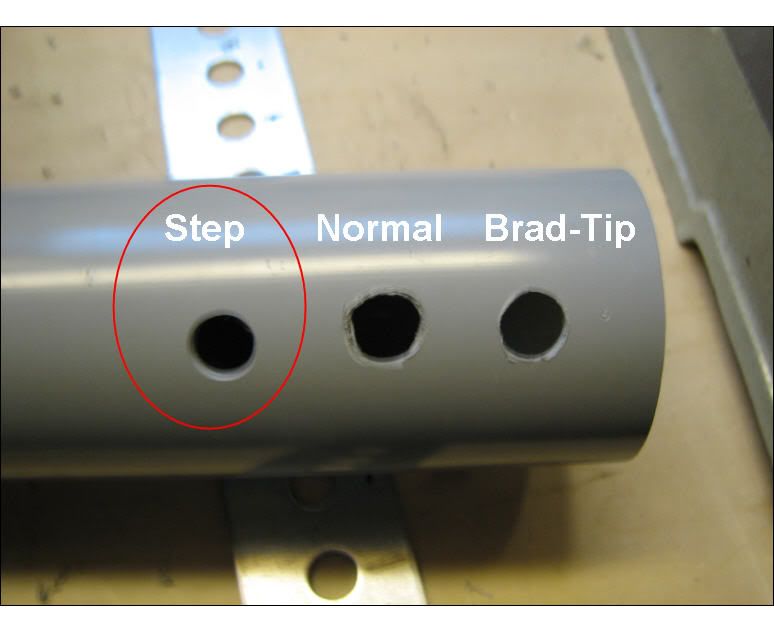
I started with testing different drill bits. Excluding all the types of bits that would not work anyways, I did a comparision of three: twist (normal), brad tip (centers, scribes, then cuts), and step (cuts progressively wider). The step bit won hands-down with no chipping out or melting. The "next" step on the bit smoothed out the hole automatically, so it requires no sanding nor using a round file (which was previously causing me fits since it could slightly deform the holes on cleanup as well as leaving initial holes a bit pitted). You can use fancy $20 v-jigs (x2) to rest the pipe in and use a fancy $50 pipe-center jig to start/center the end holes, but I just used my miter box clamps and a ruler.

DS2_Build222a_sm.jpg


So, the first solution (less than $20, with the step bit at $12) is to:

- drill the ends, or holes beyond the ends if you prefer to cut off later
- bolt the tube ends to a piece of simple (and cheap) steel holed strip
- run the jig through the drill press

One interesting bonus was that I didn't even have to be dead center in the steel iron holes, since the step bit would just move to the sides of the steel hole and clean up the hole anyways. The step bit took out a nice thin spiral of ABS and didn't melt around or raise the hole.

Woo. Pleased so far... test #2 complete. :thumbsup
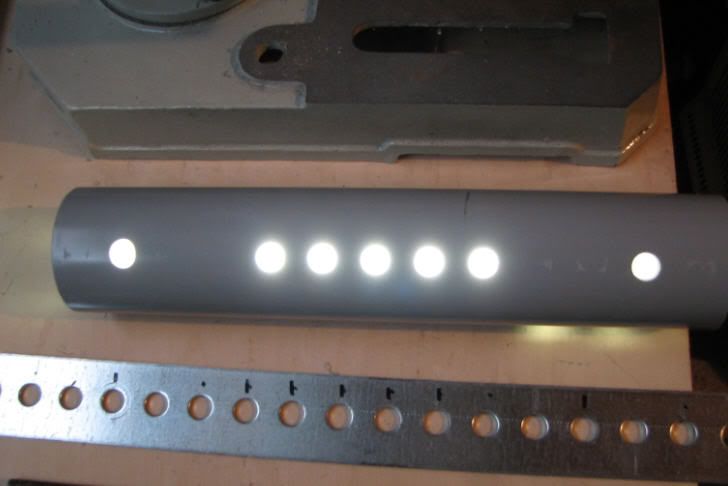
 
Finally got caught up from being out of the country and started on the official lighting tubes. Still need to spray up the inside of the tubes with high-heat glossy white to even out the light, but you get the idea. Then a little puttying and sanding on the caps, paint, and onto the next one. All the wires are hidden in the tube structures and link together light-to-light for less overall wire runs.

More soon...
 
Two months... and little progress... :cry Took a month to rebuild the computer. Gone all next week (again), but will be at WF (woo!). Finally working the other light tubes.

Designed up the back right light (first long tube).
 
Nice to see you are still making progress. I can't wait to see the finished product.

On a side note, does anyone know why the Empire would build a second death star (with thermal exhaust ports the size of a womp rat), much bigger than the first with even larger thermal exhaust ports that you could fly a freighter through? Perhaps they should have installed vent slats.
I guess, I'm slow, since it took me nearly 30 years to realize the issue.:lol

TazMan2000
 
Absolutely brilliant work, I can only hope to someday be half as talented as you are.

Keep up the fantastic work!
 
Thanks guys.

Got the first light tube painted up and started on the first long light tube. Still need to route out between several of the upper holes and file/widen the rest to standard width, but coming along. These were just rough cuts to trial it.

Hope to finish up the first long light tube this week, and then start on the final long tunnel light, and then FINALLY on to the top/surface port in June or July.
 
This is the kind of stuff that gets me fired up (when it works). :love I came up with a cheap sanding trick to make the oblong holes even out and have matching ends... I clamped the metal hole guide to the pipe and used it as a straight-edge to slide/sand the holes even in both directions. It gives uniform straight height, too. The dowel sander is from a cheap foam brush that was just the right size.

DS2_Build229d_sm.jpg


Got to paint/mount the back light tube and onto the last one in the front left of the tunnel. Progress - haven't made this much in a while!
 
I have been watching the progress on this build and I must say- you are by far "getting it right!" Thanks for the tips on how to cut the polyvinyl tubes- that info will definately come in handy someday!
 
Got the final light tube roughed out for the main tunnel (whew!). Added another little cheap trick to cut the oblong holes... used my grinder to cut a hunk off a cheap metal tool hanger shelf and used to rough out the oblongs.

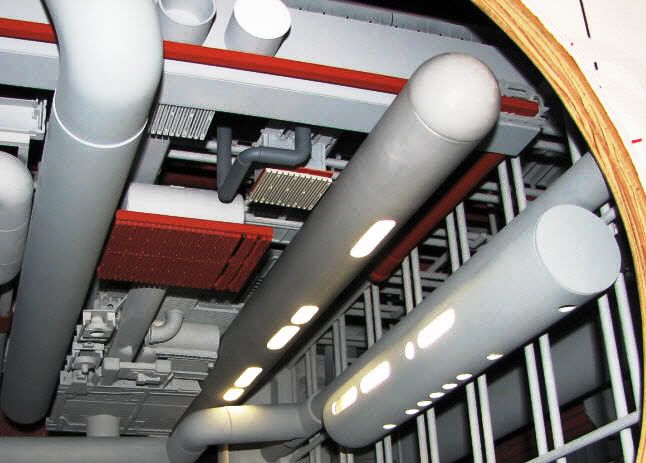
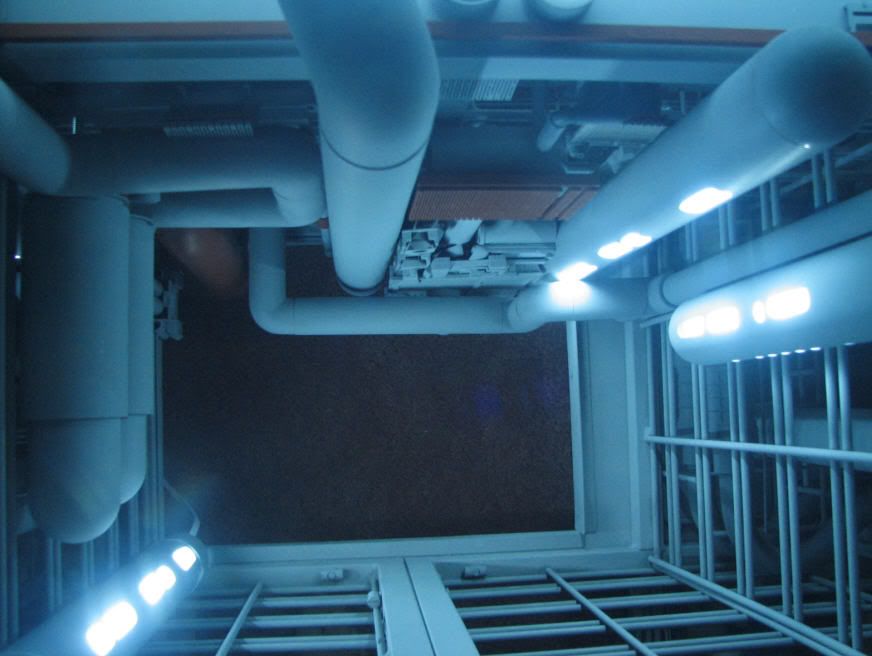
The tunnel shots are with all tunnel and backlights turned on -- NO other lights on in the room. Lights the whole tunnel up nicely. I held a cheap piece of blue cellophone in front of the camera lense and really like the "eerie blue" effect, like they did in shots in the movie.

DS2_Build230f_sm.jpg


Just need to sand and clean up the rest of the oblongs, paint all of the light tubes and run final wiring, finish the tunnel grid structure and static tubes, and on to the top of the port.
 
Very impressive work. I've just jumped into the Star Wars modeling world after focusing on armors and other sci fi for the last few years until I found images of the beginnings of this while I was searching google images for inspiration.
 
Dude I haven't checked back on this post for a weak and when I did I was shocked at how far it has come. That is crazy nice.
 
This is still impressive work, she just keeps getting better and better each time I look in.

Although, I have a question..... Will you have the Falcon at the point on entry, or will the dio be of the death star as the Falcon escapes with flames behind her?
 
Last edited:
Back
Top