You are using an out of date browser. It may not display this or other websites correctly.
You should upgrade or use an alternative browser.
You should upgrade or use an alternative browser.
Death Star 2 Port Attack Diorama
- Thread starter OTnROTSfan
- Start date
I like the R2-D2 "skirt" the Tie is sitting on. What's it from, the interactive R2?
This thing gets cooler and cooler. Nice job.
Just the std MPC one. It was actually by accident... I had the little Vader TIE sitting there and just put it in the ring so it wouldn't get lost and it just seemed to "fit" right. Been finding plenty of spots for old SW kit greeblies. Love your dios, by the way.:cool
Thanks everyone. Been slooooow and steady so far, but making progress. Got to do all the inside stuff before getting to the top part and tunnel (believe me it is hard to hold off). Will be off traveling over a long weekend then working on the lighting next week... my tubing came in. If I get anything done on the lower mini TIE bay, will post before leaving Fri.
Finally had a bit of time to work on the second superdetailed bay... got the basic structure framed out.
Slooooow progress in the summer, as soon as the "personal art" areas of the two cutaway areas are done, I will be back working on all the lighting tubes. I got my small garage workshop reorganized over my vacation and all of my tubing came in, so I will be working on the drilling jig in the coming weeks.
Slooooow progress in the summer, as soon as the "personal art" areas of the two cutaway areas are done, I will be back working on all the lighting tubes. I got my small garage workshop reorganized over my vacation and all of my tubing came in, so I will be working on the drilling jig in the coming weeks.
3d-builder
Sr Member
Finally had a bit of time to work on the second superdetailed bay... got the basic structure framed out.
Slooooow progress in the summer, as soon as the "personal art" areas of the two cutaway areas are done, I will be back working on all the lighting tubes. I got my small garage workshop reorganized over my vacation and all of my tubing came in, so I will be working on the drilling jig in the coming weeks.
OH LAWD this is so nice....much love in this and it shows!!:thumbsup
Darth Fetty
Sr Member
Great stuff!") thumbsup
thumbsup
Always loved the intricate piping in the DSII.
thumbsupAlways loved the intricate piping in the DSII.
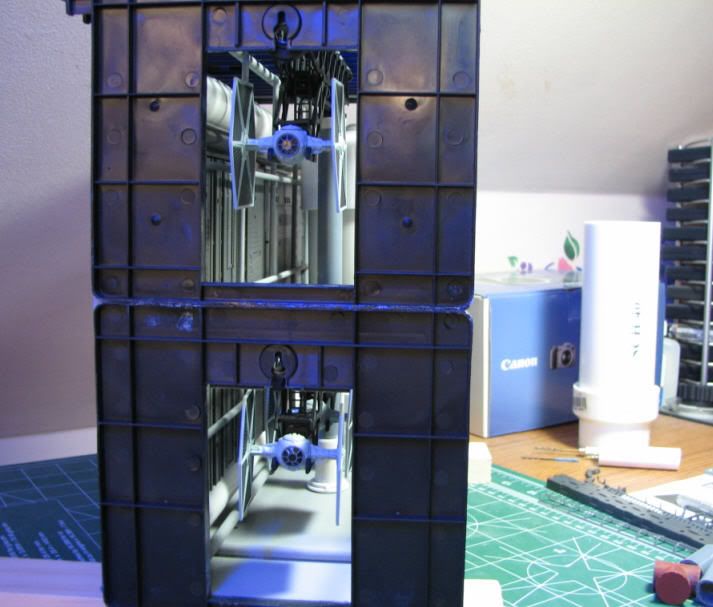
So my little diversion to fill out the cutaway view bays is basically... DONE!
Just need to epoxy (or velcro) everything in... then finally on to the lighting tubes and center tunnel. The lower TIE bays will get backlighting from a light tube, so more detail will show up then... some pics with the eerie blue lighting.
Last edited:
Starting to mock up the inner left tunnel... for the first light tube.
3d-builder
Sr Member
Starting to mock up the inner left tunnel... for the first light tube.
This is super interesting to look at, and even more fun to watch it get built!
clancampbell
Sr Member
What a fantastic project, i love the level of detail!
Rich
Rich
Been a while since I posted... was sick for almost two months with a nasty seasonal sinus infection. Couldn't go near sanding, resin, glue or paint - really sucked. Almost like withdrawal picking up the hobby knife... but all is good and working on it again... so back to regular updates. :cool
* * *
Just been styrene-veneering up all the tunnel pipes I mocked up and painting them... nothing much to show - just bent gray pipes. They take a bit of time to align and glue up with with all the angled parts. I also found one of my original side/horizontal pipes was really crooked, so I carefully cut it out and snaked it through from both ends with some trickery. Working on the front left light tube next.
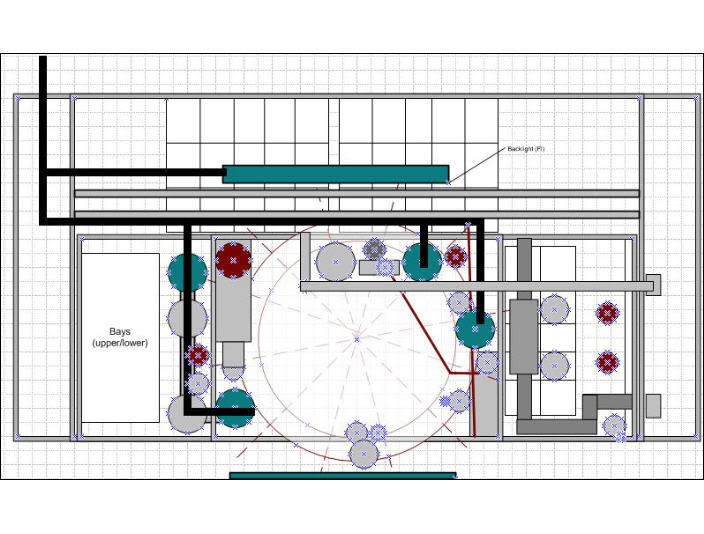
I did get the general tunnel lighting layout finished up and mock position-tested while I was sick...
* * *
Just been styrene-veneering up all the tunnel pipes I mocked up and painting them... nothing much to show - just bent gray pipes. They take a bit of time to align and glue up with with all the angled parts. I also found one of my original side/horizontal pipes was really crooked, so I carefully cut it out and snaked it through from both ends with some trickery. Working on the front left light tube next.
I did get the general tunnel lighting layout finished up and mock position-tested while I was sick...
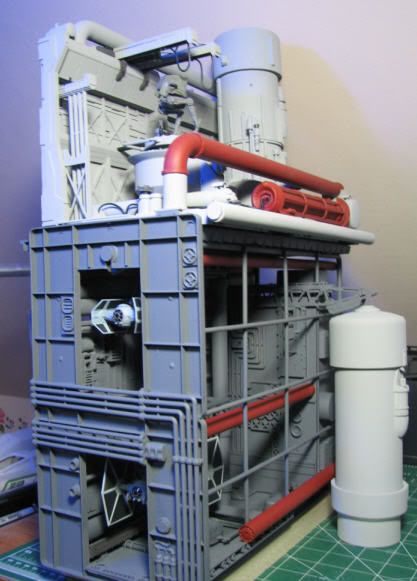
Finally, some progress... Got the base tunnel piping in on the left and back. Working on the platform mockups for the back tunnel. Glad I put those casters on it long ago, this things getting big (and heavy)!
"Look at the size of that thing...":
Will be working trying to finish the back tunnel wall this weekend... woohoo, picking up steam again... layer after layer we go! This is about layer seven... and around 15 cans of primer (I can't remember anymore)!
"Look at the size of that thing...":
Will be working trying to finish the back tunnel wall this weekend... woohoo, picking up steam again... layer after layer we go! This is about layer seven... and around 15 cans of primer (I can't remember anymore)!
Last edited:
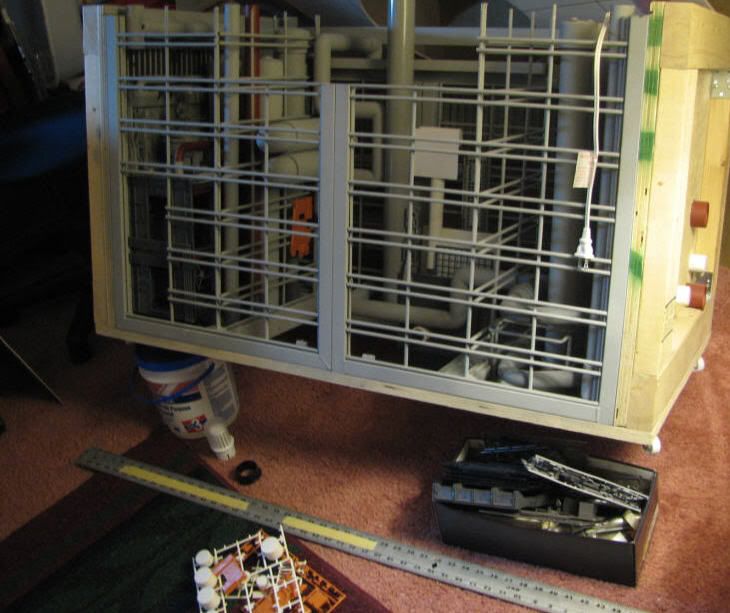
Layer 7 (back wall) foundation is all done... I have it up on cement blocks so I can get at all sides and from top/bottom now. This layer has modularized styrene platforms that bolt/screw to the metal frame. This will provide me "plastic" to glue/add detail to going forward.
Third pic has a simple background light tube (on the very left)... There will be two more inside the tunnel itself on the back/right and right. Next up is finishing the bottom left of the tunnel and then the trickier offset right side to finish out the tunnel foundation layer...
Third pic has a simple background light tube (on the very left)... There will be two more inside the tunnel itself on the back/right and right. Next up is finishing the bottom left of the tunnel and then the trickier offset right side to finish out the tunnel foundation layer...
Last edited:
propologist
Sr Member
Damn that's incredible. Wow if only i didn't have a wife and kids I think about all the stuff I could build ...lol
Thanks. Finished up most of the back tunnel wall layer. Veneered out the long horizontal platform (near the top of the tunnel) with styrene and started mocking up upper back tunnel details...
Just tacked together with white glue. Need to final align everything and glue it all to the back platforms I did last update.
Next Up: Finish a few final piping details on the left tunnel wall.
Just tacked together with white glue. Need to final align everything and glue it all to the back platforms I did last update.
Next Up: Finish a few final piping details on the left tunnel wall.
That is going to be extremely cool when finished!
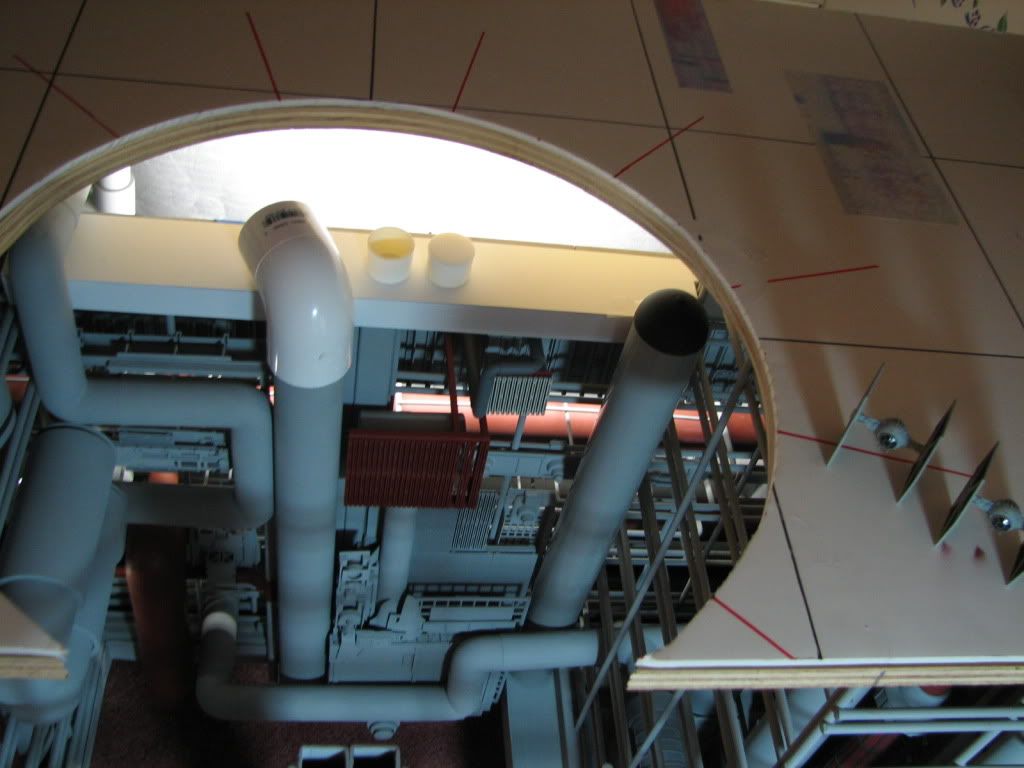
Almost an OOPs! The mockup for the rear right light tube looked funny to me... that's because I aligned it to the wrong template mark... :eek I also built out the lower back wall too wide, then.
Luckily - this is why a lot of the major parts are screwed/bolted on and why I have my trusty foamboard templates. Hacked off the lower right side and it should move over under the right mark now... score one for planning and triple-checking... whew!
It moved over two inches, but will make all the difference to everything on the right...
Last edited:
Similar threads
- Replies
- 8
- Views
- 1,432
- Replies
- 5
- Views
- 1,422
- Replies
- 34
- Views
- 5,360
- Replies
- 12
- Views
- 1,913