So... for lighting tube drilling test #2. I needed to account for:
- how to cheaply build a jig that doesn't cost more than the tool
- bit walking across curved tube
- chipping/splintering of ABS tube
- smoothness of cut
- straight line down tube
- trying to drill the holes parallel down a curved surface
- trying to drill the holes equidistant down a curved surface
- how to smooth/sand out the holes without deforming them
- how to cut out the oblong ones inbetween
"I'm not afraid... You will be... you will be..."
Test #2 solved all but the last issue (haven't really got to that issue, yet - probably will use a fluted bit on a router table to clean out between the holes).
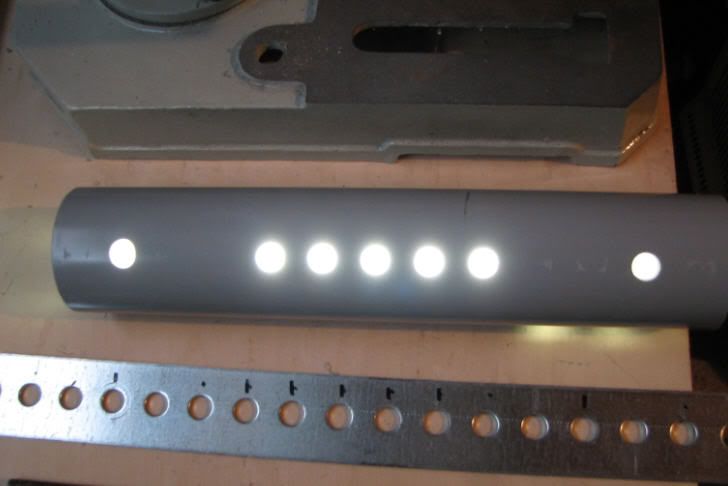
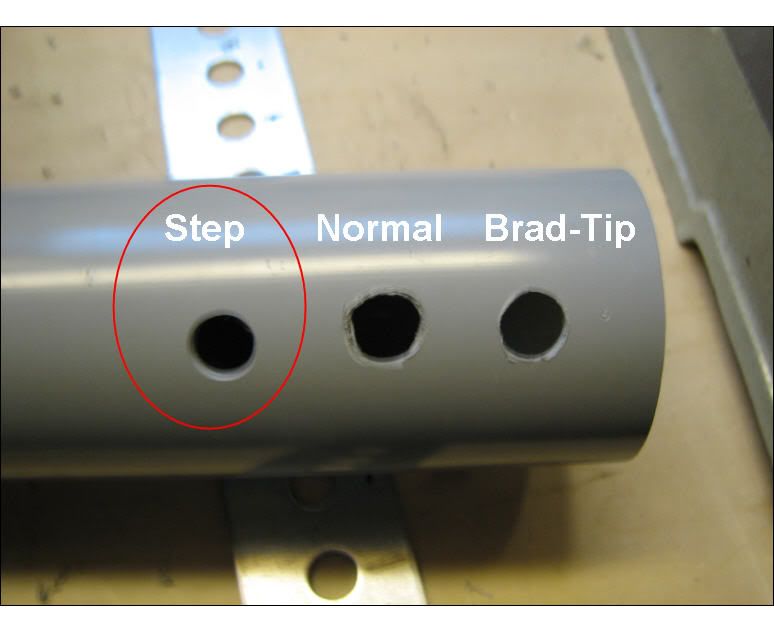
I started with testing different drill bits. Excluding all the types of bits that would not work anyways, I did a comparision of three: twist (normal), brad tip (centers, scribes, then cuts), and step (cuts progressively wider). The step bit won hands-down with no chipping out or melting. The "next" step on the bit smoothed out the hole automatically, so it requires no sanding nor using a round file (which was previously causing me fits since it could slightly deform the holes on cleanup as well as leaving initial holes a bit pitted). You can use fancy $20 v-jigs (x2) to rest the pipe in and use a fancy $50 pipe-center jig to start/center the end holes, but I just used my miter box clamps and a ruler.
So, the first solution (less than $20, with the step bit at $12) is to:
- drill the ends, or holes beyond the ends if you prefer to cut off later
- bolt the tube ends to a piece of simple (and cheap) steel holed strip
- run the jig through the drill press
One interesting bonus was that I didn't even have to be dead center in the steel iron holes, since the step bit would just move to the sides of the steel hole and clean up the hole anyways. The step bit took out a nice thin spiral of ABS and didn't melt around or raise the hole.
Woo. Pleased so far... test #2 complete. :thumbsup
")