You are using an out of date browser. It may not display this or other websites correctly.
You should upgrade or use an alternative browser.
You should upgrade or use an alternative browser.
Darth Vader square shroud dedicated stunt saber + Barbican
- Thread starter eethan
- Start date
So, we can message about this too but since your prototypes are so good i wanted to offer my theory.
The barbican core looks a lot like the Hoth Blaster spacer. Raw metal with glue residue that darkened with age. It turns it slightly yellow or brown
It’s my strong belief in that video with Roger Christian, Rinzler and French… the blade they hold up first has the Barbican core attached to it. The holes line up, or seem to.
This would make sense, if they had to use the bladed saber again, that they made a new shorter core and at some point just glued it in. It can’t be the same core because the countersunk bolts held that in.. and this core only goes halfway past the first hole.
We at least know this was molded with the original bolts and bubble strip in Jedi. Quite possibly without the core since they used clay around the bolt heads, raising them up. The shroud was cut down for this I think.
Also was used for the Energizer commercial and it was bladed for that.
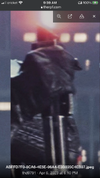
so, the only picture with a real yellow hue is this one and it's very blurry:

now, all the other photos I have, I first thought it was possibly owidation on the brass that turned it darker inside the lateral holes, ignore the arrow:

but now, with the new photos I was given, it looks like it has this same hue on the front opening as well and looks like raw, partially rusted steel.
possibly, in the blurry picture, it just caught light weirdly and got that really yellow shiny hue. You can see on the back the extremely yellow hot spot on the Maul saber as well, so there was probably very saturated lighting on that exhibit.
That's where I'm unsure, do we go with purely as we think it was constructed, people can let the metal rust if they want or try to preserve it if they prefer. Or do we try to go for something like we see in the exhibits and use brass...
Now, I'm worried about the second part of your message. I was planning to offer the Square shroud version with no holes at all in the tube. I thought those were added after as I can't seem to find any evidence in the snapshots even though they are not super clear for sure!


cheers
now, all the other photos I have, I first thought it was possibly owidation on the brass that turned it darker inside the lateral holes, ignore the arrow:
but now, with the new photos I was given, it looks like it has this same hue on the front opening as well and looks like raw, partially rusted steel.
possibly, in the blurry picture, it just caught light weirdly and got that really yellow shiny hue. You can see on the back the extremely yellow hot spot on the Maul saber as well, so there was probably very saturated lighting on that exhibit.
That's where I'm unsure, do we go with purely as we think it was constructed, people can let the metal rust if they want or try to preserve it if they prefer. Or do we try to go for something like we see in the exhibits and use brass...
Now, I'm worried about the second part of your message. I was planning to offer the Square shroud version with no holes at all in the tube. I thought those were added after as I can't seem to find any evidence in the snapshots even though they are not super clear for sure!
cheers
I am basing my supposition on the fact there are no holes in the square tube version on matching the view from the movie with the barbican, and although the snap shot is not very clear, one of the lateral holes would be right in the middle of the undisrupted silver area visible in the snapshot:

so, I still assume there are yet no holes in that version of the saber.
this is also a good reminder that the clamp was apparently positioned lower at this time.
so, I still assume there are yet no holes in that version of the saber.
this is also a good reminder that the clamp was apparently positioned lower at this time.
Oh I don’t want to worry you. We don’t have good reference, but the only reason they countersunk black bolts was to situate a blade system for Empire filming.I am basing my supposition on the fact there are no holes in the square tube version on matching the view from the movie with the barbican, and although the snap shot is not very clear, one of the lateral holes would be right in the middle of the undisrupted silver area visible in the snapshot:
View attachment 1687906
so, I still assume there are yet no holes in that version of the saber.
this is also a good reminder that the clamp was apparently positioned lower at this time.
We have a great shot of Vader when Luke hits him in the shoulder on the catwalk, showing the saber in Empire and it still has the square shroud.
ANH - square shroud, tube with only holes for switch and wires
ESB - same prop has countersunk holes put in for a solid core to replace the motor
Jedi - same prop molded for the Vader hand gag, unsure about core
Post - short (probably steel) core inside the emitter, blade put in for commercial in 90s
hey Tom,
so, we are in agreement, no countersunk holes for the original square shroud version from ANH, right?
I have the photos you posted from ESB indeed but, although this saber looks a lot like the Barbican, I'm not convinced that shroud is the same, the proportions are super weird.
I know that Halliwax said at some point a second square shroud was identified, I don't know if it was this one or not. I would need to try to match this in 3D with my model but to me, the shape, angle and proportions of the shroud are completely different.
Yes! In ANH I don’t think there were anything either, maybe cardboard shims and a couple set screws for the motor
Now that would be interesting! If you could lay your models over it…
The shot from the back is in motion and may be affecting the shape of the top. This one is at least stable,
I do remember Halliwax positing this.. it would be strange to see another square stunt pop up that is such a bad copy of an MPP hahaha
Attachments
Hello guys,
I'm caught up on the 2 new shrouds, need to machine the round corners for the Barbican/cast versions on them now!
Now, to be clear, the kits for now will not include MPP clamps, but I'm testing the waters to see what's out there. So, I received clamps from the custom saber shop, and they are not great. The black finish is ok, much better than some photos I had seen, so that's ok, the shape is not super accurate, neither is the lever and obviously the side bars are not the proper color for our purpose but are a complete miss in shape as well. I'm going to try to machine accurate side bars for those two but that's all I can do for them i think.
I'm going as fast as I can to finish those prototypes and open the interest thread and I'm hoping that Roman can help bring a batch of MPP clamps with his next batch of hilts but I haven't contacted him yet as I have no numbers at all to give him yet.
alright, now, I spent today working on the activation greebly, I'm going to need your help determine if that's ok or not. I'm very hard on my work and those make no exception, they are resin printed and I have managed to improve the result quite a bit today, but I'm not sure this is good enough yet.
my wife wants to try to lightly airbrush some varnish on them to bring the whole thing together and maybe make them look closer to the actual part that i think was painted. So I guess we will try that and see if that looks good. In any case, it will be your choice to paint the part when assembling the kit.
and my last solution, I can prep a few of those very nicelly and my wife can try to cast them in resin instead of the slightly post processed resin prints. No certainty of outcome on this and it has a slightly heavy cost to try as they need to be mastered, moulded and cast.
the pros:
- they are made by me so I can control the result
- printing them from shapeways is around 12€ per part so it really adds a lot to the overall price of the kit, here they are basically free, I think I can print around 10 of them per batch and they take 30 minutes, they have no supports to remove, so no time lost on this and no wasted material at all.
- seen from the top, they are absolutely great!
- the result is extremely accurate in shape and dimensions to my matched 3D model and the original part.
the cons:
- I am postprocessing the sides quickly by sanding them against a sanding bar, then polishing quickly with mother mag and washing them with a toothbrush. It takes only a couple minute per part but still, it is postprocessing and the sides don't look "industrial" because of this
- when left raw, there are some white/grey traces on the parts, apparently due to the sanding/washing process
- there are a few printing layers visible on the inside walls when photographed with a macro lens
here are some photos, it's really hard because the parts looks rather good to the naked eye and they can look less good when taking a photo, depending on lighting and zoom.
the worst first, those are taken from a bit of distance and a not so great lighting with my normal phone lens:


here, some visible white residue on the sides:


now, in those photos, i think it looks really great, it has a really authentic, vintage look, i couldn't hope for better than that...


here is where we are now:

and some close ups:


so yeah, i don't really know what to think, and I'm really keen on any feedback on what you guys think for those parts.
thank you!
cheers
I'm caught up on the 2 new shrouds, need to machine the round corners for the Barbican/cast versions on them now!
Now, to be clear, the kits for now will not include MPP clamps, but I'm testing the waters to see what's out there. So, I received clamps from the custom saber shop, and they are not great. The black finish is ok, much better than some photos I had seen, so that's ok, the shape is not super accurate, neither is the lever and obviously the side bars are not the proper color for our purpose but are a complete miss in shape as well. I'm going to try to machine accurate side bars for those two but that's all I can do for them i think.
I'm going as fast as I can to finish those prototypes and open the interest thread and I'm hoping that Roman can help bring a batch of MPP clamps with his next batch of hilts but I haven't contacted him yet as I have no numbers at all to give him yet.
alright, now, I spent today working on the activation greebly, I'm going to need your help determine if that's ok or not. I'm very hard on my work and those make no exception, they are resin printed and I have managed to improve the result quite a bit today, but I'm not sure this is good enough yet.
my wife wants to try to lightly airbrush some varnish on them to bring the whole thing together and maybe make them look closer to the actual part that i think was painted. So I guess we will try that and see if that looks good. In any case, it will be your choice to paint the part when assembling the kit.
and my last solution, I can prep a few of those very nicelly and my wife can try to cast them in resin instead of the slightly post processed resin prints. No certainty of outcome on this and it has a slightly heavy cost to try as they need to be mastered, moulded and cast.
the pros:
- they are made by me so I can control the result
- printing them from shapeways is around 12€ per part so it really adds a lot to the overall price of the kit, here they are basically free, I think I can print around 10 of them per batch and they take 30 minutes, they have no supports to remove, so no time lost on this and no wasted material at all.
- seen from the top, they are absolutely great!
- the result is extremely accurate in shape and dimensions to my matched 3D model and the original part.
the cons:
- I am postprocessing the sides quickly by sanding them against a sanding bar, then polishing quickly with mother mag and washing them with a toothbrush. It takes only a couple minute per part but still, it is postprocessing and the sides don't look "industrial" because of this
- when left raw, there are some white/grey traces on the parts, apparently due to the sanding/washing process
- there are a few printing layers visible on the inside walls when photographed with a macro lens
here are some photos, it's really hard because the parts looks rather good to the naked eye and they can look less good when taking a photo, depending on lighting and zoom.
the worst first, those are taken from a bit of distance and a not so great lighting with my normal phone lens:
here, some visible white residue on the sides:
now, in those photos, i think it looks really great, it has a really authentic, vintage look, i couldn't hope for better than that...
here is where we are now:
and some close ups:
so yeah, i don't really know what to think, and I'm really keen on any feedback on what you guys think for those parts.
thank you!
cheers
Thank you guys for the kind words,
I'm still worried about those activation greeblies, I'm open to any opinion here and I'll definitely try my best to try to improve them again.
in the meantime, I have drilled and countersunk all the holes on the 3 versions (well not all, I haven't done the wire and switch holes in the back)
those work very nicelly, I'm trying to let them kind of as is as we can clearly see some metal barbs on the original:

I do have to clean from the inside a bit to fit the cores as those are pretty adjusted.
alright, here are some photos!

here, a recess to lock the set screw from the shroud and a set screw to attach the cores, hidden under the large section of the shroud

and here are the side holes and a basic assembly as is for now. the screw for the cast version is what I had on hand, it is slightly undersized. I need to find something better for the run as well as the thumbscrew on the other side.


there we go!
don't hesitate to comment. This is a very decision heavy and complex project to do perfectly and I'm very keen on feedback before it's too late!
I hope you like it")
cheers
I'm still worried about those activation greeblies, I'm open to any opinion here and I'll definitely try my best to try to improve them again.
in the meantime, I have drilled and countersunk all the holes on the 3 versions (well not all, I haven't done the wire and switch holes in the back)
those work very nicelly, I'm trying to let them kind of as is as we can clearly see some metal barbs on the original:
I do have to clean from the inside a bit to fit the cores as those are pretty adjusted.
alright, here are some photos!
here, a recess to lock the set screw from the shroud and a set screw to attach the cores, hidden under the large section of the shroud
and here are the side holes and a basic assembly as is for now. the screw for the cast version is what I had on hand, it is slightly undersized. I need to find something better for the run as well as the thumbscrew on the other side.
there we go!
don't hesitate to comment. This is a very decision heavy and complex project to do perfectly and I'm very keen on feedback before it's too late!
I hope you like it
cheers
My opinions:
It looks wonderful. With only the public reference I think you’ve nailed it - and great decision on the grub screws, it’s what I did to hold the tangs in place. Especially with this, you can’t use the bolts to hold the core in and glue just isn’t a good reliable option lol
the bolts seems to be the same on the pipe stunt and M6 bolt heads back then we’re a little different, looking at my screws the new ones have smaller heads. You might have to open the countersink more if you use older screws. The plastruct parts just barely sit in the real holes
Real clean job using a straight-flute countersink! With my bench top drill press I had to use the bits with the round holes instead to get a clean bore. I got lots of chatter with straight flutes
The mystery greeblie… I like it. You’ve got the chunky walls and shape down really well. The print lines/steps, personally, are a draw back but 3D printing is really difficult.
With the reference you have, does it seem like that part is cast metal, ceramic, or bakelite/plastic?
I get the feeling the greeblie on the cast shroud is a model kit part but I can’t identify it. It had a protruding round section when on screen I think.
Hi Tom,My opinions:
It looks wonderful. With only the public reference I think you’ve nailed it - and great decision on the grub screws, it’s what I did to hold the tangs in place. Especially with this, you can’t use the bolts to hold the core in and glue just isn’t a good reliable option lol
the bolts seems to be the same on the pipe stunt and M6 bolt heads back then we’re a little different, looking at my screws the new ones have smaller heads. You might have to open the countersink more if you use older screws. The plastruct parts just barely sit in the real holes
Real clean job using a straight-flute countersink! With my bench top drill press I had to use the bits with the round holes instead to get a clean bore. I got lots of chatter with straight flutes
The mystery greeblie… I like it. You’ve got the chunky walls and shape down really well. The print lines/steps, personally, are a draw back but 3D printing is really difficult.
With the reference you have, does it seem like that part is cast metal, ceramic, or bakelite/plastic?
I get the feeling the greeblie on the cast shroud is a model kit part but I can’t identify it. It had a protruding round section when on screen I think.
the bolts I have are very slightly undersized, but the countersunk are already the right size here.
regarding the straight flute countersink, it's a matter of using a slow enough speed. even with a 12mm countersink, you need to go pretty slow already, in this case I'm using a 16mm countersunk to go up to 14mm and the speed is around 150rpm, this is the slowest my mill goes and the result is perfect. it can be surprising as you could think using a higher speed would be cleaner, but it starts vibrating very quickly when going up in speed. that's the whole secret
I'll try to improve the activation greebly!
looking at the references, at first i thought it might be painted metals as the edges were very shiny in some of the exhibits photos. Now, with more refs, I think it's painted plastic or just black plastic, but it has a shine in some places that possibly look like paint.
I haven't modeled the shroud greebly for the cast version yet, I always tend to delay stuff that I don't have clear references of... I'm interested if anyone has anything good about this. Especially if it looks different on screen!
thanks
thanks Markus! sure, why not, if I'm happy with the resultAwesome work as usual Matthieu!
Will I be able to get some resin printed activation boxes separately?
I have always thought they put clay in a D ring and molded it as a flat piece. I have no idea what this shape is but there’s a slotted screw in the round cylinder. You can see the hole for it between the barbican d ring block holes in that picture inside the emitter

Similar threads
- Replies
- 4
- Views
- 1,046
- Replies
- 4
- Views
- 863
- Replies
- 6
- Views
- 1,324