Cormac
Active Member
Re: Hulk Build + skin questions
So after much experimenting, mishaps and frustration i have something i'm happy with. I've got pictures i can share of the upper body.
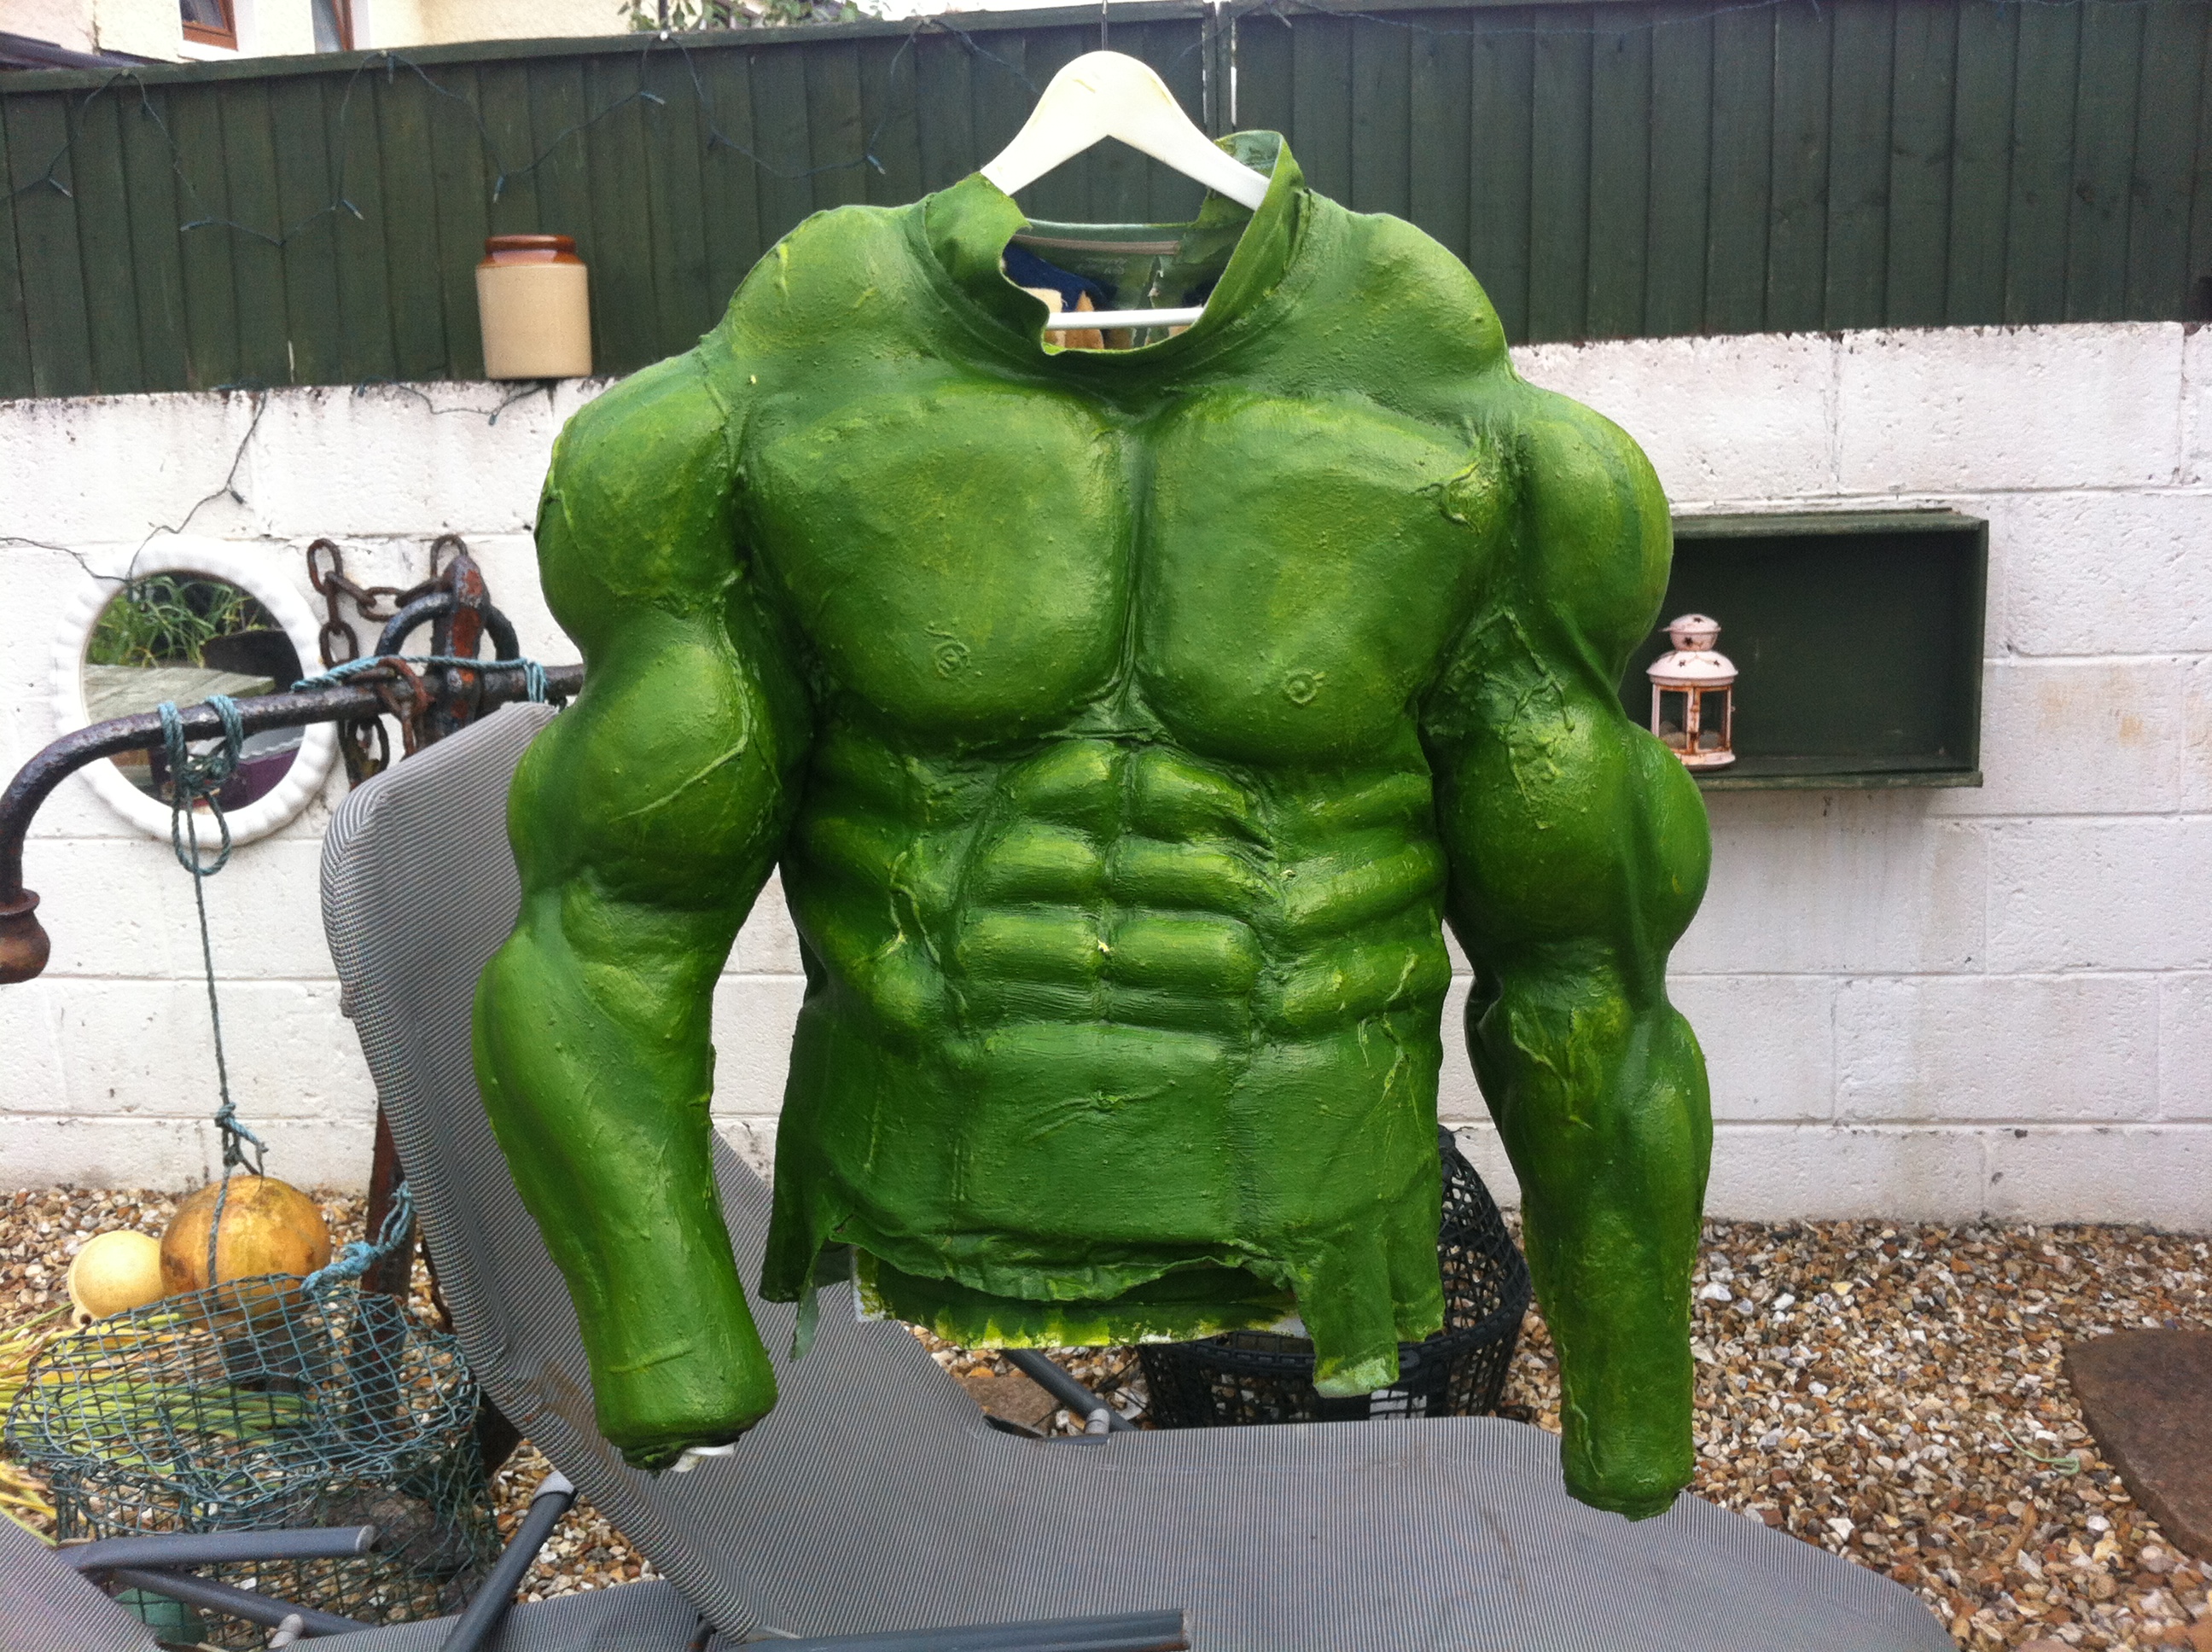
The colour isn't actually what i had in mind but i'm really starting to like it. The coats of latex have built up enough to hide some of the creases while keeping the muscle definition the way i wanted it.
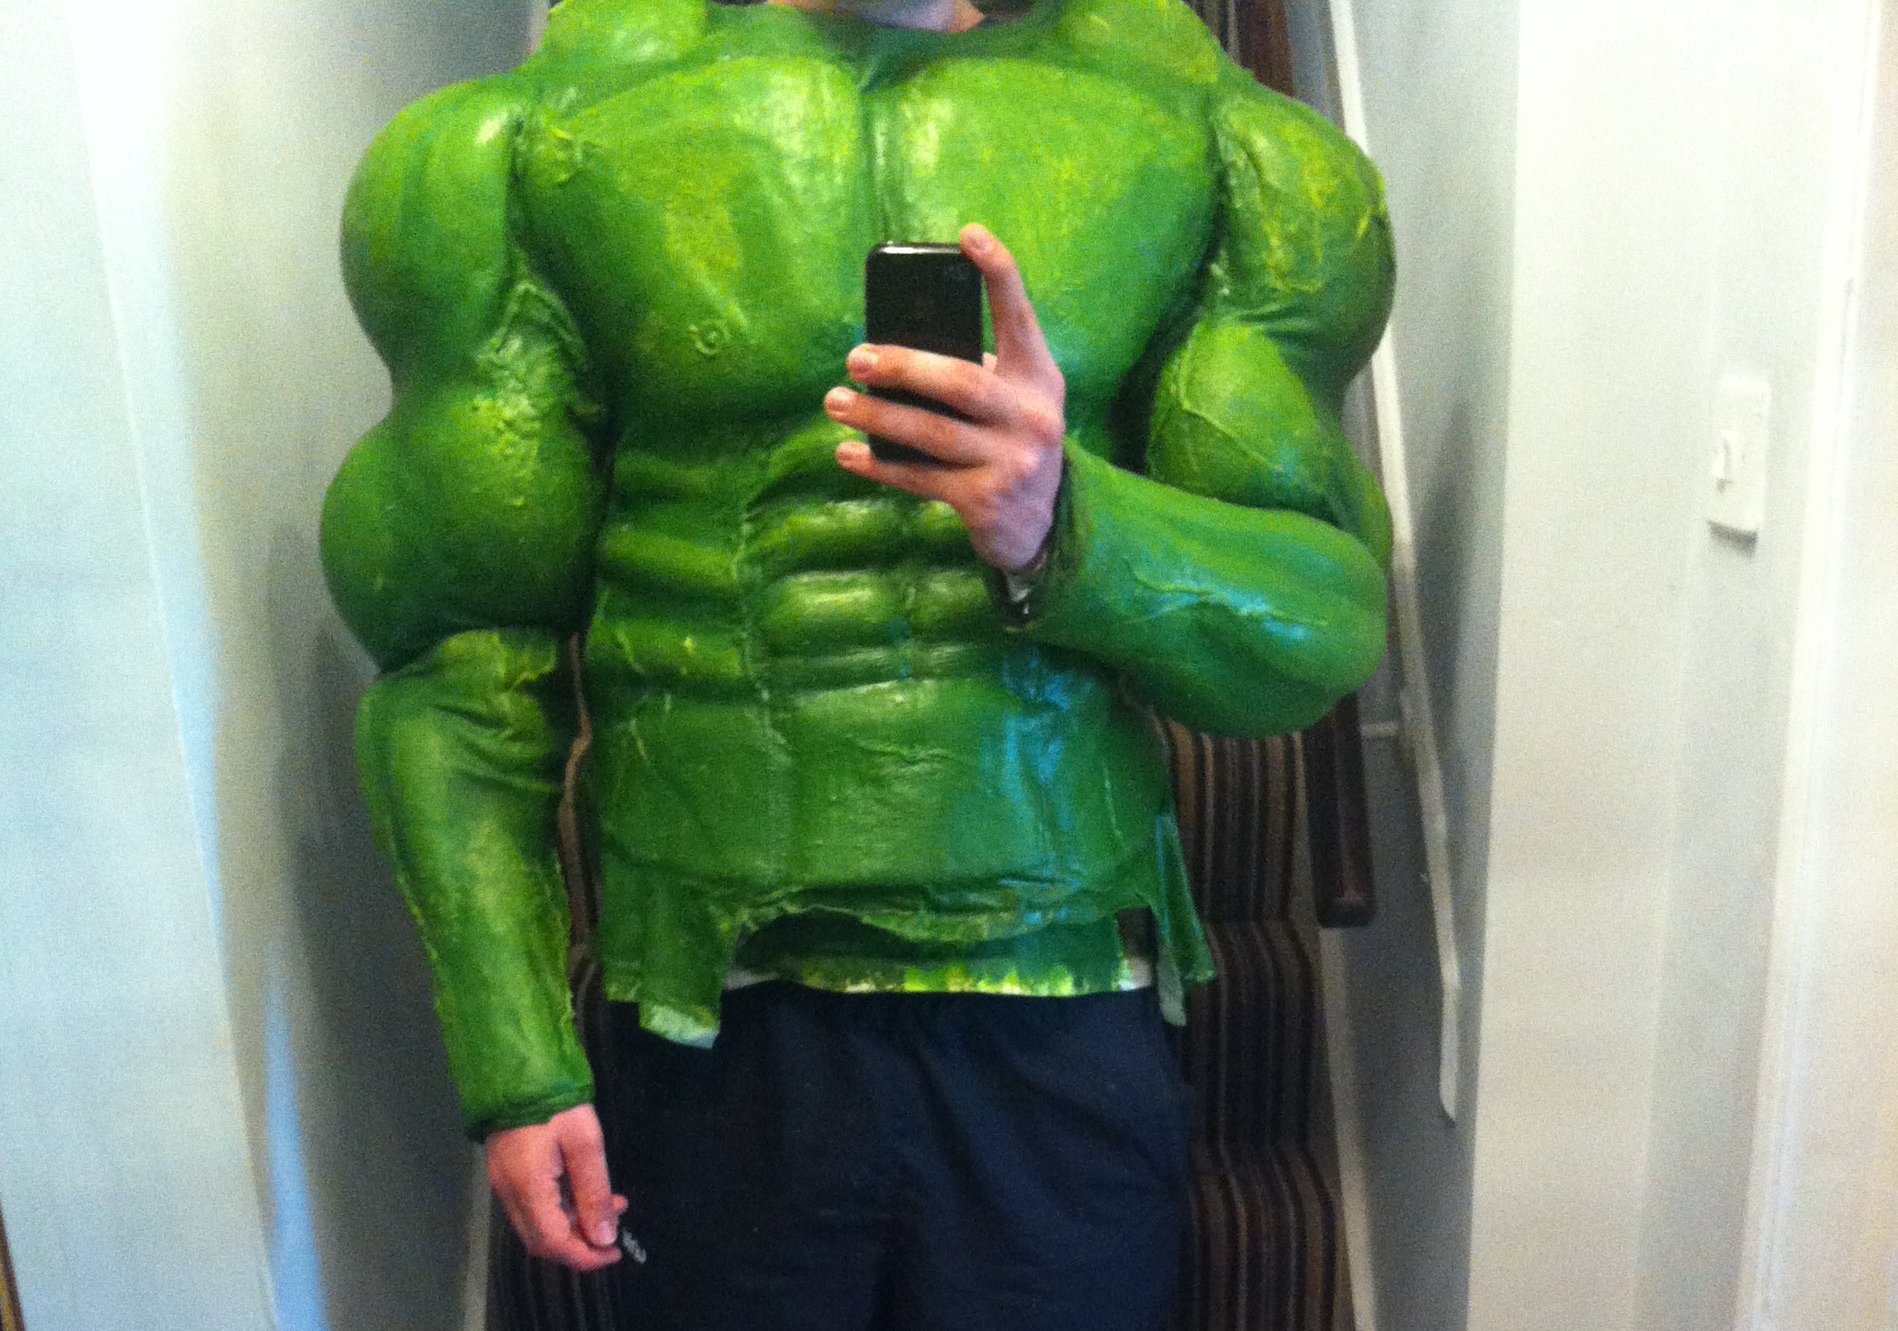
This was my first test fit since I put any type of latex/ paint on it. I'm pretty thrilled with how it fits. I found that if i hold the back of the suit together the abdominal section tightens up a lot and makes it look much more accurate. I'm going to attach a buckle to make this fit better.
So here's the How-To. Note:there may be some over-lap in the beginning with the previous post. Also this is the shortened "how it should have gone" version. In reality a few of these steps were repeated for any number of reasons. you can see three of the different shades i ended up with along the way in the pictures below.


First off i gave the whole body a coat of latex. This fist coat soaks in a lot so i was quite heavy with it. I found it was taking a long time to cure so i left it over night.
Next came 2 coats of a latex/acrylic paint mixture. These were heavily weighted towards the latex.I would say 70/30 At this point i wanted to make sure it would have a solid base while also beginning to cover up some of the different colours of the fabric. This is what lead to the very yellow pictures in the previous post.
After this i focused on getting the colour right. This time the mixture was in roughly the opposite proportions. Perhaps even 80/20 paint/latex. light coats of this was enough to give me a good base.
At this stage i used my glue gun to create some details such as veins and nipples. I found that the mixed paint wouldn't adhere to the glue so i gave each vein one coat of plain acrylic paint. once this was dry i did one more coat of the base colour.
I then took some of this same paint/latex mixture and added some extra yellow. I used this to give some highlights. I did each muscle with one light coat of this.
Then i proceeded to add a little more yellow and quite a lot more latex to the same mix. I used this to do some of the finer highlights and to make certain areas stand out.
Top tips:
Latex absolutely stinks when wet. It's the ammonia. You really do need to work in a ventilated area. I wore a standard dust mask which seemed to help but i'd recommend a respirator if you have one.
the latex is opaque while it's wet but dries almost clear. For this reason you should mix your paints first until it looks right. then add the latex. It will look way too light going on but when it dries it should return to the colour of the paint. this can be very unnerving but have faith.
as Override says above, Light coats are the key for shading/ highlights. I found that adding more latex to the mix helped too as it made the coats of colour thinner and easier to control.
when painting many parts of a costume like i was and with paint that you have mixed yourself make sure to mix big batches that can cover any parts that will be seen together. Otherwise you'll give yourself all kinds of problems trying to get them to match.
Similarly when doing highlights/ lowlights make sure you start from the base colour and lighten/darken from there. This makes the change seem natural rather than patchy.
Keep the brushes you want to use submerged in soapy water between coats. they'll be ruined eventually but this can help them last a few coats.
Finally make sure that any fabric that may need to stretch is either kept free from latex/paint or is held in it's stretched position while it sets.
As i write this the legs and feet are setting. the hands will need to be re-made as they became way too inflexible once the paint went on. I'm working on a new design for them.
As always,
Thanks for reading.
So after much experimenting, mishaps and frustration i have something i'm happy with. I've got pictures i can share of the upper body.
The colour isn't actually what i had in mind but i'm really starting to like it. The coats of latex have built up enough to hide some of the creases while keeping the muscle definition the way i wanted it.
This was my first test fit since I put any type of latex/ paint on it. I'm pretty thrilled with how it fits. I found that if i hold the back of the suit together the abdominal section tightens up a lot and makes it look much more accurate. I'm going to attach a buckle to make this fit better.
So here's the How-To. Note:there may be some over-lap in the beginning with the previous post. Also this is the shortened "how it should have gone" version. In reality a few of these steps were repeated for any number of reasons. you can see three of the different shades i ended up with along the way in the pictures below.
First off i gave the whole body a coat of latex. This fist coat soaks in a lot so i was quite heavy with it. I found it was taking a long time to cure so i left it over night.
Next came 2 coats of a latex/acrylic paint mixture. These were heavily weighted towards the latex.I would say 70/30 At this point i wanted to make sure it would have a solid base while also beginning to cover up some of the different colours of the fabric. This is what lead to the very yellow pictures in the previous post.
After this i focused on getting the colour right. This time the mixture was in roughly the opposite proportions. Perhaps even 80/20 paint/latex. light coats of this was enough to give me a good base.
At this stage i used my glue gun to create some details such as veins and nipples. I found that the mixed paint wouldn't adhere to the glue so i gave each vein one coat of plain acrylic paint. once this was dry i did one more coat of the base colour.
I then took some of this same paint/latex mixture and added some extra yellow. I used this to give some highlights. I did each muscle with one light coat of this.
Then i proceeded to add a little more yellow and quite a lot more latex to the same mix. I used this to do some of the finer highlights and to make certain areas stand out.
Top tips:
Latex absolutely stinks when wet. It's the ammonia. You really do need to work in a ventilated area. I wore a standard dust mask which seemed to help but i'd recommend a respirator if you have one.
the latex is opaque while it's wet but dries almost clear. For this reason you should mix your paints first until it looks right. then add the latex. It will look way too light going on but when it dries it should return to the colour of the paint. this can be very unnerving but have faith.
as Override says above, Light coats are the key for shading/ highlights. I found that adding more latex to the mix helped too as it made the coats of colour thinner and easier to control.
when painting many parts of a costume like i was and with paint that you have mixed yourself make sure to mix big batches that can cover any parts that will be seen together. Otherwise you'll give yourself all kinds of problems trying to get them to match.
Similarly when doing highlights/ lowlights make sure you start from the base colour and lighten/darken from there. This makes the change seem natural rather than patchy.
Keep the brushes you want to use submerged in soapy water between coats. they'll be ruined eventually but this can help them last a few coats.
Finally make sure that any fabric that may need to stretch is either kept free from latex/paint or is held in it's stretched position while it sets.
As i write this the legs and feet are setting. the hands will need to be re-made as they became way too inflexible once the paint went on. I'm working on a new design for them.
As always,
Thanks for reading.

") I've been following your build closely since I need to do something similar for my upcoming rhino build. Although rather than latex, I think I may use tinted vyta flex rubber to skin my foam. That way it matches the cowl. I've done some tests and it holds up really well once applied to the foam. And although it's more expensive, I'm hoping it pays off in the long run since I shouldn't need to worry about o going repairs/durability which tends to be an issue with latex.
I've been following your build closely since I need to do something similar for my upcoming rhino build. Although rather than latex, I think I may use tinted vyta flex rubber to skin my foam. That way it matches the cowl. I've done some tests and it holds up really well once applied to the foam. And although it's more expensive, I'm hoping it pays off in the long run since I shouldn't need to worry about o going repairs/durability which tends to be an issue with latex.


