You are using an out of date browser. It may not display this or other websites correctly.
You should upgrade or use an alternative browser.
You should upgrade or use an alternative browser.
Captain Marvel Build - NEMA
- Thread starter Sni9er
- Start date
-
- Tags
- avengers captain marvel marvel
I am enjoying following this build. Great effort and attention to detail. Looking forward to seeing the finished costume.
thank you sir! and thanks for the detail spot was the perfect time to catch that!!
Great Job! Looks amazing!
thanks!!!
those boots are LIFE!I thought getting a pair of wedge ankle boots would be easy but I was very wrong. Its taken a month to find a pair suitable but I love them and think they will work really well. I even found a blue pair so I don't need to dye them.
I think this is going to turn out Pretty Cool!
thanks mikid we hope so too!!!
Just a small one today folks spent the evening getting the belt parts done!
modeled in Solidworks using the Sub D model reference from the model in Fusion360 #CrossingTheStreams!
they have been split to match the splits on the original and will be pieced & bonded together on a belt base, extra size has been let on the rear so it can be trimmed to suit varying waist sizes


all that remains is the infernal shin and boot covers which I'm frankly a little daunted by but I think I have a strategy!!
it's starting to come together nicely as all the pieces begin to slot into place!

modeled in Solidworks using the Sub D model reference from the model in Fusion360 #CrossingTheStreams!
they have been split to match the splits on the original and will be pieced & bonded together on a belt base, extra size has been let on the rear so it can be trimmed to suit varying waist sizes
all that remains is the infernal shin and boot covers which I'm frankly a little daunted by but I think I have a strategy!!
it's starting to come together nicely as all the pieces begin to slot into place!
So this week has been Hectic !!! in un-related new to captain marvel we sold our house!! enter much whaling and stressing about finding a new home
and somewhat delayed captain marvel haha
we got together on Friday to work on the parts to get them ready to mold this weekend coming up
karen and Gwyn sanded while I worked prepping for mold on another project I'd been late on finishing for Sano (FOTK from TLJ) but that's done and on its way out this week! so back to the marvel!
we decided there is just too much detail on the gauntlets to pull in from the 3d print ready for mold so we are going to make a waste mold on that part too!
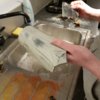
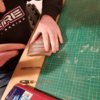
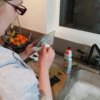
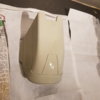
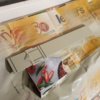
the belt parts printed up great and we set on them at speed! a little bit more Filling to go but they're getting there
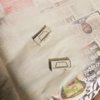

still, some of the triangles to fix the top surfaces of then we'll be good to go! mostly cleaned via Exacto Scraping
tonight however I began the part I've been dreading since I returned to work .. the shins they are numerous in parts and fine detail and I'm concerned about not capturing all the original detail
I made a preliminary pass at the major basics this eve, moderately happy but need some more tuning on the top central trapezoid (edges from front aspect are curved but should appear straight


after some small tweaking, I was happier with that area's shape

next, I'll thicken out and begin to work on the surface detailing!
more to follow on Wednesday, as I'm out tomorrow catching up with some friends we haven't seen since before Christmas, and also as a mild celebration of the house sale!!
ttfn!
and somewhat delayed captain marvel haha
we got together on Friday to work on the parts to get them ready to mold this weekend coming up
karen and Gwyn sanded while I worked prepping for mold on another project I'd been late on finishing for Sano (FOTK from TLJ) but that's done and on its way out this week! so back to the marvel!
we decided there is just too much detail on the gauntlets to pull in from the 3d print ready for mold so we are going to make a waste mold on that part too!


the belt parts printed up great and we set on them at speed! a little bit more Filling to go but they're getting there


still, some of the triangles to fix the top surfaces of then we'll be good to go! mostly cleaned via Exacto Scraping
tonight however I began the part I've been dreading since I returned to work .. the shins they are numerous in parts and fine detail and I'm concerned about not capturing all the original detail
I made a preliminary pass at the major basics this eve, moderately happy but need some more tuning on the top central trapezoid (edges from front aspect are curved but should appear straight


after some small tweaking, I was happier with that area's shape
next, I'll thicken out and begin to work on the surface detailing!
more to follow on Wednesday, as I'm out tomorrow catching up with some friends we haven't seen since before Christmas, and also as a mild celebration of the house sale!!
ttfn!
mrmilom1990
New Member
Superb planning, design and engineering. So fantastic... I really love Marvel Movies!
Thanks Mr Milom !! trying our best to do our best work!!Superb planning, design and engineering. So fantastic... I really love Marvel Movies!
Fantastic work! Very inspiring!
Mad Monkey
Well-Known Member
Congratulations on your sale!
Jen Tate
New Member
Jen Tate
New Member
I have drafted most of the patterns and I have made a start on putting together a draft costume using some scrap fabric. I’m working on the vest part and I have got the basic pattern worked out, just needs a few tweaks. I have put this together very roughly. The breast piece will be glued on top of this and I will add the back piece separately to cover the zip.


Jen Tate
New Member
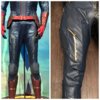
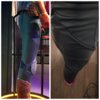
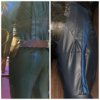
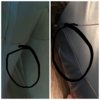 Yesterday I got Emma to draw roughly on a pair of trousers so I could cut them up and get a better idea of all the panels on the trousers. Today I have cut out the first draft pattern to see how they fit together and what the size and positions look like. It’s pretty good but needs some adjusting in places to tighten everything up and the knees are wrong. The final pants will be lined and top stitched with embossed sections, piping and the rubber gold and red details sewn in. This is a very rough mock up that I can use to draw on and cut up. I’m happy we finally worked out the strange crotch panel which I have circled. This has been the hardest pattern I’ve ever made especially since there are no side seams and has over 40 panels on the trousers alone.
Jen Tate
New Member
I’m starting to play around with techniques before I start the real deal. The fabric I’m using is a really thin stretch pleather so I will be using interface to thicken it up and make it less stretchy. Quite a lot of panels are overlapped then top stiched and I’m happy with how my fabric looks for this part.
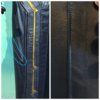

DiggsBarklightr
Sr Member
Lookin really nice.

DiggsBarklightr
Sr Member
Even that is so intricate in its design. Seeing this come together is like seeing an outward version of what my mind does daily. 
Similar threads
- Replies
- 2
- Views
- 681
- Replies
- 2
- Views
- 378


