The Dress.
The Bellatrix dress we decided to make out of suiting linen. We had several reasons for this. Firstly linen tends to really absorb light so that you don't get any reflections like you do with polyester based fabrics. Secondly, the large, heavy warp and weft we thought would look better when it was left ragged at the bottom of the dress as it is in the movie. Thirdly, we thought it would probably take the paint for the spirals and the embroidery thread better. And, finally, it is a natural fibre which has got to be good for the world. Something we didn't like about the linen was the price - A$25 per metre! I think we ended up having to by five metres because of the awkward sizing of some of the pieces, particularly the skirt and the hood. At least there will be some fabric left over if we want to make changes in the future (we suspect we will be changing the sleeves and perhaps having to reinforce the shoulders of the dress where the eyelets punch through close to the edge).


We came up with our own pattern, which we will draw up as a PDF for anyone who might be interested. We decided that we wouldn't include any bust pleats as there didn't seem to be any in the film costume, so we just dropped the front waist seam down a few centimetres in the middle (you can see the peaked waist line on the pattern) and gathered the material at the middle of the bust. The result of this was that the front waist seam was actually longer than the back and that the result would be more fabric at the front of the skirt than the back. However, considering there was going to be a corset hiding this area we actually thought that this would be an advantage and would give us folds of fabric at the front of the dress which we thought more closely matched the screen costume.
After we had made the dress we decided that the neck line and the shoulders were too tight and so we opened it up a bit and restitched the gather at the bust. The hood was a simple 50cm x 50cm right angled triangle of linen which was then stitched into the neck line. The seam at the neck line was left raw and unfelled as was the seam around the edge of the hood.
The shoulders were turned over by about 5-7mm and top stitched. We didn't want these to fray too much as they had to hold eyelets.
We attached the skirt to the waist but left it much longer than necessary and left the selvage along the bottom (the reason for that will become clear shortly).


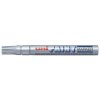
Once we had finished sewing the dress we painted silver spirals all over it using a Uni Paint Pen (2.2mm - 2.8mm). I practiced a little bit on some paper so that I could get used to drawing different types of spirals, then, using a polypropylene chopping board (so that the paint wouldn't go through to the fabric underneath) I sat on the sofa watching "Order of the Phoenix" and "spiralled" away.

Once I had painted the whole dress it went into the washing machine and when it came out the spirals were faded almost perfectly. Then we used some silver thread to free-motion embroider some spirals onto the dress. We need to do some more of these before Supanova Sydney, but given that we had never done any FME before we think we have made a good start.


The other thing we did was to cut away the selvage at the bottom of the dress and to start distressing the raw end of the fabric with a craft knife and a seam ripper, so that it would appear like the screen costume.
Some things we should have done differently!
We should have done the eyelets on the shoulders after the wash. Some of them came of the fabric and they had to be redone and, as a consequence, moved slightly from their original positions. We used the smallest black eyelets you can get from Spotlight and put nine of them around the top of the shoulder (which seemed to be about the right number looking at pictures of the screen costume).


