Bard the Bowman costume build - The Hobbit movies

jessamygriffin

Well-Known Member
Well, this is going to be my first time posting up on RPF about a costume build, though I've enjoyed looking at other's works!

I quite enjoy The Hobbit movies, not least of which because the actor/characters are somewhat within the age range I can portray. Plus, they are intricate and rich with detail, as I found out when I made my Thorin Oakenshield costume and helped with my flatmate's Fili build. But of course this thread isn't going to be about the Thorin costume, there's been several excellent threads on that already!

Bard the Bowman, bargeman by day and the bane of the Master of Laketown. Definitely a one-coat, single pair of boots character. I liked the relative simplicity of the costume after the Thorin build.

The costume is mostly done, barring me making longer arrows, the arrow nocks and tips, and the quiver.

The Cloaks and Daggers book by Weta talks about how Dale and thus Laketown was a mix of people and culture inspirations, which certainly explains Bard's curve-tip boots.

10717759244_507573fb9c_o.jpg

The book also states that the boots were adapted from Ugg boots and fancified. The shirt is a rough and loose-woven silk, and the coat was Luke Evan's choice from several costumes they tried. Kangaroo pelts! They shaved down the fur in the back and sleeves so he wouldn't overheat.

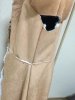
Okay, on to the first piece, going from the boring under-layers on out. The undershirt!
 
First layer - the undershirt.

From production pics, it looks like a mixed grey linen type, and the Cloaks and Daggers book confirms this.
tumblr_mvwdnxmaq61s2qkt9o8_r2_1280.jpg
You might think, why is he wearing just a brown sleeveless tunic over this? In all the movie shots where he's wearing the coat, you can see the brown cuffs of the brown tunic sticking out! When he lifts his arms, you see brown, not grey!
The answer is pretty simple - we see Bard in the movies without his coat just twice - in the scene in Desolation of Smaug when they they bring Kili back to his house, and when the Guards of Laketown come to arrest him.
vlcsnap-2015-03-27-18h23m56s67.png
The production crew probably decided they didn't want Luke Evans to expire of heat in his 'roo coat, and the brown cuffs are tacked inside the coat. That leave the question of the armpits, which can be seen when he lifts his arms. They patched more brown onto the undershirt to cover the gaps.
5063f3dd92736d52057909eaa654fc30.jpg
Anyway, from detail shots of the shirt, it's your average t-style tunic with a button down front and slits up the sides. The buttons look like either small wooden ones or leather and the top one has a thread hanging off it. There's a small collar.

For the sake of coolness and because the original fabric looks so wrinkly, I found a nice linen of grey and white threads.
2015-03-15 14.26.29.jpg

The sleeves are un-gathered, and for my own comfort I put in under-arm gussets to allow for better movement. For buttons, I cut some leather, punched holes in the circles and water-hardened them with near-boiling water until they shrunk down. I'm not going to post pattern pics for the shirt - it's easy enough to find similar styles on reenactor websites.
2015-03-16 22.24.31.jpg2015-03-16 22.24.41.jpg
Lastly, to cover that under-arm gap, I cut two ovals from the brown tunic fabric I'd chosen, aged them with a bit of paint, stay-stitched the edges because it frays like crazy and attached them with a running stitch.
2015-04-01 16.22.39.jpg
Next boring layer - the pants.
 
Last edited:
Pants. Like everything Bard has, they are well worn, frayed down to the weave. They have a rough texture but drape well with no wrinkles. Any guess for the fabric content is up in the air - for mine, I looked for something that was textured and close enough.

B24dyXhIIAETPjG.jpg large.jpgbow2 (2).jpgBard_12b.jpg

The pants look like they had a long-dead dream of being dark blue at one point, but age, washing and wear have left them greyish non-colour. We don't get to see how they are fastened, what the waistband is like, which makes it pretty simple. It meant I got to choose all of that. They are big, frayed, dirty, clown pants, lots of looseness in the leg.

My fabric choice wound up being a light wool that was nubbly. Ideally, it would have been a fabric where I could wear away at the knees, fray with impunity and still leave the fabric intact, but what I found seemed similar enough. I didn't think the wool would hold up to the wearing without coming apart. Plus, being wool, it drapes beautifully and doesn't wrinkle.

The original colour was a bright blue. A packet of Rit colour remover later, they were a sad grey-blue, with some odd rusty spots where apparently the fabric was reacting with the heat at the bottom of the pot I was using too quickly. Dye removal is a tricky thing, always, and it was just as well the pants were meant to look pretty bad.
2015-03-29 00.28.46.jpg2015-03-30 11.26.14.jpg
I cut clown pants, basically. The waist was gathered into a waistband, and I gave Bard's pants a button-fly with some metal buttons because that's so much more elegant than an elastic waistband. I'm sure Bard's trousers were nice once upon a time. I did use elastic in the ankle for convenience and to help keep the gathering even when I tucked them into the boots.
2015-04-01 16.21.50.jpg
Moving on - the brown tunic.
 
The Tunic

As I mentioned above in the post about the grey undershirt, we only see the full tunic with arms once, when the Guards come to arrest Bard in his house just under 2 hours into the movie. Otherwise, in all the back-stage shots, it's a sleeveless tunic for comfort. The fake cuffs are attached inside the kangaroo coat.

The Cloaks and Daggers books states the fabric is silk, and boy howdy is that type of silk hard to find in such a loose weave. It doesn't seem hemmed, just fraying away naturally at most of the edges.

la_ca_0908_the_hobbit_battle_five_armies_193 copy.jpg

The pattern is simple - pretty much a rectangle with a collar. It has side slits and of course is kept closed down the front with the lacing. Again, the usual theme of dirty, rough, and aged comes into play, especially around the collar and front, which makes sense as the coat would keep the sides and back somewhat cleaner. My version did have front facing of the same wool and the collar is a double layer, which meant the front edge had double the amount of wool to fray.
B24dyXhIIAETPjG.jpg large.jpgbow2 (2).jpg
I found yet another nubbly wool in a loose weave that would work well enough.
shirt.jpg
Of course, what makes the shirt Bard's is the wear and tear. None of my edges were finished - a straight stitch was run around all the edges about an inch or so in. Then I sat and began to fray, pulling loose threads out and teasing them free with an awl. I also used the awl to pull some snags out from the wool. I used a large eye needle with some of the threads I'd pulled out to stitch and tied a few strands back into the front of the tunic to hang free.
2015-03-30 20.41.46.jpg

Ageing was applied with acrylic paints mixed with water and a Febreze bottle. The Febreze bottle worked well for a very fine mist that covered a large area. Extra cuffs were cut and frayed and aged as well for later attachment to the coat.
2015-03-30 20.41.19.jpg
The lacing is pretty much a leather strip shoved through the loose weave of the fabric. It wasn't worth putting eyelets in such a loose weave.
lacing.jpg

Oh, and the sash Bard wears? I'll mention it here, it's just a small piece that you see in the one pic. Bard's sash - long, brown, frayed, etc.
Mine - long, brown, frayed etc piece of double gauze cotton.

Next - the coat. It's done, but it's getting a bit late, I'll post the start pics and the finished pics tomorrow.
 
Last edited:
The Coat.

How I love a long coat. It makes lumpy people elegant, and bargemen into kings.

Cloaks and Daggers states it is kangaroo pelts, which certainly explains the odd texture of the fur at the lapels vs the collar and hems. I say hems, but it's just pretty much the raw edge of the pelt, hardly trimmed and with some holes, possibly from the tanning process. Or Bard's job.
10717759244_507573fb9c_o.jpg
vlcsnap-2015-03-19-20h08m46s208.png
holes.jpg

Of interest to me and any other person who would wear this to a convention - the under arms of the sleeves are not attached to the coat, which allows for good movement (Bard the Bowman, after all) and ventilation (Thank you, costume designer, say I.)
vlcsnap-2015-03-27-18h08m11s68.png
The pattern is much like any long coat pattern you can get commercially, though a slightly historical pattern would also work, like a greatcoat. I apparently didn't take pictures of the pattern for this as I drafted it, which surprises me and I apologise.

Bard's coat body doesn't have a single side seam but two (you can sort of see the one seam near the back in the above picture). The shoulder seam is set slightly back, not on the top of the shoulder and has bit of fur stick up. The sleeve cap has large dark hand-stitching showing.

The skirts of the coat are two pieces per side, with a side seam. The skirts are open in the back. They attach at the waist of the coat body. The lapels are fairly wide, and the collar is shown folded and standing up sometimes, or just flopping down and all over.
tumblr_mugialcs3u1rp382io2_500_bard.jpg

As kangaroo pelts are rare and bound to be pricey in Japan, I opted for that fabric... I am not sure what you call it. It's all synthetic. Looks like suede on one side, and has a fur backing. I was pretty stymied for choice and ended up with one with a really horrible, too-fine, and MUCH too short fur on the inside. Soft and white. There was no way it was going to look authentic enough, and thus I turned to second-hand shops for winter fur coats to recycle. Happily, I found one cheap as a clearance.
2015-03-16 22.25.09.jpg
Not sure what kind of fur it is - the leather was very, very fine and thin, so much so that it was backed with glued on fabric when I tore out the lining. But it was the closest I could get to the colour and texture of kangaroo. It wasn't enough to line the entire coat. All I wanted was to line the areas that were going to be most exposed - the edges of the coat skirts, the front body, the lapels and the collar.
2015-03-18 23.03.07.jpg
After piecing the fur coat and cutting the pattern for Bard's coat, the real fur was attached on the inside of the coat with contact cement (not ideal but it comes in large cans). I actually glued the real fur on TOP of the fake fur, and then began to airbrush and age the fake fur so it wasn't too jarring if it were seen. I will admit, the fake fur painting is one of the weak areas - all the advice I found about airbrushing fake fur didn't work well with this really fine textured fur. It got a but clumpy, and the colour match isn't the best. Oh well, moving on.
2015-03-26 19.01.11.jpg
2015-03-19 21.55.22.jpg2015-03-26 23.53.18.jpg
Issues with the contact glue - you can see in the right picture that the surface of the fake suede ended up a touch bumpy after the real fur was applied. It's also not as flexible and drapey as seen in the left picture, which didn't have the fur glued in yet. I decided I'd not worry about the bumps, figuring they could be masked with paint ageing. I also decided I could live with the stiffness.

More to follow tomorrow, mostly to do with paint ageing the coat down to absolute grubbiness and grime.

The Coat, Part 2, to be continued. Thanks!
 

Attachments

  • 2015-03-19 21.55.46.jpg
    2015-03-19 21.55.46.jpg
    1.9 MB · Views: 459
Oh, nice! An actual close-up of the gaiters! I've already bodged together some gaiters, not the best. It is the curse of the costumer to find the detail pics AFTER.

Now, I haven't tackled the boots yet...

Thanks so much!

- - - Updated - - -

I can't find the original link to the person i got these from so i uploaded them to my flickr account... They might be of some help to you.
https://www.flickr.com/photos/128405157@N03/sets/72157651778860912/
 
Okay, going on with The Coat.

Mainly, what happened next with The Coat is a lot of paint ageing, done with watered down acrylics and the Febreze spray bottle. I started with two shades of brown, went on the grey brown and then a weak wash of black.
2015-03-26 23.53.18.jpg2015-03-26 23.54.06.jpg


Stage 2 - Browns
2015-03-27 18.47.47.jpg2015-03-27 18.48.36.jpg

Stage 3 - Greys and Blacks
2015-03-28 19.51.29.jpg2015-03-28 19.51.48.jpg2015-03-28 19.52.10.jpg

Stage 4 and 5 involved dry-brushing some acrylic gloss to the areas that would have high wear - elbows and underarms, the shoulders, cuffs and parts of the hem. As well there are some shiny patches on the back of Bard's coat.
vlcsnap-2015-03-19-20h12m47s237.png


The last touches involved clipping some of the fur on the lapel a bit shorter, airbrushing some whites and blacks into the real fur and wetting and brushing out the fur along the hem edges where it was clumpy. Finally, the brown tunic cuffs were tacked inside the sleeves.
2015-04-01 16.25.49.jpg
2015-04-01 16.27.15.jpg

My coat wound up a bit darker than the movie version, though I don't mind this, sometimes photos end up washed out. Anyway, Bard is a one-coat man who wears it constantly for work etc. I think it ought to be fairly grubby.

But best of all, the fake suede doesn't look fake at all any more. The partial real fur attachments look well, though I won't be taking any coat-swirling, windy pics for fear of exposing the fake fur bits that don't match up well.

2015-03-30 20.40.12.jpg


2015-03-30 20.40.47.jpg

Next - the gloves and my current gaiters.
 
Well, the bulk of my weather work for the costume was the coat, and it's pretty much the same technique for all the stuff I did on Bard. Acrylic wash, Febreze bottle that mists and doesn't squirt to avoid splashiness, and airbrush for small and narrow areas that need more controlled work.

Granted, I don't know how much of the ageing will hold up on the brown tunic if I put it in the washing machine. There's always a chance of weakening acrylic's bonding agents with too much water; some of the ageing may wash out. We'll see! I think there was some advice about it on airbrush sites, but I can't always get the right materials easily in Japan. Or maybe I can, but my internet shopping/reading skills aren't up to it.

I guess my advice is make sure you've an excellent spray bottle you clean after every colour and use, and test how it looks and dries on scraps of course. There's tons of painterly techniques to help with weathering and ageing - spongework, brush, dry brush.

It was nerve-wracking to finally do the coat, but I'm really happy with how it looks. A lot of imperfections were hidden by the paint work.
 
The fingerless gloves

gloves.jpg
gloves (2).jpg
gloves1.jpg

Made from a pelt, leather side out and tied off with a thin rope. Your guess is as good as mine on the fur type, but with mine, I decided that some cheap rabbit pelts in brownish grey would be fine. The leather side of my pelts was natural, of course. Sadly, that brings me into an area of annoyance - leather dye.
I'd bought some brown leather dye at a shop in Japan but it ended up not being right - it was half paint, half-dye and all ugly weird orangey brown. Previously when I'd got leather dye from an online shop for my Thorin bracers and Orchrist's baldric, it was barely sufficient - if it takes four or five passes of dye to get that blue-green I wanted on the baldric, it's not good enough. One ought to have a dark dye that can be thinned out! I wound up using nearly all the bottle on the baldric, just one bloody belt length and I couldn't see myself plonking down that kind of money for a small project. Sorry, Bard.

Thus, fake it until you make it. As Bard's gloves as as shabby as the rest of him, I decided to treat them as I did the coat. I thinned out a craft paint (from Pebeo, I think) that was good for fabrics or leather and painted the rabbit skins, mixing in some different shades to simulate wear and a bad dye job. The leather lost the suede touch, but that was better than ordering another bottle of half-arsed leather dye.

Two rabbit pelts gave me just enough to do two gloves, using the pattern here, minus the fingers.
2015-04-01 01.33.06.jpg
2015-04-01 01.34.03.jpg
I used black fake sinew, an awl for poking holes and just a cheap sharp needle to stitch the gloves by hand. Wound up breaking a needle anyway, but since they were 100yen shop ones, I wasn't fussed. It was a great relief not to have to worry about getting very pretty, even stitches for once!
Since the side seam of the glove shows fur sticking out, I simply overlapped the seam edges.
2015-04-01 15.13.12.jpg
I double stitched the thumb piece, as it was going to get the most stress.
2015-04-01 15.13.19.jpg
Then I put on the gloves, flexed my hands to see where I'd grip a bow and where creases would fall, wet them down and smudged on some black paint while still wearing them (ought to have put on plastic gloves, though.). The thumb piece would up being awkwardly long and I cut it down. A slit was cut into the wrist and a hemp cord was threaded through - that way, I wouldn't end up losing some piece of string that a person would see and think, "What is this trash doing lying around?" and throw away a costume component.
2015-04-01 15.17.24.jpg
And that was pretty much it for the gloves. If anyone makes their own, be sure to mock up one beforehand to check the thumb placement and shape, and make sure it's wide enough at the top to tuck in the grey undershirt.

For the finished look, all I did was roll back the top to my knuckles, exposing all that lovely fluffy bunny fur. They are wonderfully soft, though tying the cord was a pain and involved teeth. If the fur is geting in the way, you can roll up the gloves a few times, the leather is thin enough.
2015-04-05 15.34.40.jpg
gloves3.jpg

Next - Gaiters
 
Last edited:
The Gaiters

The gaiters are most likely shearling and put together in such a way it looks as if off-scraps of hide were jigsawed together. I can't quite tell whether they are open on the side and overlap, or whether they are just tubes that fit over the boots and can be pulled on together. Ropes tie them off at the ankle and tops.

gaiters1.jpggaiters2.jpg
Gaiters3.jpggaiters.jpg

I had some odd greyish brown fur-backed fabric from a purchase that was possibly meant for Bard's coat, but wound up not using because it was too dark. Technically, it's too dark for the Bard gaiters as well, but I went with what I had, being both unable to find a. actual shearling, b. a decent fabric-backed shearling look-alike, c. and not really wanting to outlay more money at the time. I may go back and do them over, if I can score a decent second-hand coat.

My pattern is more simplified than Bard's, and I will probably go back and rough up the bottom edge with some jagged cutting. I decided to make my gaiters large tubes. Open-sided gaiters that overlapped would be easier to put on and take off. But when I tested the pattern with overlapping on the sides and tied them off, there was too much gapping. Perhaps I just need more rope. Yeah, I definitely more rope. Thicker rope, too.

The top edge, after I handsewed the long edges so that bits of fur were exposed, was cut unevenly to look more scrappy.

2015-04-01 20.23.26.jpg2015-04-02 22.24.14.jpg
2015-04-02 22.23.41.jpggaiters.jpg

So, thus far, the gaiters are not very screen accurate for a variety of reasons. Couldn't paint-work them lighter over the underlying dark fabric, need to rough up the bottom edges more and get better rope. They are functional and most people don't look down much. Perhaps when I get around to adapting a pair of boots, they will. For now, the gaiters are sufficient - they cover up my non-Bard boots and can pass.

Next - The Bow
 
The Bow

From Cloaks and Daggers, we know that Bard's bow was cast in two pieces, assembled and finished and was a functional working prop. It was 2.2 m long, and simple and efficient in design. It also has a nifty braided grip and leather and braid accents at both ends.
bow6.jpg
bow2 (2).jpg

bow3 (2).jpg
tumblr_ndt4z52B7U1sml467o3_1280.jpg


It kind of killed me to make a bow that had to be non-functioning. Japanese cons are really antsy about weapons that could potentially harm someone, and some want props that can be broken down into small pieces to bring to the site so as not to alarm people. Well.

With that in mind, my goals were to A. Make a take-down bow that split in two, B. make a bow that would not, even if I tried, shoot an arrow. At all. Which meant I couldn't allow any flex in the bow at all. So that meant C. To do the action style shots where he's pulling for the stars, the bow would have to be pre-curved.

Other hurdles - I live in a Japanese apartment complex, and the fanciest things in my cardboard box of tools are a Dremel tool, and a jigsaw and drill purchased at Ikea. So, actual verisimilitude was just going to have to go by the way-side. I decided PVC pipe was my friend, and said good bye to the way Bard's bow has the nice round backside and a flat front and thickened at the grip. In fact, if anyone can point out something that can work, from a material I could plausibly find overseas, that'd be grand. Otherwise, this bow was just going to be a painted pipe.

I do wish I had a workshop, making props would be so much easier.

A tutorial on bending PVC pipe without kinking it came to my rescue - tape an end, fill it with sand and apply heat with a heat gun. For my first time, I was amazed how well this technique works. The internet is genius.

The first go-through wasn't bent quite enough, so I worked it a second time. The bow, before bending, was over 6 foot, making it proportional to my own height. It comes together at the centre with another pipe inside that the ends fit over and a bolt and nut to keep it steady.
Witness as well the awesome jigsaw work on the ends, done in my apartment with no worktable, no clamps and a stool, doubtless to the annoyance of my neighbours. This is not a pretty bow. This is a bow made under under conditions that would make a shop teacher cry.

2015-04-02 22.24.52.jpg
2015-04-02 22.25.59.jpg
2015-04-04 23.58.36.jpg

When I had the pipe bent to my satisfaction, I sanded, primed and painted it dark chestnut brown, with some wood graining dry-brushed on in two different shades of acrylic. A last coat of clear varnish later, I was ready to move on to the prettier bits.

Next - the leather work on the bow.
 
Last edited:
I don't know if it's just me, but I can't see the bow pics. I definitely want to see those, as I need to build a non-functioning bow for a Hawkeye costume at some point and want to see what you've done. I also had the idea to do it pre-curved, but wasn't really sure how to go about it.
 
I don't know if it's just me, but I can't see the bow pics. I definitely want to see those, as I need to build a non-functioning bow for a Hawkeye costume at some point and want to see what you've done. I also had the idea to do it pre-curved, but wasn't really sure how to go about it.

I've noticed that, some of the pics I put up just... go away and leave a link, I can click the link and see the pics but why aren't they showing in the post? It can't be size, the pics are usually only about 500kbs. I'll try and edit it again.
 
I don't know if it's just me, but I can't see the bow pics. I definitely want to see those, as I need to build a non-functioning bow for a Hawkeye costume at some point and want to see what you've done. I also had the idea to do it pre-curved, but wasn't really sure how to go about it.

Okay, have tried to edit the post. Just in case, here's the bow progress pics, without the actual movie Bard bow pics.

bow10.jpgbow8.jpgbow9.jpg

bow.jpgbow1.jpgbow12.jpg
 
That's looking really good! I especially love that you can take it apart for easier transport. I will have to keep that in mind for Hawkeye's bow. I cosplayed as Green Arrow a couple of years ago with an actual hand-carved wooden bow, and transporting it was always tricky.

Thanks for reposting. :)
 
This thread is more than 8 years old.

Your message may be considered spam for the following reasons:

  1. This thread hasn't been active in some time. A new post in this thread might not contribute constructively to this discussion after so long.
If you wish to reply despite these issues, check the box below before replying.
Be aware that malicious compliance may result in more severe penalties.
Back
Top