ANH Hero DL-44 Discussion - Three ANH Greeblies Found

Looks awesome.

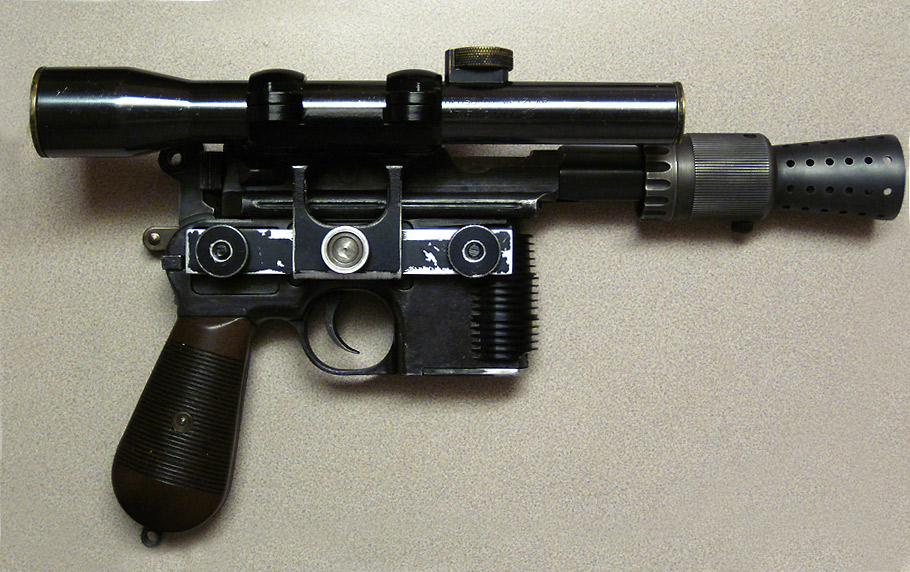
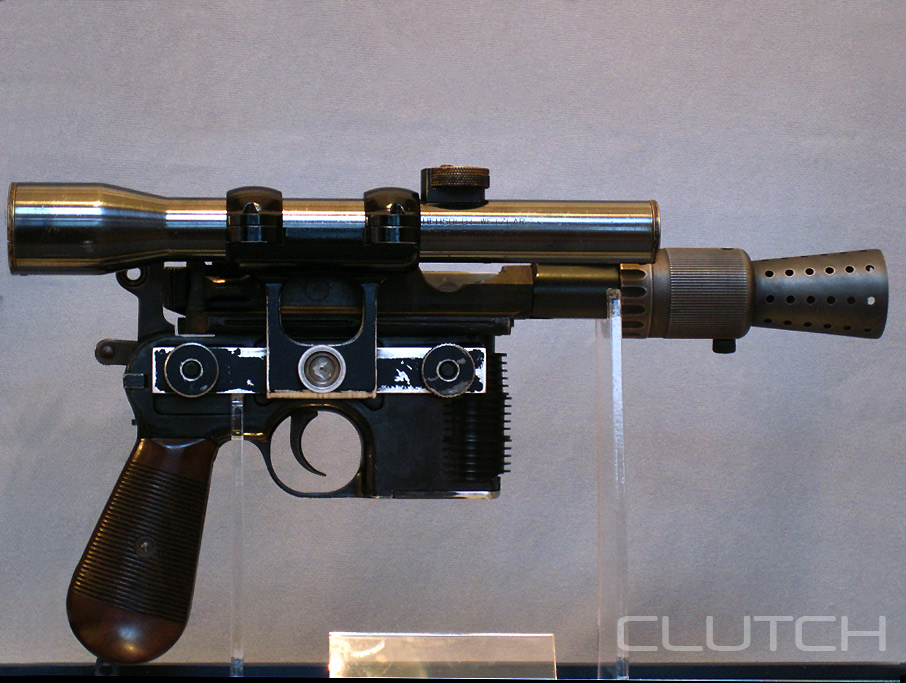
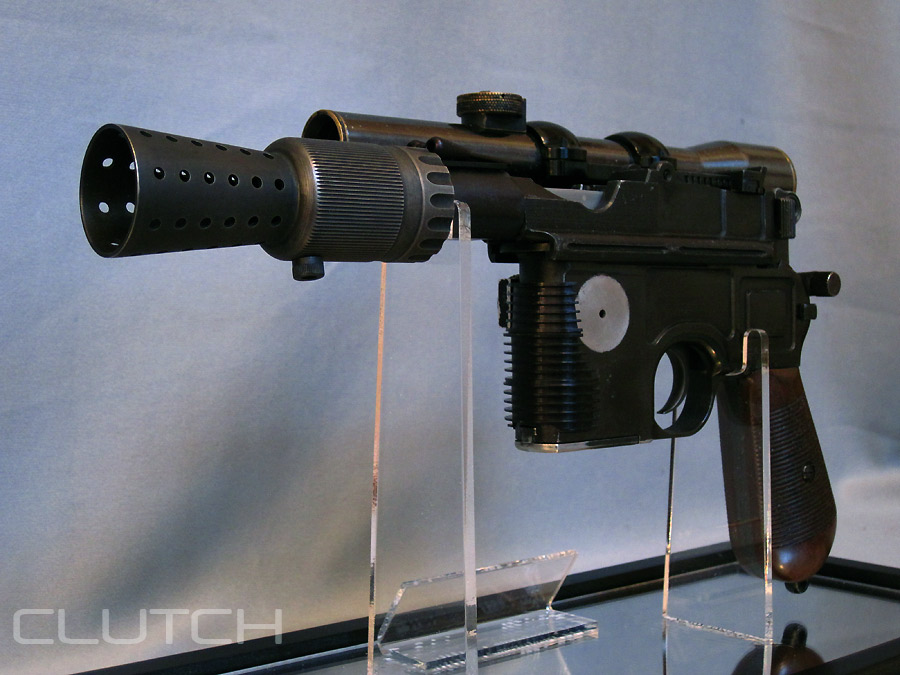
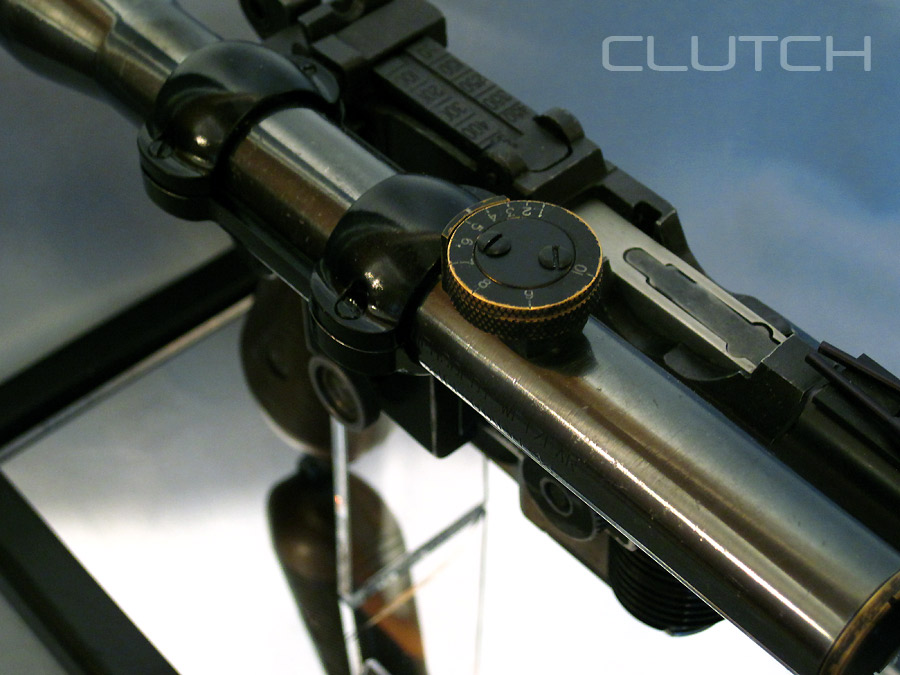
So, tonight I tried my idea of chucking the upper receiver in a drill press to aid in filing it down for the bull barrel. Not good. Not precise enough. Looks like I'm going to have to file by hand after all. And, to get it to fit in the chuck, I had to cut off the end of the barrel with the front sight. While the main body and barrel are not steel, the plug inside my barrel is. Took forever to cut through. Tried a razor saw, then large hack saw and finally a cutting wheel in my dremel.
 
the screws on the very top of the knob assy are 4-40 rounded flatheads, they are the only ones that were even close, I got them from McMaster, if anyone has another suggestion let me know
 
Harbor Freight sells decent sized cutoff wheels for a good price. I've used mine more than I ever thought I would.
 
made this for fun...

Things to come...or...They're here...

"I have a bad feeling about this"...

swep7oldtimerpostermara.jpg
 
Last edited:
Vid helped tons. Thanks. I tried some test filings on some old screws and it worked! The drill didn't destroy the threads either because it doesn't have to be tightened too much.

Tried a video tutorial for a homemade drill lathe for reshaping screws and such.

Use at your own risk. :cool

Remember to use safety glasses. Go slow. Watch out for bounce back of file.

You will need: Good FLAT metal file (safety edge preferable but can use ridged, just may file your drill a bit.)

Drill

You can use tape to protect threads but not necessary if you don't over-tighten. Practice on test screws first.

Maybe a plastic washer as Michael (Lichtbringer suggested)

Have fun...


Screw Reshape Tutorial Video by kpax4rpf | Photobucket

new interest thread:
http://www.therpf.com/f13/anh-hero-dl-44-style-blaster-parts-179985/index2.html
 
...great! glad it helped. A bit out of focus and kept slipping off the temp lamp mount I taped the camera to...

This will work in a Dremel too if you have the chuck or collets that fit.

Note: don't push too hard as you can make the screw head asymmetric/oblong due to un even wear.

You can also use a needle file and give the under side of the head a bevel!
 
^ That is a thing of beauty. Very nicely done. Can't wait to begin mine once the 2nd run of parts is done. Your photos will be a very useful guide. Thanks for sharing.

By the way, can anyone point me to the source that shows the original HW scope reticle didn't have the upper line? I have a scope but it has all four lines in the crosshair and I want to be REALLY certain before cutting out the wire that makes up the top line.
 
Last edited:
Good looking blaster, Jeff. :thumbsup

Btw. sweet display stand - selfmade?


Regarding the scopes crosshair, the real one on my Hero has 4 lines - right, left and upper have flat ends, and the one from the underside to the middle is sharp pointed.

PC010011.jpg


Just checked my Hensoldts - they also made them with 3 lines

Hensoldt2015.jpg
 
Last edited:
nice work Clutch!
FH really looks great.


Thanks for showing the scopes Michael.

We had to pick one and the sample we worked from had 3.

That reticle can be replaced as you like. Print it on acetate.
 
Thanks for posting the photos, Michael. Has there ever been a photo that shows which version ended up on the SW hero blaster?
 
I don't think a scope view of the hero has ever surfaced.

Anyone ever see one?
Any way to tell by the markings?
 
Back
Top