You are using an out of date browser. It may not display this or other websites correctly.
You should upgrade or use an alternative browser.
You should upgrade or use an alternative browser.
ANH Hero DL-44 Discussion - Three ANH Greeblies Found
- Thread starter deadbolt
- Start date
Lichtbringer
Master Member
Here's the knob. It's a lot more muted in real life. The screws look like a__ but whatta gonna do? I sprayed the barrel with dull, then polished with Novis. Looks like I want it to now.
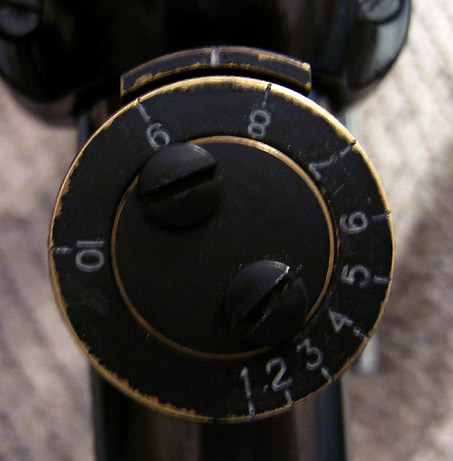
That are some serious big screws. :eek Numbers seem to be a little bit to prominent, too. Can you turn the parts a little bit - to have the screws placed in another direction?
The inner disc on my real scopes is on both not worn enough to have the metal shine through - other than these points it looks good.
")

lonepigeon
Master Member
Thanks for these pics!
So that´s the "master", which the ESB stunt blaster/ "Muppet" blaster was molded from!? very cool....thanks for giving me the idea what to do with the extra C96´s I have
That's not the master. It's just one of the resin castings same as the Muppet blaster (it could even be THE Muppet blaster).
I held this particular prop about 10 years ago before Prop Store got it. It's a nice piece, but a pretty rough casting.
Clutch
Master Member
The numbers really aren't as white as they appear. I painted them with gray and then gave them a black wash. I have no access to a lathe so I'm screwed I tried doing the drill thing, but these screws are HARD.
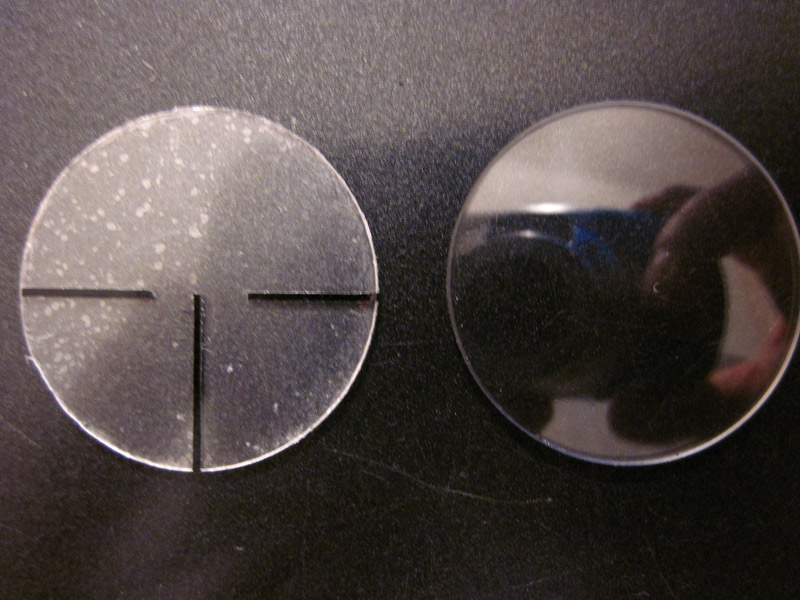
What's the deal with the reticle? Is it a sticker on a clear disc, or is the clear disc it?
What's the deal with the reticle? Is it a sticker on a clear disc, or is the clear disc it?
Lichtbringer
Master Member
The numbers really aren't as white as they appear. I painted them with gray and then gave them a black wash.
I wasn´t talking about the grade of white, but their size.
I have no access to a lathe so I'm screwed I tried doing the drill thing, but these screws are HARD.
Damn, at that small size i would have recommended the drill thing, even with a lathe available. :confused
Have you tried sanding paper, or a really good metal file?
What's the deal with the reticle? Is it a sticker on a clear disc, or is the clear disc it?
??? Mine are real Hensoldts, so real reticles.
Clutch
Master Member
I wasn´t talking about the grade of white, but their size.
Ah, can't do much about that.
Damn, at that small size i would have recommended the drill thing, even with a lathe available. :confused
Have you tried sanding paper, or a really good metal file?
I have. Maybe I just wasn't patient enough. That and the fear of screwing them up beyond repair. They are also cone shaped, so they sit up pretty high in profile too.
??? Mine are real Hensoldts, so real reticles.
Sorry, I was referring to the fake reticle that came with the kit. I thought it was a decal on a clear disc because it looks like it has air bubbles in it. However, if it is a sticker meant to go on the glass eye piece, I cannot peel it off.
Lichtbringer
Master Member
Ah, can't do much about that.
Don´t worry, just go a step away, and i´m sure it´s no longer visible.
I have. Maybe I just wasn't patient enough. That and the fear of screwing them up beyond repair. They are also cone shaped, so they sit up pretty high in profile too.
Other than that, and a lot of patience, i would have no better suggestion atm. Sorry.
Regarding the reticle - i´m sure Pat will chime in and help.
kpax
Sr Member
The screws are a bit oversized because that size and shape head are no longer available. You can maybe find better matching one in an old hardware shop, but for production we had to use available stock.
They are not that hard to file if you have a good metal file and some sand paper.
You can also get brass screws that may be easier to work with.
Note that the two real HW scopes have different sized screws! The HERO seems to have the larger ones.
The reticle is as you discovered covered by a protective film. The actual cross-hairs are vinyl cut outs so don't scratch then off!
Don't be sad Clutch, The image below shows a sized comparison of Lichtbringers two samples, the KIT knob and the HERO.
Pretty darn close if you ask me...:cool
Note Clutch's knob - rotated and sized as the real HW.
...and you should all note that the HERO know is set at between 4 and 5 on the dial!
Lichtbringer
Master Member
Don't be sad Clutch, The image below shows a sized comparison of Lichtbringers two samples, the KIT knob and the HERO.
Pretty darn close if you ask me...:cool
Close enough - and if not, go a step away and the difference is no longer visible.
Note Clutch's knob - rotated and sized as the real HW.
...and you should all note that the HERO know is set at between 4 and 5 on the dial!
Due to no requirement with my Hensoldts i havn´t memorized all the assembling details - is the center disc rotating with the whole knob as the real ones, or can it be rotated individualy? I´m asking due to the combined position of screws and markings, when i adjust the real knob between 4 and 5 the bolts have the same position as on the hero-pic.
Lichtbringer
Master Member
no brass, but steel-screws
Markus
Aye - and some discoloration from dirt, maybe even still WW1 dirt. :lol
Clutch
Master Member
Due to no requirement with my Hensoldts i havn´t memorized all the assembling details - is the center disc rotating with the whole knob as the real ones, or can it be rotated individualy? I´m asking due to the combined position of screws and markings, when i adjust the real knob between 4 and 5 the bolts have the same position as on the hero-pic.
The center disc can be rotated to any position. I personally place more emphasis on a correct look than functional correctness. If I could find the right sized screws but the threads were wrong, I would be happy to just glue the whole assembly together.
Lichtbringer
Master Member
The center disc can be rotated to any position.
Then you should be able to rotate the knob until the screws are in the right position, and then loosen the center disc to adjust the outer ring until the markings match in position, then thighening the centerdisc/screws again.

Lichtbringer
Master Member
Ace Hardware was a bust. Screws didn't come anywhere near matching the type I need.
What do you need - head diameter, thread length, metric/imperial, ...?
Clutch
Master Member
What do you need - head diameter, thread length, metric/imperial, ...?
Whatever matches the screws on the right.
Similar threads
- Replies
- 7
- Views
- 1,326
- Replies
- 8
- Views
- 2,891
- Replies
- 38
- Views
- 4,619
- Replies
- 19
- Views
- 3,426