You are using an out of date browser. It may not display this or other websites correctly.
You should upgrade or use an alternative browser.
You should upgrade or use an alternative browser.
ANH Hero DL-44 Discussion - Three ANH Greeblies Found
- Thread starter deadbolt
- Start date
pinder91
Sr Member
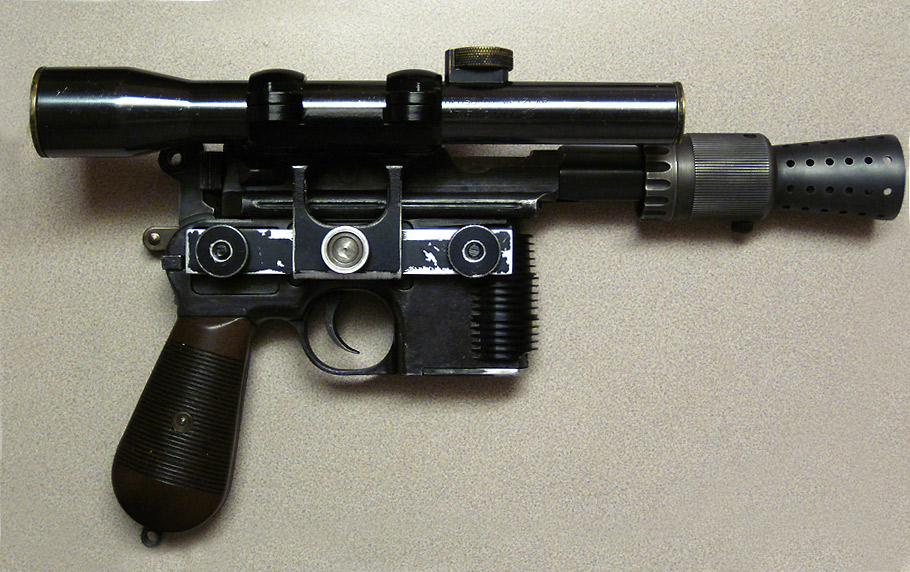
What are you guys using as a spacer for the scope mount bar so it doesn't hit the grill? Just a washer on top of the spacers provided in the kit? Or did you replace them completely? I was thinking maybe some brass bushings (if I can find any in a close size) would fit right in.
Lichtbringer
Master Member
Whatever matches the screws on the right.")
Great answer.
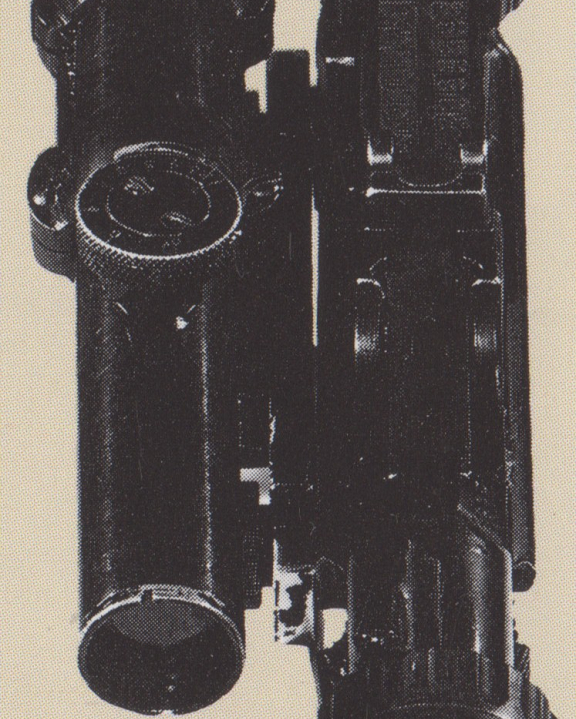
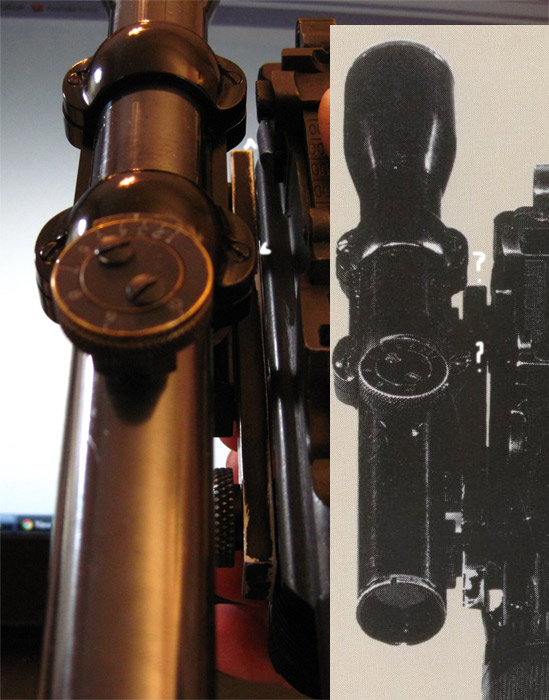
I know - i just asked for that details to keep an open eye here for screws that may possible match your scope parts - or can be modified to fit. Mainly the threading, then the diameter size of the sunken circle of your center disc.
I think the scope is made so detailed, and those little moveable gimmicks are THE difference between a good replica to toy around with, and a static shelf piece. (Aye, i´m 46, but still a child, playing with these toys :rolleyes )
We should try to keep the detail functional, not just glued together cause the new screws only look right.
If that plan fails, we can still go the "just right looking" way.
Lichtbringer
Master Member
If he made them metric, the chances to find something might be better this side off the ocean.
kpax
Sr Member
I think the screws are mostly metric in an attempt to keep everything as accurate as possible. The major online supply houses don't have anything closer than Dave found. The heads are the big difference.
Really is not so hard to turn them down in a drill. As Michael said, it is easier than a lathe really.
I can maybe do a tutorial. Just have to get a good flat ******* file...did I do that joke already?
You chuck the srew in leaving a little of the thread above the chuck. Clamp the drill to a table if you can and run the drill med slow rotating toward you and hold the file up against the edge of the chuck and take short strokes. Go slow and test size or measure. When you have the correct diameter, reshape the head to be domed and finish with emery... simple...right?... I'll try a vid later...
Lichtbringer
Master Member
If i may suggest additional: Cut a small thin plastic disc (maybe around 20mm diameter and 1mm thick) and drill it the threading size (or one drill above, whatever you have available) in the middle. Put this on the screw before chucking it in the drill.
That will minimize the risc of having the file getting into the drillchuck.
Some may find working that way more safe than without. Esspecially if you are not that used to work with fast rotating machineparts.
That will minimize the risc of having the file getting into the drillchuck.
Some may find working that way more safe than without. Esspecially if you are not that used to work with fast rotating machineparts.
Clutch
Master Member
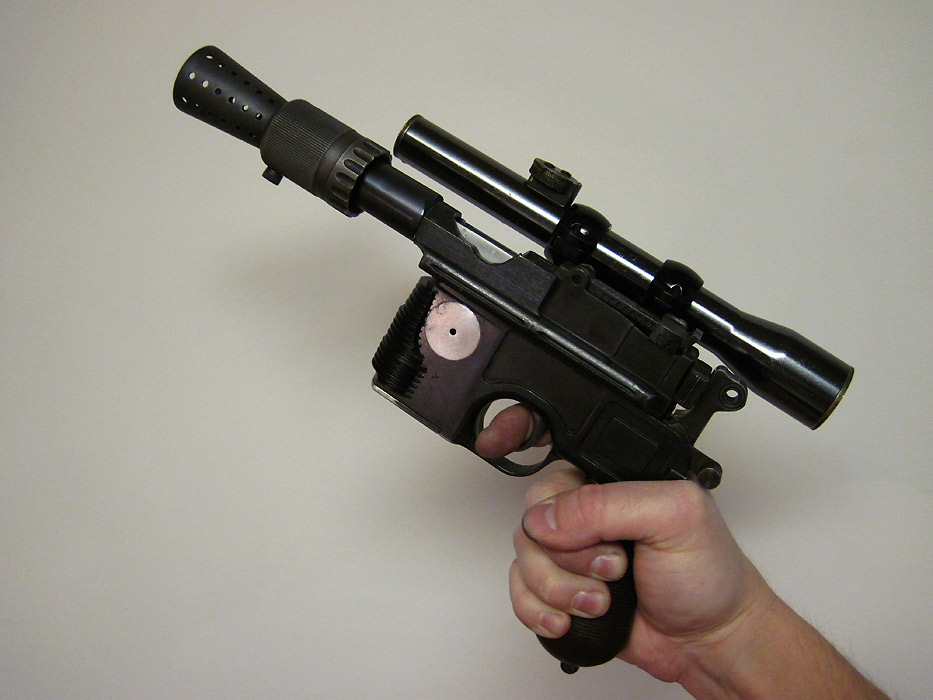
Good advice. I'm obsessing over the scope mount. I think I got mine just a bit too high. Sheeze. I was also looking at the 'above' shot and that scope sits way out from the gun. More than what the kit spacers put it. I'm now wondering if we should really shim it up with an extra washer per bolt? Even one of the previous screencaps shows it floating way out. :lol
kpax
Sr Member
If i may suggest additional: Cut a small thin plastic disc (maybe around 20mm diameter and 1mm thick) and drill it the threading size (or one drill above, whatever you have available) in the middle. Put this on the screw before chucking it in the drill.
That will minimize the risc of having the file getting into the drillchuck.
Some may find working that way more safe than without. Esspecially if you are not that used to work with fast rotating machineparts.
Good advise... and watch the kick back and wear safety glasses!

kpax
Sr Member

new interest thread:
http://www.therpf.com/f13/anh-hero-dl-44-style-blaster-parts-179985/index2.html
Last edited:
kpax
Sr Member
Tried a video tutorial for a homemade drill lathe for reshaping screws and such.
Use at your own risk. :cool
Remember to use safety glasses. Go slow. Watch out for bounce back of file.
You will need: Good FLAT metal file (safety edge preferable but can use ridged, just may file your drill a bit.)
Drill
You can use tape to protect threads but not necessary if you don't over-tighten. Practice on test screws first.
Maybe a plastic washer as Michael (Lichtbringer suggested)
Have fun...
Screw Reshape Tutorial Video by kpax4rpf | Photobucket
new interest thread:
http://www.therpf.com/f13/anh-hero-dl-44-style-blaster-parts-179985/index2.html
Last edited:
Stormy320
Sr Member
Starting to look like something finally.
Looks amazing. I'm too lazy to build one. I'll have to buy a finished one like this some day. :darnkids
Clutch
Master Member
Thanks everyone. I first marked the center of the decal. I then stuck it on the gun and drilled the hole. I carefully aligned the 'border' part of the sticker with the disc and stuck that to the gun. I then peeled the disc off. It was then just a matter of careful sanding, taking care not to damage the edges of the sticker.
Here is my interpretation of the antenna part using some Gino T-Track.
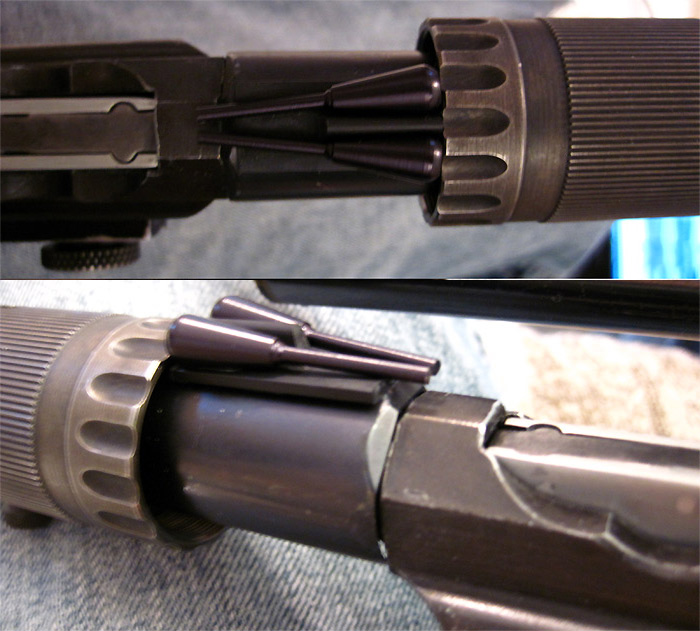
Edit: Just realized the top pic is flipped! Doh!
Edit: Fixed!
Here is my interpretation of the antenna part using some Gino T-Track.
Edit: Just realized the top pic is flipped! Doh!
Edit: Fixed!
Last edited:
Similar threads
- Replies
- 7
- Views
- 1,301
- Replies
- 8
- Views
- 2,859
- Replies
- 38
- Views
- 4,554
- Replies
- 19
- Views
- 3,404