Sym-Cha
Master Member
Re: Obi ANH saber. Where to place the cotter pins and 'figure 8' holes?
Hi Markus,
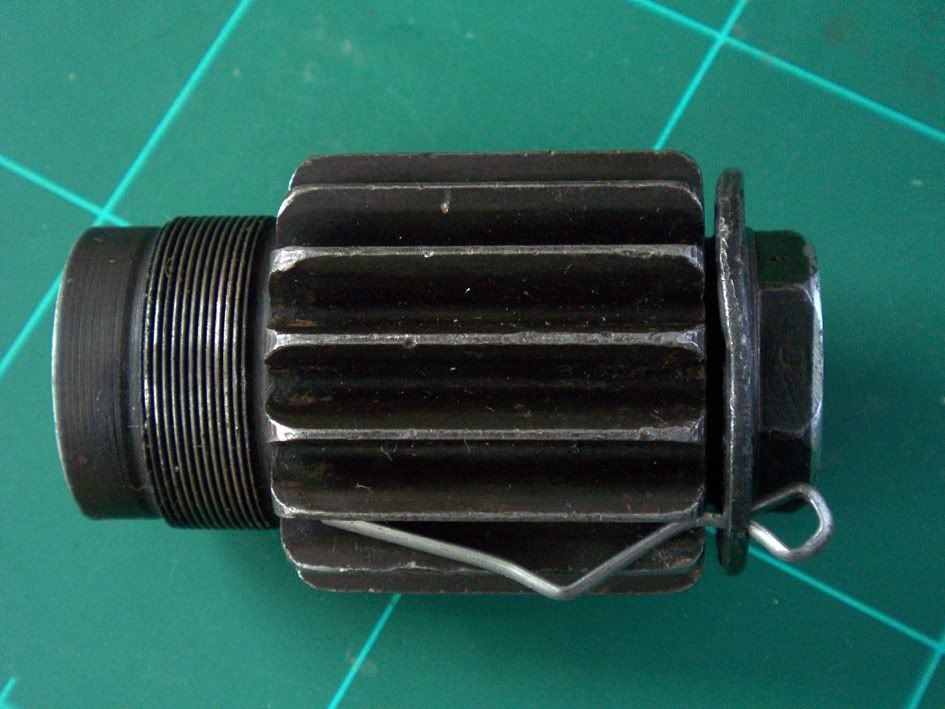
I always though that the figure eight hole is made from 2 'O' drill holes which partly overlap in the middle thus the occuring of the figure 8. That way if you now push the cotter pin once through the first hole and then pull it tight towards the booster so that it gets stuck in the second 'O' of the eighthole ... savey? So there's no need to go in and back out!
-Chaim
Hi Markus,
I always though that the figure eight hole is made from 2 'O' drill holes which partly overlap in the middle thus the occuring of the figure 8. That way if you now push the cotter pin once through the first hole and then pull it tight towards the booster so that it gets stuck in the second 'O' of the eighthole ... savey? So there's no need to go in and back out!
-Chaim


") That's exactly what I meant Clutch ... I have no figure eight-holes in any of my graflex clamps yet,
That's exactly what I meant Clutch ... I have no figure eight-holes in any of my graflex clamps yet,