Aliens APC 1:18 scale with interior

Thanks indeed TazMan2000, that's high praise coming from you.

The surroundings of Gorman's console got some love today, including the odd structures on the ceiling which are actually wartime gun sights.

APC_21092801.jpg


The ceiling gets a temporary look-see.

APC_21092802.jpg


From the door it looks OK. It's too dark yet but there's more interior ceiling lights to add. I might even keep the light leaks under the desk, they're pretty cool. We'll see.

APC_21092803.jpg


Next - a view with the roof off!

APC_21092804.jpg


And lastly a look at the console from Apone's POV.

APC_21092805.jpg


Lots of paint detail, fibre optics (maybe) greeblies and finessing to add yet.
 
Great work. Love the seat adjustment track detail. Exactly like used on light aircraft which also permitted easy removal for inspection below flight deck.
 
Thanks Tazman2000, it's staying!

Thanks Searun - that rail solution seemed the easiest most logical way to to it.

I've been asked 'Why eight screens across'. The blueprint by Graham Langridge has seven - as do other sources I've found, and there isn't really a clear view of the full bank of screens in the live action set but I suspect it's seven too.

So, why have I put eight in?

Going by seating, there's the driver at the front cabin, the gunner (particle beam phalanx) behind him, the commander (Gorman) at the console - that's the three minimum APC crew, echoing what happens in real APC design. So the rear bay of eight seats and two lots of two seats makes up to 12 'active' troops who could/will need monitoring when they disembark. Therefore two banks of two and one bank of eight. There are of course two screens for each squad member, one bio, one cam feed - for a total of twenty four.
 
One of my jobs to finish is the interior ceiling in the rear bay.

APC_21100701.jpg


I dug out the ammo boxes I printed out and started to arrange them - sorting out how many I'd like to use. They'll be stored between retaining bars just like the ones on set (as seen behind Hudson's head in the printed screenshot).

APC_21100702.jpg


Wiring continues to bug me, but it'll get sorted out. I'll be re-routing the switches to outside the model to avoid having to take the roof off to turn interior/exterior lights on or off.

APC_21100703.jpg


I'd been working on the rear bay ceiling so I tested to make sure that the bulkhead lights are still working.

APC_21100704.jpg


While I was adding ceiling detail, I routed the wiring for the main searchlight, so that got a test too.
 

Attachments

  • APC_21100701.jpg
    APC_21100701.jpg
    174.3 KB · Views: 101
  • APC_21100701.jpg
    APC_21100701.jpg
    174.3 KB · Views: 106
  • APC_21100701.jpg
    APC_21100701.jpg
    174.3 KB · Views: 106
  • APC_21100701.jpg
    APC_21100701.jpg
    174.3 KB · Views: 109
Thank you so much, Joberg!

For this update I've carried on developing the inner ceiling spaces. The rear bay in the live-action set has a ribbed look to it.

I had produced some of that effect on the back wall using styrene strips but since there's a lot more here, I thought a 3d print would be better - more regular looking and definitely quicker to produce.

APC_21101101.jpg


I printed three copies, one for each of the three surfaces.

APC_21101102.jpg


They got trimmed, applied, and a little primer added. I also put some 'plate' detail on the ceiling above the central section - the 4 green strips are cut from tank side-skirts. :)

APC_21101103.jpg


Here's a closer look at the brass bars I've installed to hold the ammo crates in properly - just as they were on set.

APC_21101104.jpg


This last image kinda shows what the ammo storage looks like. I'll glue everything in place once it's all painted up.

APC_21101105.jpg


So, onward! (Probably to more lighting, wring etc).
 
Thank you Joberg! Yes indeedy - I'm not doing all this work to hide it all away. :)

I figured out the best way to get inset lighting into the cross-members - I just made LED shaped square holes in the cross-member and planted LEDs in the gaps, so they shine both sides.

APC_21102600.jpg


Now I get lighting both front and back. I'd done some work on the ceiling pieces (including the gunner's controls and sight) so I thought I'd take some more shots.

APC_21102601.jpg


APC_21102603.jpg


The red LED I put in the driver's cab is producing the right effect.

APC_21102602.jpg


APC_21102604.jpg


I'm happy with the view from Apone's seat. There's still detail paintwork to add to everything but I'm liking the effect.

APC_21102606.jpg


From back here the place is looking pretty good. I think this is my favourite shot of the lot - looking forward to the driver's cab from right at the back.

APC_21102605.jpg
 
Thank you all very much, folks. That means a lot looking at some of the builds you have achieved.

I am toying with getting a web-cam based mini-camera to get some better pics but just sticking my phone in and snapping away seems to work quite well.

There's more detail to add to the ceilings and walls - baskets of gear, winches and other devices, signage and paint variation. Plenty left to do. I have a slight worry that the whole lighting setup (including cabin lights and the seat restraint bars) might be too bright but if that's the case I'll throw in a resistor or two to bring it down a little.

I don't know if I've mentioned it yet but I was hoping to use figures from Marauder.inc but they don't ship to the UK so I'll have to think again on that.

I've been asked if there's a drop ship on the horizon - if there is, it's pretty far off but never say never. :)
 
A quick update: I've not had any time to continue with the build (very busy at work) but I've been very fortunate due to the help of our very own Epsilon on the Aliens Legacy boards. He messaged me to say that he had 1:18 scale figures that he'd like to send to me if I could cover the postage costs.

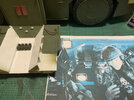
Here's what he very kindly sent me:

APC_21111401.jpg


There's a Hot Toys Drake and Apone (or Frost?) and an unbranded Merc who will be very useful. I'll be able to repair the joints where needed and noted that these Hot Toys figures are SO much better than the newer Hiya Toys ones. Epsilon also sent me this guy (below).

APC_21111402.jpg


With a lick of paint on the uniform this guy is a perfect Lt. Gorman! He looks very much at home in his command chair. :)

Another friend, a local mate who came to visit yesterday, brought me this string of cool-white micro LEDs, perfect for interior cabin lighting.

APC_21111403.jpg


There are a ton of LEDs here - more than enough!

APC_21111404.jpg


They light up really well - not too bright and they'll look the part when incorporated into the APC.

APC_21111405.jpg


Here's a look at the size of the individual LEDs against a scalpel blade. It looks like there's a little blob of hot glue type stuff on each one, which makes them look like 'emergency' lights. I'll just have to scrape or burn off the lacquer coating on the wire when I solder them together.

I feel blessed to receive such kindness from forum buddies and local friends alike and I'm really looking forward to getting back to it.
 
Yay! I got a couple of hours in on the APC. :)

APC_21112901.jpg
APC_21112901.jpg


Yes, the colour of the rear lights has been bugging me for a while. I made mine red, thinking logically and not even checking any reference.

APC_21112902.jpg
APC_21112902.jpg


Of course they're blue in the movie, so my red LEDs got dug out and replaced with blue. I needed to shave them down on the dremel to get rid of the 'dome' top.

APC_21112903.jpg
APC_21112903.jpg


APC_21112904.jpg
APC_21112904.jpg


Next step was light blocking with thick black acrylic. (I'm sure I've been here before). :)

APC_21112905.jpg
APC_21112904.jpg


There we are. It looks a little weird on camera but looks fine in real life.

APC_21112906.jpg
APC_21112905.jpg


Gorman got a couple of khaki base coats too.

APC_21112907.jpg
APC_21112906.jpg


Last up for today, I tackled the searchlight brush guard. Brass rod was bent up, glued into pre-drilled holes and given a lick of paint.

APC_21112908.jpg
APC_21112907.jpg


APC_21112908.jpg


There we go. The exterior of the APC is all different shades of Olive Drab at the moment. I can't get a regular paint to match what's in the rattle can. It'll get a final overspray from that but I only have one can left, so that'll be one of the last jobs.
 
Nice update Skiffy really is coming together with these little jobs - loved the kind donation of extra troops, really shows there's some very kind people out there.
After asking a custom figure maker as to where he got his bits from, I went to order some figures from Marauders-Gun Runners you spoke of and also found out they don't ship to the UK - I did question them as to why, and it seemed it was down to too much paperwork -which I found odd considering just about everyone else I've bought things from in the USA over the last couple of years have shipped to the UK?
I did however ask the fellow customizer to order them to his address in the end and get him to ship to me, took three months via a strange convoluted USPS tracking - landing in the UK, then headed to AUS, then back to Blighty, but got them in the end and gained a new friend.
Can't wait for more updates...then you can get started on that Dropship :rolleyes: :p
 
Thanks Chuffy - I should have a new video update ready soon - concentrating on the lighting of the APC. The pandemic and teaching duties have been kicking my arse of late, but hopefully more to see before too long. :)
 

Your message may be considered spam for the following reasons:

If you wish to reply despite these issues, check the box below before replying.
Be aware that malicious compliance may result in more severe penalties.
Back
Top