Aliens APC 1:18 scale with interior

Welcome to the club when trials and errors are your daily bread:p Silver lining: you learn as you go and you'll be able to solve the same/similar issue in the future! Looking very good(y)(y)
 
Chrisisall, Analyzer - Thank you very much! It's been a long road but it's encouraging to see it now coming together. :)

Joberg - Thank you and, yes, there are always mistakes. It's like the old proverb 'He who never makes a mistake never makes anything'.

3d printing is not currently my friend. I'm having tech issues to do with a system board so in the meantime I fall back on good ol' hand-built components. There's a lesson there. :)

APC_21033001.jpg


These parts will form the padded pieces that sit in the seat restraints. the hinges are hand made and are about as small as I can work (old eyes, old hands) at 3mm x 4mm.

APC_21033002.jpg


I managed to file these two into the same shape - pretty much. Feeling like I needed a bit of a boost I chucked some NATO green on them.

APC_21033003.jpg


Wow - they're looking very nice if I do say so myself. 2 down, 10 to go. :)
 
Thanks Chuffy 70 - I'm looking for a new supplier for these tiny LEDs, my go-to guys don't post here anymore (bloody Brexit). When I find one I'll let you know. :)

Found some - 10Pcs 20cm t0603wm pre-soldered micro 0.1mm copper wired white smd led 060;UK | eBay

I was happy with the progress so I did a little more tonight, including adding the new lighting idea (back to back LEDs).

APC_210330a.jpg


They look great and will get some light blocking paint in the middle and at the edges.

APC_210330b.jpg


I found a couple of folks to test it out for me. :) 
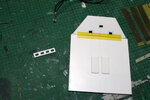
It looks good in the light but better with it off.

APC_210330c.jpg


APC_210330d.jpg


This worked really well so I'm looking forward to doing the rest - especially the back eight - and seeing how they all look together.
 
Last edited:
thank you alienbuilder. I'll try to recreate as much of the interior lighting as I can without flooding the place with light.
That is such an awesome build! I have seen many builds with fully decked out interior lighting that were way too bright for my tastes. The lights themselves were IMO always placed in the right spots, but the brightness of the light sources, at least when photographed, were almost always too bright, with blinking lights often being too fast. I think that toning down the light intensity makes detail pop out, I love that light and shadow in that picture with your test personnel ;)
 
Very nice that seating set-up! Love the lighting of the soldiers and when everything will be said and done, I'll eagerly wait for pics of the inside with all of those details and stuff (y) (y) :cool: :cool:
 
Thank you so much DaddyfromNaboo, Joberg. I'm looking forward to seeing some of the lighting come alive too.

I started to give the interior rear wall some love. I've provided a gap between the inner and outer so that I can route cables through for the lighting.

APC_21040101.jpg


The two panels on the back are in place - they'll be painted red and I think they're fire blankets. I'm making surrounds for the lights in a block of four so they're easier to work with (there's a spare there in case of a fubar).

APC_21040102.jpg


Here I've test-fit a shaved down LED in the top slot along with checking the general fit overall.

APC_21040103.jpg


The light surrounds are in place and I've started on the ribbing on the ceiling panels.

APC_21040104.jpg


..and here's the finished article in place but not glued in - I've got the LEDs to fit in yet.

APC_21040105.jpg


..and lastly, a shot of APC Central. I really need to tidy up but I'm too busy. :)
 

Attachments

  • APC_21040101.jpg
    APC_21040101.jpg
    180.8 KB · Views: 89
  • APC_21040101.jpg
    APC_21040101.jpg
    180.8 KB · Views: 85
  • APC_21040101.jpg
    APC_21040101.jpg
    180.8 KB · Views: 79
  • APC_21040101.jpg
    APC_21040101.jpg
    180.8 KB · Views: 83
  • APC_21040101.jpg
    APC_21040101.jpg
    180.8 KB · Views: 83
I am so enjoying watching the rapid progress on this build skiffy !

Funny you call your work space "APC Central", I call mine the "Nostromo Central":cool:, and I wish I was as tidy as you are! my place is a mess!
 
I am so enjoying watching the rapid progress on this build skiffy !

Funny you call your work space "APC Central", I call mine the "Nostromo Central":cool:, and I wish I was as tidy as you are! my place is a mess!
Same here mates:p!! As long as you have the space to build, who cares about the outer layer :lol:
 
Thank you NostromoCrew, Joberg. luckily my wife isn't that concerned about the state of this corner of my attic studio. She is threatening to come up and 'clean' sometime soon though. :)

I'm making good progress while I wait for more of the micro LEDs to arrive. I've been prepping the seat restrain components.

APC_21040201.jpg


That's a lot of seats. :)

APC_21040202.jpg


I carried on with the back wall, installing the regular LED lights. Here they are ready for soldering.

APC_21040203.jpg


And here are some of the connecting wires ready for tinning.

APC_21040204.jpg


It's alive! (I'm not showing the mess of wiring on the back though - lol)

APC_21040205.jpg


The diffusers work really well - these look quite a lot dimmer in person.

APC_21040206.jpg


I couldn't resist priming and painting the back wall and doing a temp install with a few of my helpful test guys.
 
A small update today. I've done some work on the upper roof area but that's not very interesting - I'll show it later.

APC_21040501.jpg


Today I've been 3d printing ammo boxes. I need 5 so there are 3 spares there too. One of these hit Gorman on the head. :) I thought about making them hollow, hence the 2 part build up but decided not to bother.

APC_21040502.jpg


After sanding to give a gluing 'key' the halves were joined.

APC_21040503.jpg


And painted olive green. I'll be adding some teeny tiny lettering to these, either by hand or decal transfer.
 
^^Beauty mate (y)
Thanks Joberg! I'll need to start tidying up the wiring loom soon and install the battery boxes.

As I indicated before, I've been working on the roof and the exterior panelling. There are also little gaps where some of the styrene plates of the structure join together that need filling.

APC_21040801.jpg


So here I'm filing, sanding and adding filler to smooth things out. The wheel that is masked off couldn't be persuaded to detach and I didn't want to force it and break the axle - so it's staying. :)

APC_21040802.jpg


The other side got some love too. While I wait for supplies so I can finish off the seat restraints (more LED bulbs) I started on more of the curved pads that sit against the marines' chests. I need 10 of them.

APC_21040803.jpg


The best way to get these to 'set' in the correct curve is to use thin styrene and laminate two pieces together.

APC_21040804.jpg


The outer piece has a square hole in the middle to take the centre hinge.

APC_21040805.jpg


Lots of drilling, cutting and filing. :)

APC_21040806.jpg


.. and there we are. 20 of the little buggers.

APC_21040807.jpg


They all need a curved profile so I bent them all with pliers.

APC_21040808.jpg


A slow-set cyano was added to them and they were then taped to a former with the correct radius - which just happened to be a refil tube for Molotow chrome paint. :)

APC_21040809.jpg


Then I had to make the hinges. They were formed around a section of brass tube that was the correct diameter.

APC_21040810.jpg


Here's an overview of the primed wall/roof area ready for a final sanding.

APC_21040811.jpg


..and lastly another 'all-up' view. The whole thing is starting to weigh quite a bit now. It's got a nice heft to it. :)
 
Wow...I came back to the first pages of your build and...man!! Lots of work and trials and good things happening throughout (y) (y) :cool: :cool: Keep up the great work!!
 
Very kind of you to say, Joberg. I often go back through the early pics to remind myself of where everything started, and how far it's evolved. I'll be back teaching at University (remotely) next week so progress may slow a little.
 

Your message may be considered spam for the following reasons:

If you wish to reply despite these issues, check the box below before replying.
Be aware that malicious compliance may result in more severe penalties.
Back
Top