That makes sense. Do you know why the clavius suits were not leather?I believe the suit in the exhibition to be one of the coloured ones from the Discovery which was repainted for a pickup shot. These suits were made from leather, whereas the ones used on the moon were a silver Lamé type material.
You are using an out of date browser. It may not display this or other websites correctly.
You should upgrade or use an alternative browser.
You should upgrade or use an alternative browser.
2001: ASO Clavius Suit
- Thread starter pkashukjr
- Start date

Second coat of white epoxy on helmet, first coat of black epoxy on neck ring which will also get 3 coats with wet sanding. I'm using black on the metal parts so I can use Alclad chrome on them.
I wanted to be farther this week, but last month, my cheap laser cutter died. I upgraded to a MUSE which only arrived this past Tuesday. I set it up, started cutting, and a day later the power supply went. Now I need to sort that out so I can start cutting the data cartridges. In the meantime, thanks to wannab for the auction catalogue link, I'm redesigning the data carts now that I can finally see what the actually looked like. here is my new layout. Again, I'm not going for screen accuracy, so I have an idea on how to tech it up a bit.
I wanted to be farther this week, but last month, my cheap laser cutter died. I upgraded to a MUSE which only arrived this past Tuesday. I set it up, started cutting, and a day later the power supply went. Now I need to sort that out so I can start cutting the data cartridges. In the meantime, thanks to wannab for the auction catalogue link, I'm redesigning the data carts now that I can finally see what the actually looked like. here is my new layout. Again, I'm not going for screen accuracy, so I have an idea on how to tech it up a bit.
Attachments


Last edited:
I really am just going with the flow, and figuring it out. Im not starting other parts till I finish the helmet. The auction pics accelerated my thoughts for sure. My next large 3d print will be the chest pack, since I have that more or less modeled, but im modifying it a bit based on the new images.What an amazing build, I'm really impressed. Have decided the order in which you plan on building everything? I really appreciate you posting in my thread, your impressive work may have rekindled my creative flame. Thank you!
In parallel, im going to start to figure out the pattern for the fabric parts of the suit. Since I'm not going for screen accuracy, I may put the cuff keypad on there...it's a cool detail...curious as to what people think of this idea?
... I may put the cuff keypad on there...it's a cool detail...curious as to what people think of this idea?
I for one think it's a good idea, except I'f finish designing/printing the glove-to-sleeve couplings to ensure everything will fit properly. In regards to your pack, are are you planning on 3D printing the entire assembly or augment it with other materials (PVC, Plexiglas, plywood)?
I'm amazed by your helmet design/print. What was your method for determining the proper size? It looks well proportioned and properly scaled. -- Cheers
For the packs, I will probably stick with as much 3d print as I can. I'm using carbon fiber filled filament which has some strength to it. The Epoxy coating I'm using seems to help add a bit of strength. I will add additional strength by resin/fiber reinforce the prints from inside. The detail will be a combo of 3d resin prints and laser cut acrylic.
As for determining the size, I started by scrubbing the film for frames that were as orthographic as possible, taking into account there would be some foreshorting issues, but was able to find enough that got me into the ballpark. I cut out the silhouettes in photoshop, scaled them against each other using the neck ring and mission patch logos as my reference points since their circular nature lended to them being the same dimensions at different angles. I then imported them into MAYA as image planes to model from and went at it, constantly looking at the film to determine that it "felt right" from all angles.
Once I was happy with the general shape and proportional relationships of the details relative to each other, I went to determine final scale. I started with the premise that the Apollo program neck rings in general were 11 inches and started there. I have a slightly larger than average skull/head size so my final outer dimension of the neck ring ended up being 11.5 inches because I determined I needed a 9.5 inch interior diameter so I could comfortably put it on which bumped my scale overall up slightly.
As I mentioned earlier, once printed, I wasn't happy with the data cartridge port and a couple other minor issues so I modified these areas with some cutting and some JB Weld.
Here are some of my better images from the film. I only used film reference in the modeling stages:
Attachments
Thanks. Part of the fun for me is the "study the film" detective work for my modeling. Again, I'm not going for screen accurate. Call this my interpretation of what the original design intent was, not look like or match a prop suit.I would think there would be easier reference to help on size. Especially the neck seals.
Either way it looks great.


Sorry, that I don't know.That makes sense. Do you know why the clavius suits were not leather?
I find both suits equally stunning and would dearly love to own one of each.
I was looking back at the film, the pick up shots must have been the attached scene, when the lunar lander was approaching Clavius...you can clearly see the wrist pad. I'm going to put it on mine for sure now.That makes sense. Do you know why the clavius suits were not leather?
Anyone know if there is any reference of the camera the astronaut is holding?
Attachments
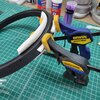
Got my Muse laser cutter up and running, so I'm starting to cut the rest of the details...starting with the lines for the backs of the neck ring recessed slots. I even cut some curved blocks to hold it at the correct radius while the glue dries.
Attachments


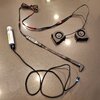
Purchased a helmet fan kit off Etsy and with a little Amazon creativity, I'm going to make it power on by hiding a magnetic phone charging cable in the neck hose and hiding the USB charging pack in the back pack.
Attachments


Correct. Suits were repainted for pickups.
I was looking back at the film, the pick up shots must have been the attached scene, when the lunar lander was approaching Clavius...you can clearly see the wrist pad. I'm going to put it on mine for sure now.
Anyone know if there is any reference of the camera the astronaut is holding?
This should help with the camera, 2001archive
Thanks!This should help with the camera, 2001archive
Similar threads
- Replies
- 110
- Views
- 16,297