gt350pony66
Master Member


Man... I like the added detail you guys are putting around the engines. I was tempted to leave mine be, but the more I look at all the flat empty panels, the more I want to start chopping up some styrene stock too. Good idea to extend the LEDs for the engines too. I was just going to drill the cones that the bells mate to, but after testing it had more of a "flashlight" effect than actually illuminating the whole bell. Ill give this a shot.
INVAR: top notch trenches. I didnt realize how narrow the stock trenches looked until I glued them to the bottom hull half and test fit the top half. They could have made them half again as tall.
That's pretty impressive. I wouldn't sweat it too much as it looks pretty fantastic even if it's not up to your expectations
View attachment 780872View attachment 780873almost there, one more good evening at the table and the greeblies are done, then set the new bells. Then I suppose it's on to the trench raising...I've come this far, may as well go the rest of the way, right? I'll admit I've had to fudge some things cause I just didn't have the right pieces to look like Invar's...and then some stuff I'm asking myself..."how'd he do that?" But, it's good enough for who it's for. It's amazing to step back and look at just how much extra stuff is added to this one panel. Invar had a lot of fortitude to tackle this in the first place. :thumbsup
G’day mate ,
been following this thread for awhile now and have it subbed . First off , thanks for sharing your build ( along with the one you had for the MF awhile back ) .
Secondly , ( for what it’s worth ) I think you’re doing a bang up job with all the extra greeblies you’ve been adding to what was once a pretty sparse engine area . You keep saying ‘ it’s good enough for who it’s for ‘ - right !? . Well , start believing it , cause it looks bloody good !
:cheersGed
Extending the height of the trenches looks great, but Ive glued the rear piece to the lower hull section. How or where did you shimm it ro match the new trench height?
hey there Ged, welcome! Thanks for the kind and encouraging words, most appreciated. However, none of it would have happened without Invar, Omnius, Escape, and the other guys doing this build. I'm all about the lighting aspect, but the add-ons that I've done are just following the other guys. There are some really clever minds on here, doing amazing things. That's why when I started this thread it was an open invitation to all who wanted to jump in, make friends, and collaborate and share. In turn, I think everyone's builds are better for it. We're all having a great time with this build and hopefully more in the future. Glad to have you aboard :thumbsup
All these builds are looking great with so many cool ideas making it hard to finish it. I keep doing extra stuff after seeing all these custom add-ons.
Some progress pictures and LEDs I'm using to light it with:
Neatly running all the lower FO to the rear to light with (2) 8mm cool white LEDs. Will be using tubes to hold down all the FO. A total (5) 8mm cool white LEDs to light all the FO and (2) 3mm red LEDs for some accent FO. This does not include the engine bells and hangar bay. I'm also going with cool white for the 3 accent points on each side of the trench with 0402 super small SMDs
View attachment 780900
Did the same with the front top
View attachment 780903
Added detail top:
View attachment 780904
Leveled the command tower and finished off where it connects at the back. The magnets hold it down very tight and flush you cannot tell its not glued which it will not be.
View attachment 780905 View attachment 780906 View attachment 780907 View attachment 780908
A closer look at the inside of the garbage chute with a back wall. I lit with flashlight for this picture. I chose a red SMD to light the interior of it which looks really cool.
View attachment 780909
I used tubes to run the LEDs for the engines. The smaller one fits into the larger tube so I can adjust how far the LED is inserted into the engine bells to get the most flooded / lit look. I'm trying out 5mm clear blue, clear white, diffuse blue and diffused white LEDs to see which ones have the best effect for the engine bells. The larger 8mm clear LED is for the FO and the 2mm diffused white LEDs is for the hangar bay.
View attachment 780910 View attachment 780911 View attachment 780912 View attachment 780913
Hangar bay Diffused LEDs
View attachment 780914
Waiting on an order of Evergreen to do all the effects around the engine bells
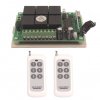
I tested the 6 channel RF wireless remote switch and it works really good. I also tested the Model trains IR dimmer switch with 3 sensors and that works really good. I will be using both together.
View attachment 780918 View attachment 780919
That's all for now!......Keep the build pictures coming
Very nice Escape. The red smd leds are a cool idea. Im picturing the red lights coming on right before the eject the junk into space!
I know right!? I love it! Looks great!, Escape..."great escape" lol...great movie. I love how neat and orderly you keep things. I'm trying to myself, somewhat. I'm just about finished with the engine panel and ready for the new bells, but still wondering what to paint the inside of them to wash out the LED sticking out there, much like yours. I thought I had resigned the idea of raising the trench walls, though I still could...but seeing Invar's, I feel like I have to now, or I'll wish I had later. So I'll have to jump over to his thread a color print som pics to go off of. This build, with all of us throwing in, (you guys more than me really) is just awesome. I think I'm gonna be sad when we're all finished :cry
Extending the height of the trenches looks great, but Ive glued the rear piece to the lower hull section. How or where did you shimm it ro match the new trench height?
A few pictures.......They are not exact to what I'm seeing but they give you an idea....The blue in person is all blue without any purple that you see in the pictures.
Diffused White with cover:
View attachment 780931
Diffused White no cover:
View attachment 780932 View attachment 780933
Diffused Blue with cover:
View attachment 780934
Diffused Blue No cover:
View attachment 780936
Wide Angle Blue with cover:
View attachment 780939
Wide Angle Blue no cover:
View attachment 780941
Wide Angle White with cover:
View attachment 780942 View attachment 780943 View attachment 780944
The pictures don't show brightness and color the way I'm seeing it but hope it serves as a guide.
To me the wide angle LEDs in blue or white with the cover is slightly dimmer then without the cover but I think it looks best when compared to the other ones.