You are using an out of date browser. It may not display this or other websites correctly.
You should upgrade or use an alternative browser.
You should upgrade or use an alternative browser.
1:1 Scale Snowspeeder (T-47 Airspeeder) build.
- Thread starter MrV
- Start date
MrV
Sr Member
Confirmation of my measurements continues. The overall cockpit space is pretty tight now that i am starting to install the Port and Starboard control panels either side of the cockpit. I was pretty excited to finally sit one of my latches in place and do a photo compare.
I calculated the panel sizes through the latch (RW found part-Thanks Wavey!) and Uher slider knobs.
The control panels are a structural base of pine with the detail of the panels made from 5mm MDF (A composite type board).
"Attack pattern Delta!"

I calculated the panel sizes through the latch (RW found part-Thanks Wavey!) and Uher slider knobs.
The control panels are a structural base of pine with the detail of the panels made from 5mm MDF (A composite type board).
"Attack pattern Delta!"
MrV
Sr Member
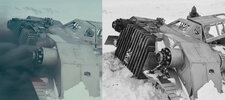
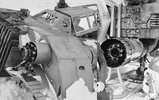
Had to visit the T-47 spare parts shop (side of the road) and started to collect some great detailing parts. One of them this old vacuum cleaner that i pulled apart. I will use this for some of the rear engine detailing. The only good photo of this area is the one below. other than that all of the models and toys have various design details that dont match. Looks like a motor cycle sprocket in the center but these are expensive so until i find a cheap one the Vac greebles will do.


MrV
Sr Member
My design for the rear is as per my sketch below. Greebles recessed within a frame that the cooling fins will be attached to. I built up the engine in layers to give it some depth, added pipes and tubing and a random VW door lock i had lying around. Bear in mind most of this is hidden by the cooling fins.
I then made a giant jig to cut the fins to shape so they all matched. I then clamped them all together and hit them with the sander so they all match perfectly with rounded corners. Still some wood grain showing so i will coat with a filler to get a nice smooth finish later.


I then made a giant jig to cut the fins to shape so they all matched. I then clamped them all together and hit them with the sander so they all match perfectly with rounded corners. Still some wood grain showing so i will coat with a filler to get a nice smooth finish later.
Lt Washburn
Sr Member
Those parts suck.
/jk
/jk
David3
Sr Member
MrV
Sr Member
I know right. I wasn't going to show that part of the build until it was complete. Everything now has a coat of Matt black with some gunmetal detailing, looks like it has just been reclaimed from the battlefield!Those parts suck.
/jk
Lt Washburn
Sr Member
Just in case my joke was not obvious...I mean they suck because they are vacuum parts. I was a little worried someone would think I meant to be rude.
MrV
Sr Member
Got the rear cooling fins completed that will feed the tow cable. It was a bit more work than i expected but happy with it. I cannot do the film accurate detailing as this will just not be practice for the smooth flow of the cable. Within the box section i will insert parallel rollers for the cable to feed through. Good shot Janson!

MrV
Sr Member
Good progress this weekend. Got the internal panels filled, sanded and primed. Started the dashboard. Again, so many angles on angles. I printed the dash out 1:1 scale and transferred the measurement so i have something pretty accurate. There are actually only two shots in the entire sequence where you can see the bottom area of the dash so i have worked with that (caps below).
I going to sand and fill the dashboard to a pretty smooth surface so it looks just like it has been molded to fit the cockpit like a car dashboard. I have "blocked" out the internal corners so i can sand some smooth, rounded edges and not get caught on nails.
The 4k versions seem to show some pretty menial red graphics on the dash so i might get a little more creative there...
MrV
Sr Member
Yes, the two up one down tube arrangement in standard Rebel Alliance engineering 101 (I totally made that up). Great spotting...again...The X-Wing has a similar exhaust tube system.
That photo you posted of the back is about the clearest available. Also where the cable release shot has some nice detail.
Well, i am almost at the stage where i can sit in my snow-speeder and tinker. I always wanted to say that
PHArchivist
Master Member
LOL I was wondering if 1:1 meant "studio scale - as in model!
Similar threads
- Sale
- Replies
- 6
- Views
- 696
- Replies
- 48
- Views
- 5,864
- Replies
- 10
- Views
- 382
- Replies
- 8
- Views
- 2,303


