MrV
Sr Member
Everybody has fantasies. Some achievable, some not. But this one is within my grasp.
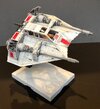
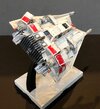
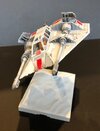
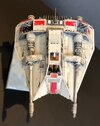
Fresh off our Speeder bike build i am feeling pretty confident to build a version of the Hoth Snowspeeder. I plan on building a version that will be the same size as the full size prop (See my sizing research link below) used for cockpit close ups and Echo base shots. The reason for building this size is;
a) Will fit into my garage.
b) Easy to build on a movable trailer that will be road legal.
c) My wife says she can use it as a coffin for me..
Bike build here.

 www.therpf.com
Snowspeeder sizing research here;
www.therpf.com
Also i dip my hat to Forum Member blewis17 who posted this totally relevant commercial. So funny.
Fresh off our Speeder bike build i am feeling pretty confident to build a version of the Hoth Snowspeeder. I plan on building a version that will be the same size as the full size prop (See my sizing research link below) used for cockpit close ups and Echo base shots. The reason for building this size is;
a) Will fit into my garage.
b) Easy to build on a movable trailer that will be road legal.
c) My wife says she can use it as a coffin for me..
Bike build here.
Full size 74-Z Speeder Bike build (ROTJ)
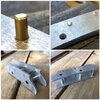
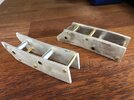
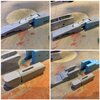
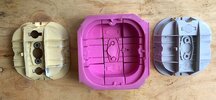
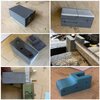
Not happy with the engine covers as they were asymmetrical. A few layers of builders bog and some sanding have improved this area. One i think i had never noticed, That Wormy pointed out is the small winged edges in this area. These can clearly be seen in the Bandai model.
www.therpf.com
Snowspeeder sizing research here;
Snowspeeder-Full size studio prop-just how big was it? Case closed with found part.
It has been mentioned in previous posts that have not come up with a definitive answer... but i want.....an answer! Just how big was that full size studio T47 Air speeder (Snowspeeder)? Nobody seems to have an answer. General agreement would say the full size scale is around 5.1-5.3 metres...
www.therpf.com
Also i dip my hat to Forum Member blewis17 who posted this totally relevant commercial. So funny.
Last edited:

") I enjoyed your thread on determining the scale - the discovery of the slide carousel was pretty remarkable.
I enjoyed your thread on determining the scale - the discovery of the slide carousel was pretty remarkable.