Weathering Air Brush or Brush

youngwm

Active Member
I am new to air brushing with some practice on an old toy or paper this weekend I hope to start painting a fine molds kit.. By next week I should be ready to weather. What is the recommended technique air brush or paint brush.. I know that it probabbly depends and maybe its even a little of both but hey I just wanted some experienced modeler's advice. I tried to research air brush weathering on youtube and really did not find much other than a little weathering on train cargo cars..

Thanks
 
Brush and Oil work great, so does an airbrush. Whatever you're comfortable with.

There are a million ways to weather. It depends on what effect you want. Rust, chipping, fading... Also dry-brushing is great for certain things.

FB
 
I prefer brush over airbrush for weathering. In my opinion, you have more control over what it is you are trying to do. When you make a blast point with an airbrush it tends to just loo like a streak with out a point of impact and burn scarring. I like to take my brush and dab some paint where I want the blast point to start, and then take my finger, dry brush or cloth and smear it backward. It gives a natural fade as the paint thins as well. You can then go back and add rust around the damaged area with a brush. Just my opinion.:confused
 
I prefer brush also. When I use the brush I feel more like an artist working on a masterpiece. With the airbrush I just feel like I'm finishing something off. Having said that ILM used both techniques on the filming models. Some had aribrush weathering but most were done by brush and misted with the airbrush. Also dont forget masking and steel wool to get the desired affect.
 
There is a builder here on the board that used a liquid shoe polish technique on his Mobeus Galactica model and steel wool. I tried it on mine minus the steel wool and I was very pleased with the outcome.
 
On the smaller scale ships I build it's generally easier to use a brush. I've also gotten good results using pastel chalks and gel ink pens. With pastels and inks I use microbrushes and cotton swabs.
 
That "look" you get in kits is done using both tools, (the airbrush and the dry brush). I had a demonstration done right in front of me a few months back.

Most flat sections are sprayed with say colour A, then a slightly lighter mix of colour A is sparyed at the edges of the flat section. Then dry brushed rust is applied very slowly to streak points, later, silver dry brush to selected high wear points,follow with hard silver using the side of the briush, to simulate scratch points.

That will pretty much give you that "cool look" you see in display cabnets.

There are lots of varaitions in style but this will give you a good easy high quality finish.
 
Another method for adding wear poits particularly along edges is by gently running a 2B pencil along the edge then gently wiping of the small granules left behind with a soft tissue or a finger. It's a method used by military modellers.

The result can be seen in the attached image of the interior of an armoured personnel carrier I build last year.
 
Last edited:
It comes down to one thing - the effect. If you know the effect you're going for, you can figure out which tool is best for the job. And there are far more options than brush or airbrush. I've used cotton swabs, makeup sponges, toothpicks, colored pencils, permanent markers, my fingers and almost anything in between.

Then you have to choose the correct medium. Are you going for a sooty look? Use pastels. Going for an oily look? Use artist oils. Going for small chipped paint? Use a prisma silver pencil.

Try to look at real-world examples of the weathering you're trying to portray. I try to weather like weathering happens in real life. It starts out with a clean slate. Vehicles don't come off the line all dirty and dented. So start with a fresh coat of paint and then layer the weathering. Maybe some dirt build-up in the crevices. And paint color modulation from weather exposure. Newly chipped paint vs. dents and dings that happened early in it's career.

Here are some examples of weathering jobs I've done, in the past


A long service life in the desert. It shows new and old dings, paint modulation from exposure and dust build-up.

Shilka_Finished_1.jpg


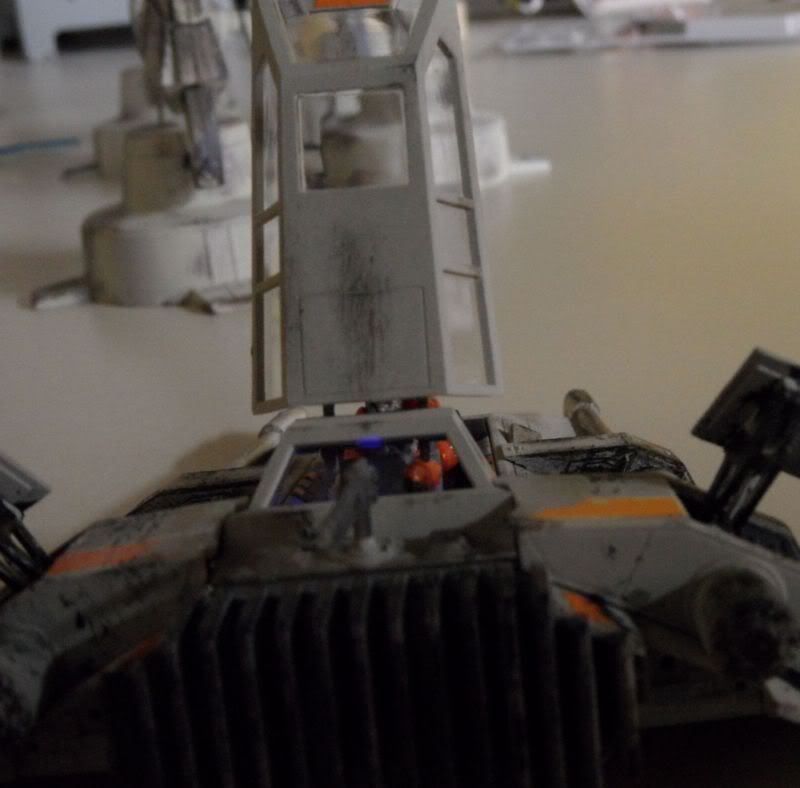
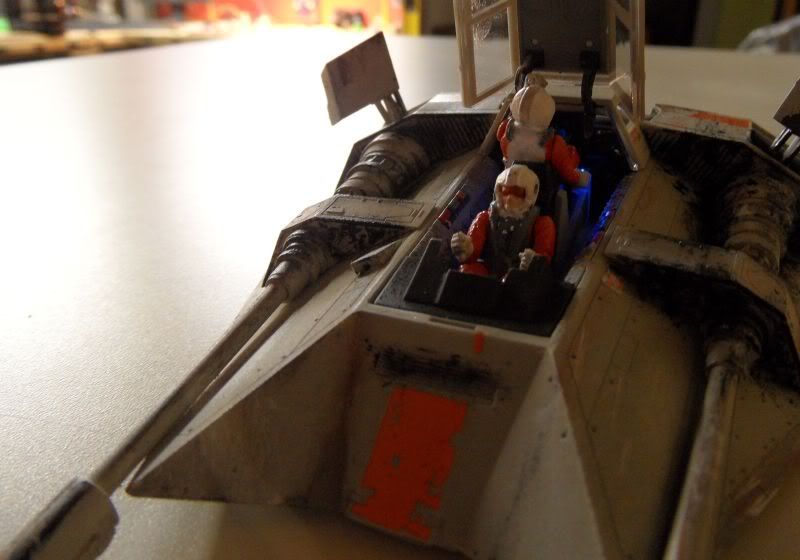
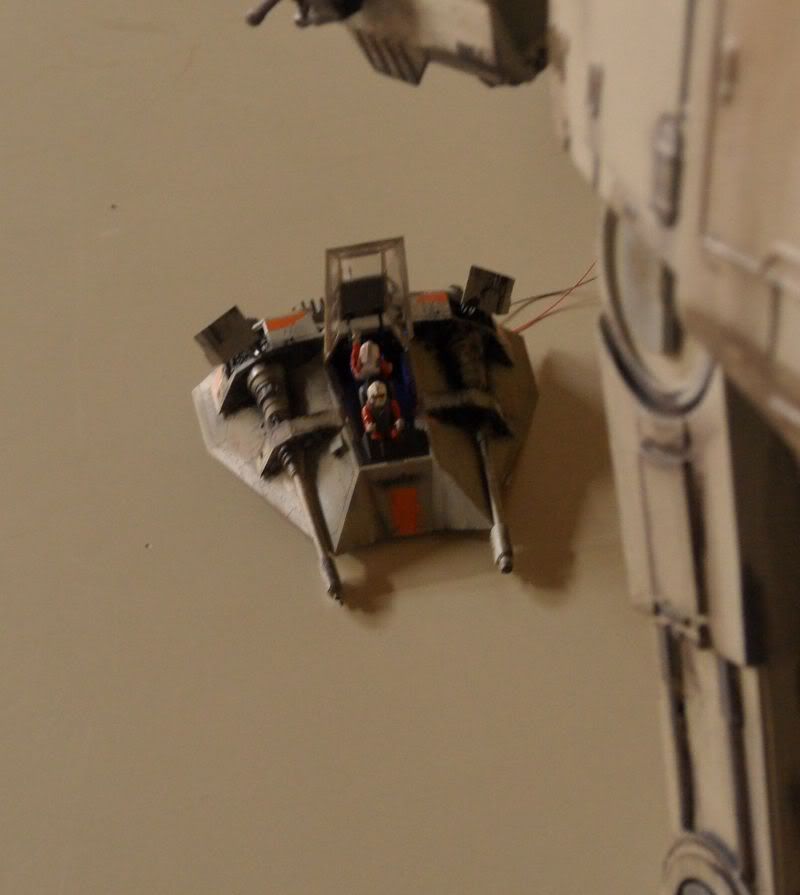
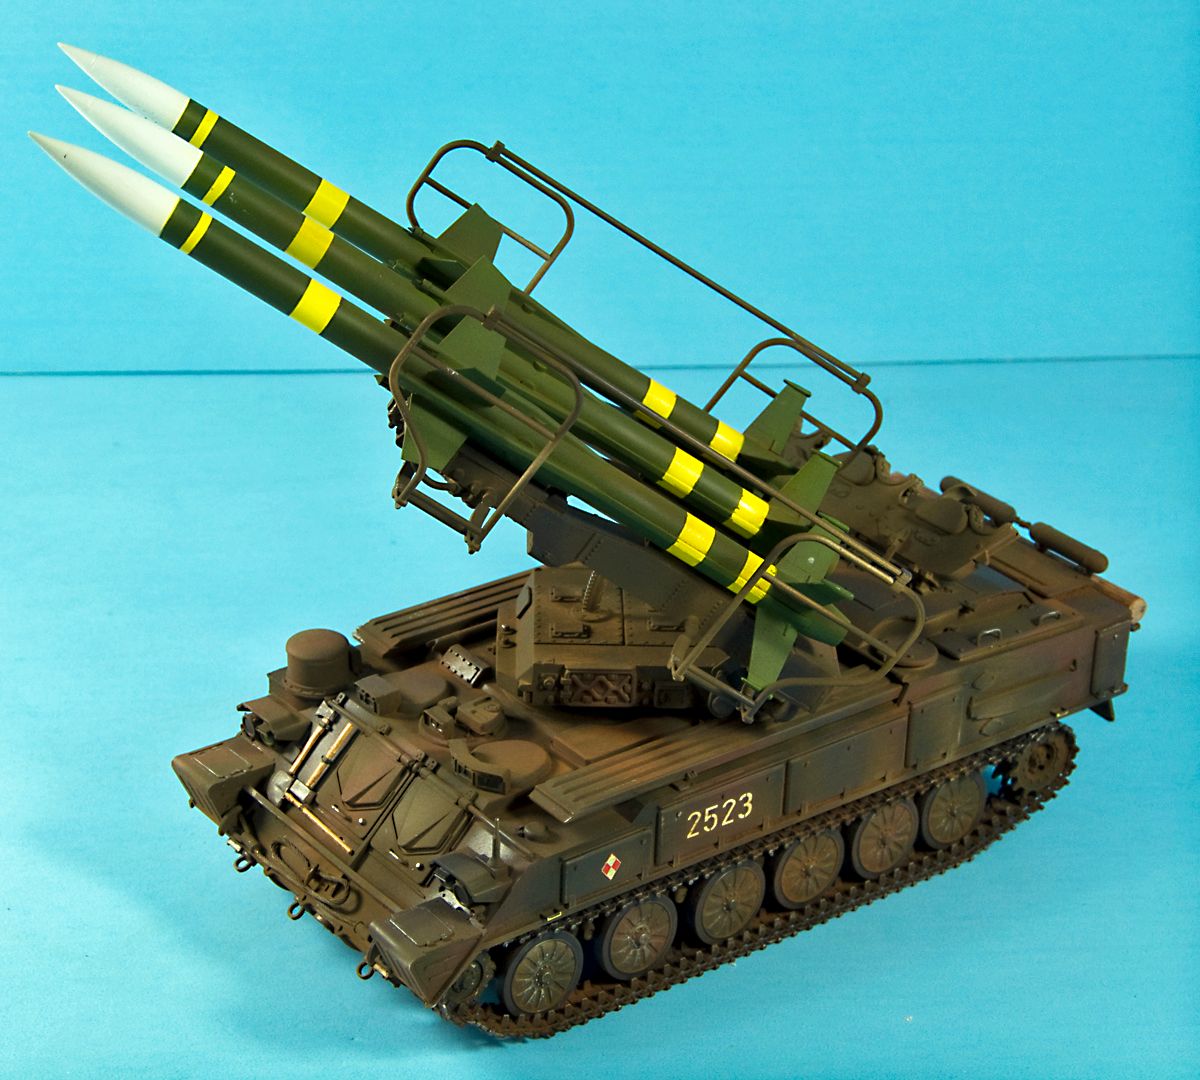
Regular field use, nothing heavy or outrageous, as missile vehicles are usually far from front-line action. The rockets are factory fresh as they're usually a one-time use weapon .

SAMfinishedleft.jpg


High altitude, supersonic flight and exposure from the desert sun.

Finished_1-1.jpg


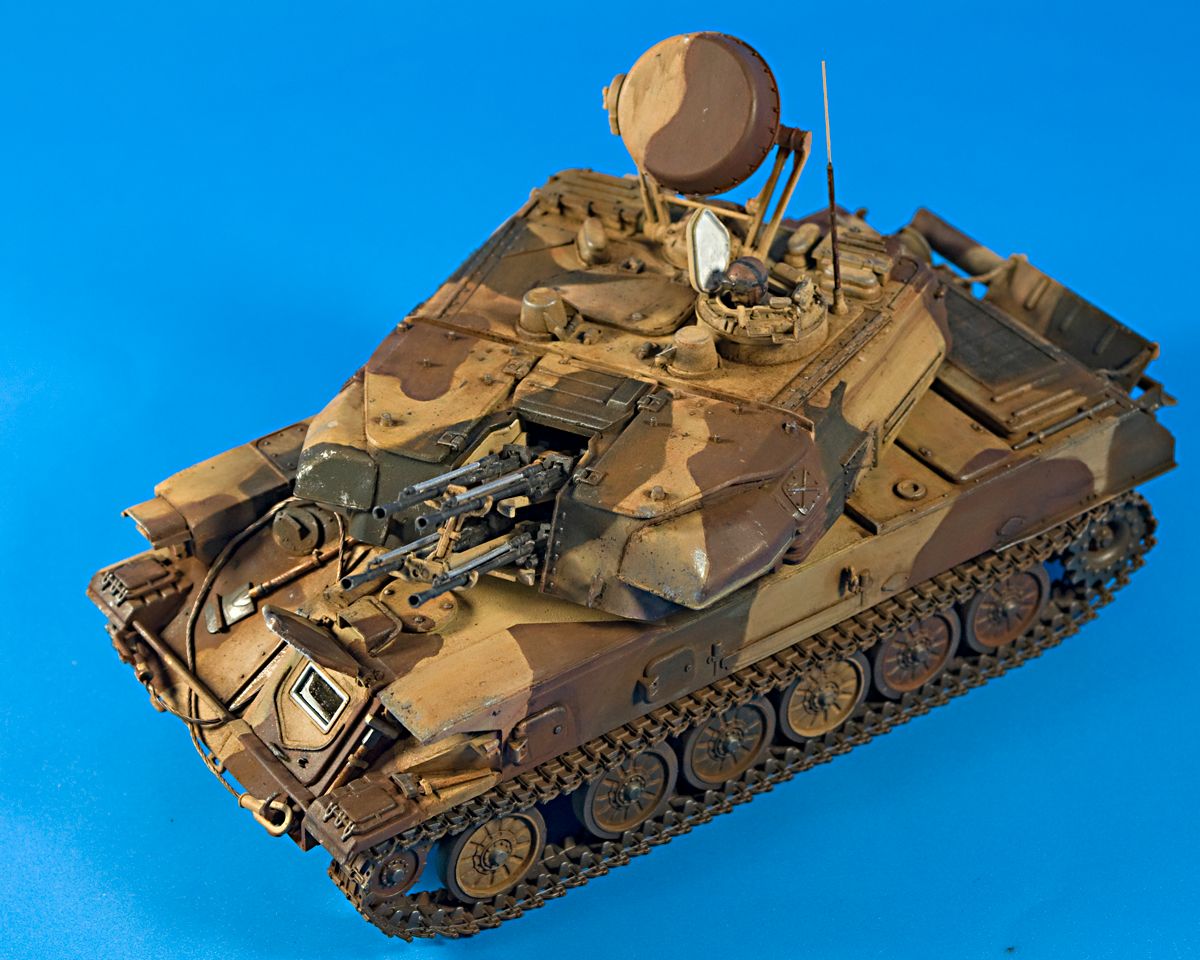
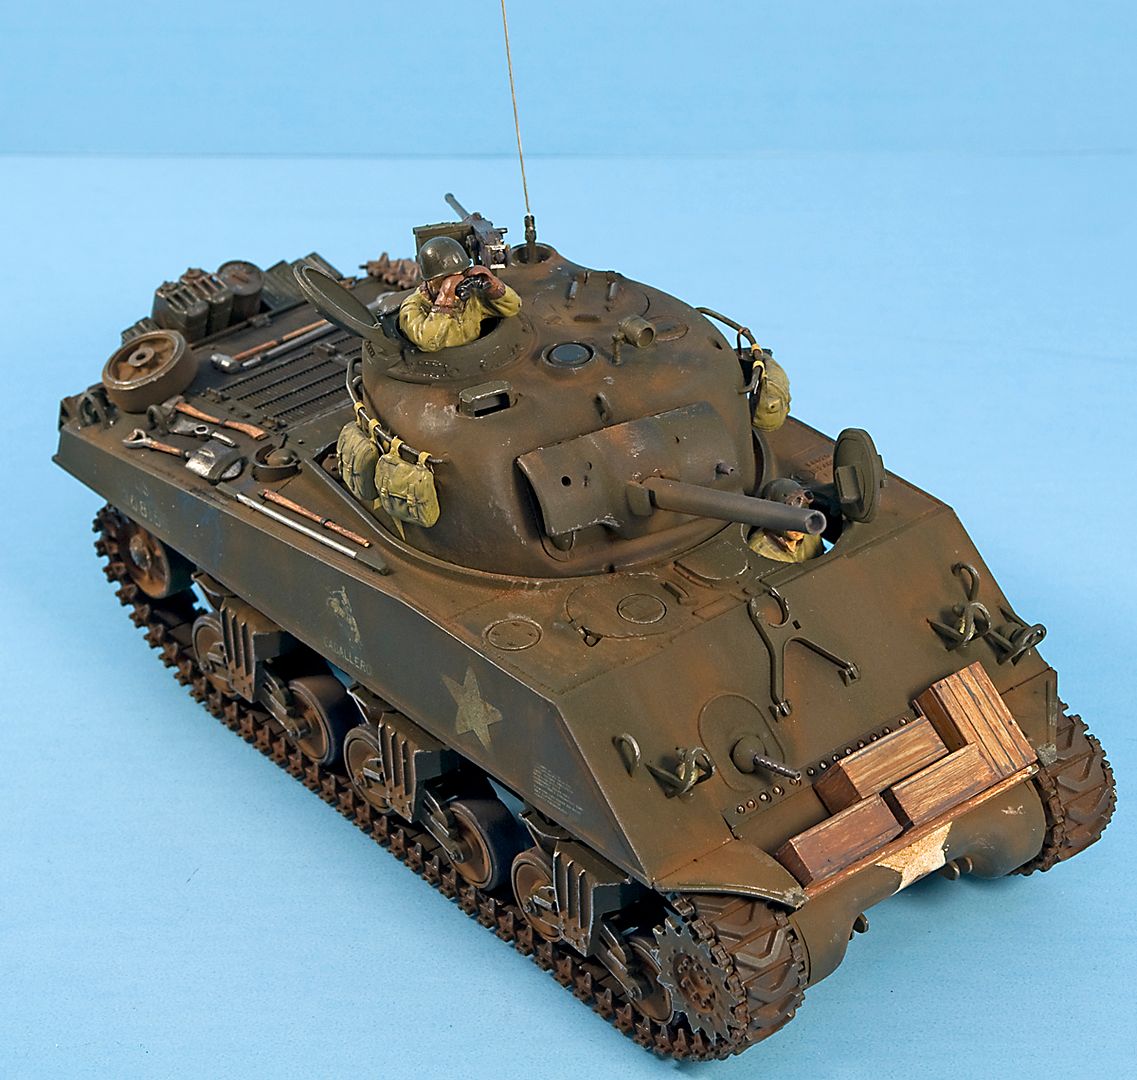
Long service life in France, mid-battle. She's seen a lot of action and is filthy from the recent dust-up against a Tiger.

ShermanM4A32.jpg


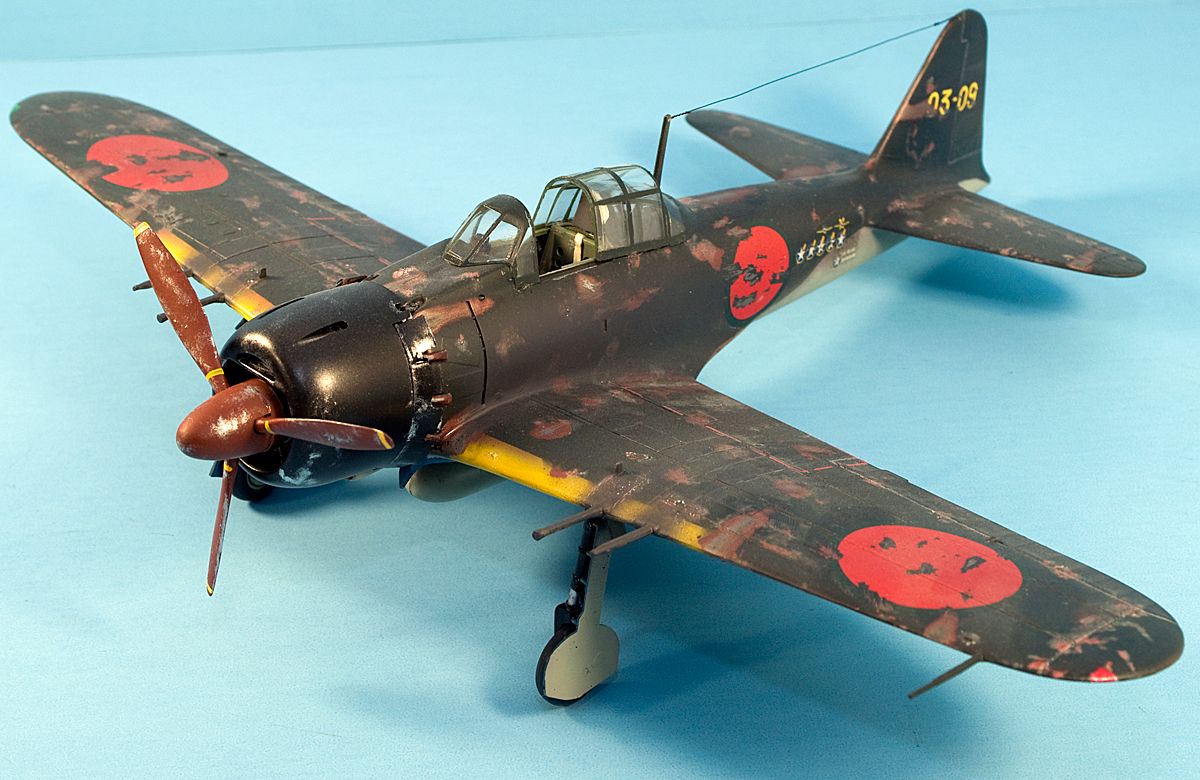
This is an "end of war" plane. The japanese had lost their top aces and were running dangerously low on materials. Looking pretty was no longer a concern for the imperial navy. This was planned as a heavy weathering job from the beginning, so it was base-coated in aluminum, then red oxide primer and then IJN green/gray scheme and then decaled. I used a salt-weathering technique between all the layers of paint, in order to produce wear that exposed different levels of paint.

A6M5-52.jpg


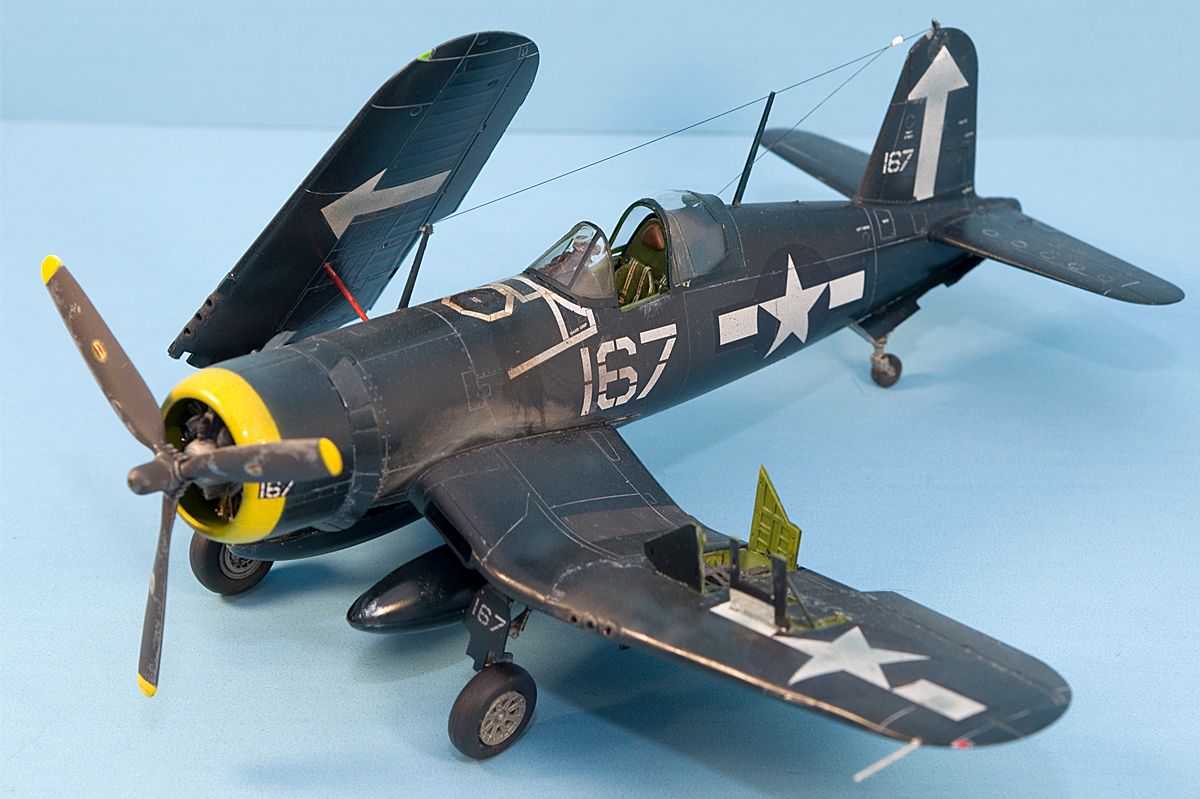
This represents a plane that was in heavy rotation in the pacific. It was exposed to a lot of direct sunlight, which led to paint fade. You can also see where fuel was spilled down the fuselage during a quick re-fuel.

F4U-1D.jpg


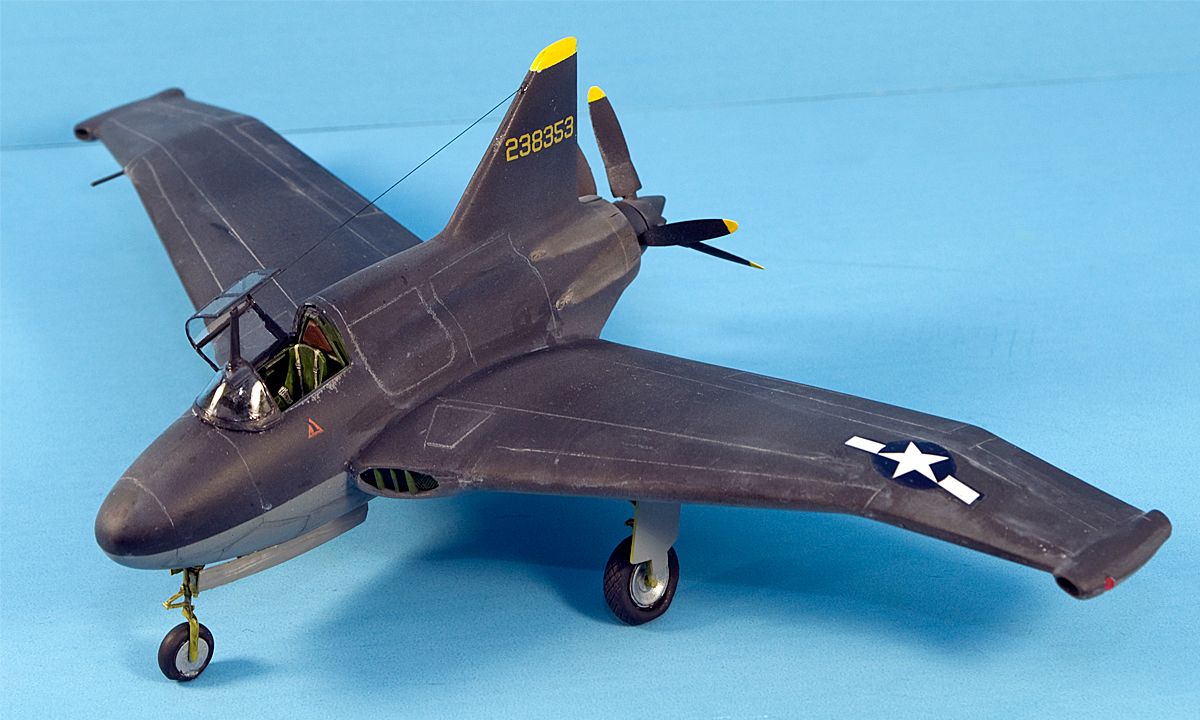
Only two of these were built and only one was photographed. They were tested out in the desert and left to sit on the airstrip. Extreme sun exposure and desert wind is hell on a paintjob.

XP-56.jpg


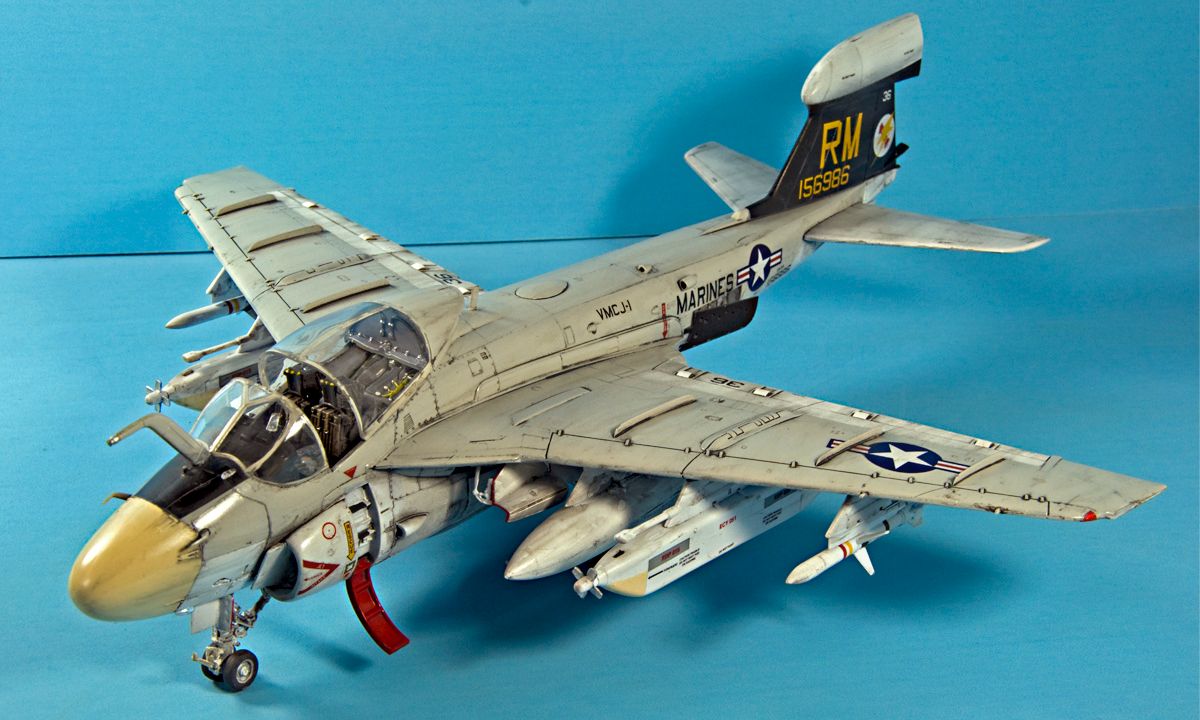
A rough mission over 'Nam. Intruders flew low level missions and were exposed to a lot of personal, small caliber firearms, AA fire and flak.

EA-6AIntruderDone-Left.jpg


Just figure out what it is that you want to represent and imagine how it happens in the real-world.

-Fred
 
Very nice examples:) you went the whole nine yards on the details, I like the fuel spill detail,it really brings the plane to life
 
Thanks, guys :cool

Detailing and weathering are my two favorite parts of model building. I feel that's what really brings a model to life.

-Fred
 
Finished my second model, fine molds snowspeeder what a great build.. Nothing fancy here compared to all the great kits built and made I see on this site but this was a sweet experience and I really took my time.. Thanks for all the weathering tips and advise.. Air brushing is great, I plan to build MPC Speeder Bike next..
The blue led is a little customization I plan to build a case add snow and have the at at closing in..
Was thinking of getting the TIE fine molds next any advice on a good online store that sales FM products?

1.jpg


Thanks again

3.jpg


2.jpg


4.jpg
 
This thread is more than 12 years old.

Your message may be considered spam for the following reasons:

  1. This thread hasn't been active in some time. A new post in this thread might not contribute constructively to this discussion after so long.
If you wish to reply despite these issues, check the box below before replying.
Be aware that malicious compliance may result in more severe penalties.
Back
Top