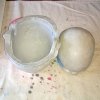
Twisty the Clown - Head Appliance

Sinned

Well-Known Member
RPF PREMIUM MEMBER
Hey all, I'm continuing to work on parts for Twisty, and am prepping to make the head "scalp". I really want to do this in silicone, and punch in the hair.

The sculpture itself will be crazy simple, just ~1/4" of clay, covering the scalp area, with rugged edges. I think I'll probably do it in WED.

My concern is coming in with how best to mold the thing, so I can get good silicone pulls from it.

I don't have a bust with the head chopped in half, so the angles are going to be a little weird, since I'm essentially just making a mold of the top, and back of the head.

A few specific questions:

1. Since it's such a simple thing, I'd like to keep the mold simple as well, and avoid seams. Do you think this can be done as a 1-piece mold, or will I need 2? Kinda thinking I'll need two, but worried about a seam right across the head.
2. Would it be best to make the mold out of epoxy (e.g. EpoxAcoat)?
3. I've never cast silicone before, but it looks like Ecoflex would be a good option for this. Thoughts?

Thanks!
 
Last edited:
Re: Tips for molding silicone head appliance?

shell shock, plasti-paste, and dragon skin-fx pro. smooth-on's website has step-by-step tutorials for all of it. you might beable to get away with a 1 piece mold but if you are doing hair a 2 piece will cover the seam. and dragon skin + thiovex can fill in a seam cut.
 
Re: Tips for molding silicone head appliance?

You should be able to get away with a one piece mold. As long as the only undercuts you have are from the clay. If it wraps around the neck at all, you'll probably need to do two. Epoxy is always great, but it all depends on how many casts you're wanting to make. I've used ecoflex. Since it's going on top of the head, you won't be needing anything too soft. Somewhere around 20 to 30 durometer would work.
 
Re: Tips for molding silicone head appliance?

To answer your questions in order:

You can absolutely do it as a one piece mold, assuming the lowest point of the clay is higher than the highest point of the armature. Avoid undercuts, basically.

I love love LOVE epoxy. I am sure I've posted it enough on this board for everyone to know by now! The thing is, unless you are going to make many copies of this it may be over kill, price wise. You can do a quick and dirty rondo mold for a third of the price.

Ecoflex is alright. Not my favorite silicone in the world. Too touchy for me..

Just remember you can't slush cast it like you would latex. You need to either brush it in or make a core and squish/inject it in.

I'd recommend the latter, and would be happy to write up an explanation if you'd like one.
 
Re: Tips for molding silicone head appliance?

Awesome, thanks all!

I ordered a new head form, hoping it shows up soon. It still isn't going to be what I ideally need, since it would be better to have just the upper half, and back of the head. I may make a quick alginate mold of that part, and cast up something more suitable. I'd do my own head, but that's a difficult 1-man job. :)

My biggest worry is just getting it keyed right. I don't think I can do that with the way the head form will be. I guess I could use the tops of the ears as pseduo-keys?

I have a good deal of epoxy on hand, so will probably use that. Unless Shell Shock would work? (I think I'm nearing expiration on some, so would be good to use for something soon)
Hopefully I'll be able to make copies for others, so I'd rather have a more lasting shell than rondo. :)

I'm pretty familiar with smooth-on, so I'll probably go the DragonSkin route. Their gel-filled process looks fairly straightforward. Although....

To answer your questions in order:
Just remember you can't slush cast it like you would latex. You need to either brush it in or make a core and squish/inject it in.

I'd recommend the latter, and would be happy to write up an explanation if you'd like one.

I've seen a few videos on injecting, so that sounds promising, especially in this situation. Since the head may not be keyed well, I could get things all lined up, and secured, then inject. Any tips on that process would be extremely welcome. :D
 
Re: Tips for molding silicone head appliance?

DragonSkin FX Pro actually has a "gel" phase and claims it can be "slush cast." I think it actually could be if you added some thinner and were patient (I'd apply some heat or slush in a warm environment so you aren't wearing your arms out for 30 minutes trying to keep it even). I used it for a chest appliance recently.

You can definitely also even make your mold of silicone. DragonSkin will demold easily from Rebound40 because of the hardness difference (you still want to use mold release).

Definitely can do this in one mold, one piece, no seams. If "Twisty" is the clown from American Horror Story, it's basically a bald cap with some hair plugged in!

If you're looking to add Slacker to make it gel-filled, keep in mind it makes it quite heavy very quickly. It's really weird stuff though lol! I tried a bit and it ended up being too heavy for my project.
 
Re: Tips for molding silicone head appliance?

Yes, Twisty from AHS. :)

I want to punch the hair, so it needs to have a little thickness to it, so slushing it wouldn't work well anyway. That's good to know about the weight going the gel/slacker route though, because I'm leaning that way. Hopefully with 1/4", it wouldn't be too bad?
 
Re: Tips for molding silicone head appliance?

Detenten, I've found the "gel" phase of Dragonskin FX Pro to be absolutely awful. The "gel phase" was no where near slushable.. BUT, I do live in a much warmer climate so your mileage may vary. Using thinner is a great idea if you do resort to slush casting.


For injecting (or squishing), I think the easiest route for you would be to make your mold with epoxy, putting keys in the negative for the future positive to lock into and also leaving space for bolts. Clean the mold, and then take clay and build up your thickness only where the silicone would be, and maybe a bit of an overflow if you want to squish mold it. Release the epoxy and clay well, and epoxy over it. While your pieces are still together, you need to drill the holes for bolts! You don't want to do this after they've been separated! Once you're good for bolts, Open it up, clean out the clay, drill your bleeders and an injection port (or if you made an over flow just squish mold it) and cast your piece. The silicone will stay where the void of the clay was, making the piece the same thickness each time.

I hope that makes sense. I don't have a handy video to link you to, so I hope my crappy text explanation works!
 
Re: Tips for molding silicone head appliance?

For injecting (or squishing), I think the easiest route for you would be to make your mold with epoxy, putting keys in the negative for the future positive to lock into and also leaving space for bolts. Clean the mold, and then take clay and build up your thickness only where the silicone would be, and maybe a bit of an overflow if you want to squish mold it. Release the epoxy and clay well, and epoxy over it. While your pieces are still together, you need to drill the holes for bolts! You don't want to do this after they've been separated! Once you're good for bolts, Open it up, clean out the clay, drill your bleeders and an injection port (or if you made an over flow just squish mold it) and cast your piece. The silicone will stay where the void of the clay was, making the piece the same thickness each time.

I hope that makes sense. I don't have a handy video to link you to, so I hope my crappy text explanation works!

Thanks SlipKnoT, yes, that makes sense. I think my biggest issue right now is creating the negative. I'm just not sure the quickest/easiest way of doing that. I have some headforms, but they're not the right "form" for what you're describing here. I've never made my own negative of a headform before. :(
 
Re: Tips for molding silicone head appliance?

Detenten, I've found the "gel" phase of Dragonskin FX Pro to be absolutely awful. The "gel phase" was no where near slushable.. BUT, I do live in a much warmer climate so your mileage may vary. Using thinner is a great idea if you do resort to slush casting.

I agree. I hated it, and I was trying to just brush a thin layer in an open mold. My low points were definitely thicker, but it wasn't a total fail. Which is why I say it "claims" to be able to be "slush cast." ;) I'm in New Orleans, so I'm also in the warm climate. Maybe crank up the AC to make it go longer?
 
Re: Tips for molding silicone head appliance?

I is it possible to run epoxy in alginate?

I'm ready to make my new head form, to sculpt the head piece on, but not sure the best way to proceed. I know I can dump in some hydrocal, but then I have to make a silicone mold of that, and then make the epoxy head. It would be awesome if I could skip the intermediate step, and just make the epoxy right away.

I'm guessing that's not possible, but wanted to check. :)

Here's what I'm working off of. Needs a little more refinement, but doesn't need to be too perfect. Just need the upper-forehead, to the top of the neck.

head-form.jpg
 
Re: Tips for molding silicone head appliance?

for you head form do a life cast with body double silk

Oo, that's not a bad idea. Damn, wish I'd thought of that before. I have a little bit on hand, but probably not enough to cover the head. I just ordered a bunch of stuff from Smooth-on for this, but didn't get more body double. I have tons of alginate though. :(
 
Re: Tips for molding silicone head appliance?

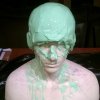
Good tip ataris121, I had just enough Body Double to cover the head! Or at least, I think I did. My plaster support is still drying, so I haven't pulled it all apart yet, and looked at the thickness. But it should be good enough to get at least one decent pull out of.

Bonus-- this totally reminded me of watching You Can't Do That On Television, when I was a kid. The original Nickelodeon slime!

slimed_zps6usulz9k.jpg
 
Last edited by a moderator:
Re: Tips for molding silicone head appliance?

Just realized I never added a picture of the finished head form. It worked out pretty well. I used ShellShock, backed with FreeForm Air.
There's a slight undercut on the back I'm going to have to be careful about, but should be okay if I make the 2nd half right.

headform_zpstpemnmr8.jpg

@SlipKnoT - quick question about the next step. I'm going to sculpt up the appliance quick, probably with WED, but I'm wondering the best way to release the epoxy shell I pour over that. Frekote Lifft? Or something else?
 
Last edited by a moderator:
Re: Tips for molding silicone head appliance?

@SlipKnoT - quick question about the next step. I'm going to sculpt up the appliance quick, probably with WED, but I'm wondering the best way to release the epoxy shell I pour over that. Frekote Lifft? Or something else?

Absolutely, Lifft would work fine. Just make sure you seal the sculpt first.

I'm not sure if epoxy would try to bond to shell shock, but two coats of Lifft should make sure the epoxy releases perfectly, and the clay will clean up relatively easily. Epoxy tends to really sink it's teeth into wed, even when released very well so there will be some clean up. I just take them outside and hose them down. Keep a close eye on those undercuts though bud. You don't want it locking on ya!

I'll actually be molding my Orlok in epoxy, so I am going to do a write up and take pics as I go when the sculpt is all done. I'll make sure to touch very thoroughly on releases. :)
 
Re: Tips for molding silicone head appliance?

Awesome, thanks, @SlipKnoT. I'll give the Lifft a go then. Definitely worried about getting the thing apart when I'm done, so hopefully will avoid the undercut...stupid back of the head shape...

That'll be really cool if you do a full write up with the Orlok molding. It's so hard to find good references on that stuff, and I've definitely sought it out! Even Stan Winston videos don't really cover it, in it's entirety.
 
Last edited by a moderator:
Re: Tips for molding silicone head appliance?

Round-robin of projects going on; finally back to this one.

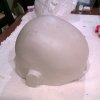
I fixed the shape of the head form to remove the undercut areas, using FreeForm air, and then sanded it down nice and even with the rest. Also added a handle inside (forgot to take a picture) to help with maneuvering the thing while sculpting, as well as removing the form from the mold.

Twisty-Scalp-01_zpsrlh7nt46.jpg

Scalp sculpt was done in WED, and sprayed with Crystal Clear. I wasn't sure how to texture a bald head, so I just winged it. I started with a sort of mottled skin texture stamp all over, and then a large pore sponge, followed by patting it all down with my hand inside a plastic trash bag. Not super realistic, but I'm happy with how it came out. Although, I went a little heavy-handed with the forehead wrinkles, but I'm racing the calendar, so let it go. Done with a thicker plastic bag, and edge of a loop tool.

Making use of my handle in the first picture below, it was super-helpful.

Twisty-Scalp-02_zpsrsaonj0b.jpg Twisty-Scalp-03_zpsxguwh5of.jpg Twisty-Scalp-04_zpswwqz8hus.jpg

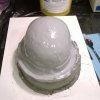
I've never molded something this way before, so a bit of trial and error as I go. I did a little layup with EM-210 to help me shape the epoxy mold, then a couple of coats of Frekote Lifft (nifty stuff, I'd never used it before). I have some fiberglass cloth, but no laminating epoxy, so I just went with 2 layers of EpoxAcoat, and a hefty dose of FreeForm Air on top. Hope it holds up!

Twisty-Scalp-05_zpsvlihxquo.jpg Twisty-Scalp-06_zpsnr2bawm3.jpg Twisty-Scalp-07_zpsbsygcyom.jpg


Here's hoping it all comes apart when I get home tonight!
 
Re: Tips for molding silicone head appliance?

So, it turns out I missed some slight undercuts right around the ears, so the epoxy locked up. Happy accident then I guess, that I didn't put any glass on there. The mold cracked when I forced it apart, but at least didn't break in half. I ground everything down, and got it so things would fit back together again, and moved on to running the silicone.

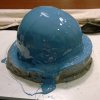
I went with DragonSkin FX Pro, and gel-filled with a Slacker mixture.

After that all set up, it was again, extremely difficult to get apart, but I finally forced it out.

The head piece turned out pretty good. A few unfortunate bubbles, but I'll take it. I used some Psycho Paint to "wound up" the cut edge, and am happy with it.

Twisty-Scalp-08_zpsxc7urio4.jpg Twisty-Scalp-09_zpscwmuy6pi.jpg Twisty-Scalp-10_zpst7ufc5h8.jpg

Twisty-Scalp-11_zpsw5wfoeal.jpg Twisty-Scalp-12_zps5fm93bxb.jpg Twisty-Scalp-13_zpsffiowyp7.jpg

Twisty-Scalp-14_zpskoytmksd.jpg Twisty-Scalp-16_zpswhzwpw9y.jpg Twisty-Scalp-17_zpshp7neznf.jpg

Twisty-Scalp-18_zpstdmekbvl.jpg Twisty-Scalp-19_zpsgjqufwaw.jpg Twisty-Scalp-15_zps31fi9sy3.jpg
 
This thread is more than 9 years old.

Your message may be considered spam for the following reasons:

  1. This thread hasn't been active in some time. A new post in this thread might not contribute constructively to this discussion after so long.
If you wish to reply despite these issues, check the box below before replying.
Be aware that malicious compliance may result in more severe penalties.
Back
Top