Tron Legacy Deluxe Identity Disc mods?

I got a size N battery holder and two mini SPST switches from radio shack, ordered some A23 12 volt batteries, and followed this wiring diagram. Ignore the part about the fuses; that's only if you're hooking it up to a car. It's only simple on and off, but that's all I really need.
 
Hello,

I think the "blade" part could have internal lights,and clear plastic that goes out when you press a button,or when you remove the disc from the holder on the back.
Woudl be like a diaphragm,but external.
When the disc in attached light is off and clear plastic is unside,when you remove it clear plastic goes visible and light is on.
 
I finally finished my set of discs. Not screen accurate, but I think they are reasonbly impressive when taken as a set.

In addition, they have custom stands (much more solid than the cheap ones included with the toy), an always-on light mode, and ALL the original sounds & lighting effects:

701.jpg
801.jpg


a002.jpg


More pics here:
custom TRON Identity Discs
 
jediknight0, I like the discs and the stands you made! Did you make the stands a one-piece type? Also did you get the colors solely by changing the LEDs or did you recolor the inner/outer rings, or another method, and did you add any additional LEDs to the discs? Either way, they look great!
 
jediknight0, I like the discs and the stands you made! Did you make the stands a one-piece type? Also did you get the colors solely by changing the LEDs or did you recolor the inner/outer rings, or another method, and did you add any additional LEDs to the discs? Either way, they look great!

The stands are just one-piece. For the legacy stands, I took the existing stands and glued some sides on it and filled in some of the holes at the top & sanded it smooth. A made a mold then used resin & enamal model paint as a cheap dye to make the final result. The classic stands are similiar but I started with an acylic plate holder turned backwards, used various styrene plastic to fill in the holes, and cut off the front of a legacy stand so I could have the "TRON" logo.

The color change is just an LED swap, except for paiting the rear rings a matching color of course.
 
Last edited:
Has anyone here successfully unfolded a Tron Legacy ID Disc pep file and managed to assemble it, I don't want to stuff about with my actual bought discs.
 
I have want to mod my disc but i have the Green board and im sooo lost x.x

The green board is really the same as the blue board just very slightly different solder locations. If you can even vaguely understand the blue board then the green board shouldn't present a problem.

As a matter of fact, after modding about a dozen different discs I've never seen a blue board except in pictures.
 
I have been on this thread since Nov (joined in DEC to ask Q's), and I'm still completely LOST on how to simple MOD my light disc. :( I thought I understood wiring...nope.. not a bit. I have the green board and a soldering iron....and that's as far as I have gotten. I've looked at pics and I'm still confused.
I need more pics. Mainly I'm gonna try and take as many pics as I can while I do this in hopes it helps others like me.

So far what I understand is--
There are 8 LEDs (6 in outer, 2 in inner ring).
ALL 8 points must be soldered on the green board at certain spots? (like below) R3-R4 & R8-R10 pins; R6+R7 (linked)
Mate you are awesome!
2011-01-08_14-04-55_389.jpg

2011-01-08_14-12-03_809.jpg

this was my very FIRST attempt at a soder job, so its not pretty, but OMG it worked! :D you have no idea how happy I am

And these all get wired/soldered to the battery point. . . .
okay... um...I need to buy extra wire right? (I have no way to jumper all this)
what wire am I looking to buy? (noob- obviously)

..help.....:cry
 
Last edited:
Just about any conductive jumper wire will do. I usually use something like this. Don't be put off by the "solderless" part, they can be soldered like any other wire, it's just not necessary on a breadboard. I'd also recommend having some extra solder to use rather than working with what's already there as it won't be enough to add a new wire (especially for novices).
 
Just about any conductive jumper wire will do. I usually use something like this. Don't be put off by the "solderless" part, they can be soldered like any other wire, it's just not necessary on a breadboard. I'd also recommend having some extra solder to use rather than working with what's already there as it won't be enough to add a new wire (especially for novices).

Thanks!!!! I'll be out looking for that today or the next. :)
 
Hey guys, another noob looking to mod my identity disc here =)

I'm not after bells and whistles, just wanting to make it light up much brighter / fuller. The closest thing I've seen on here that I like is the example posted by @soulinertia which I believe is done using an SMD LED Strip? Does anybody have more details / tutorial on this setup? Will it be ok sticking with the standard blue inserts? And did anybody do any tests regarding having it running for long periods of time?

I'd love to make it work with batteries, but also plug in to a power source when in the stand to make it a kind of desk lamp.

Any help would be hugely appreciated.

/G
 
Last edited:
there's a few youtube videos floating around out there that show you how.

finding them might be hard though ><
 
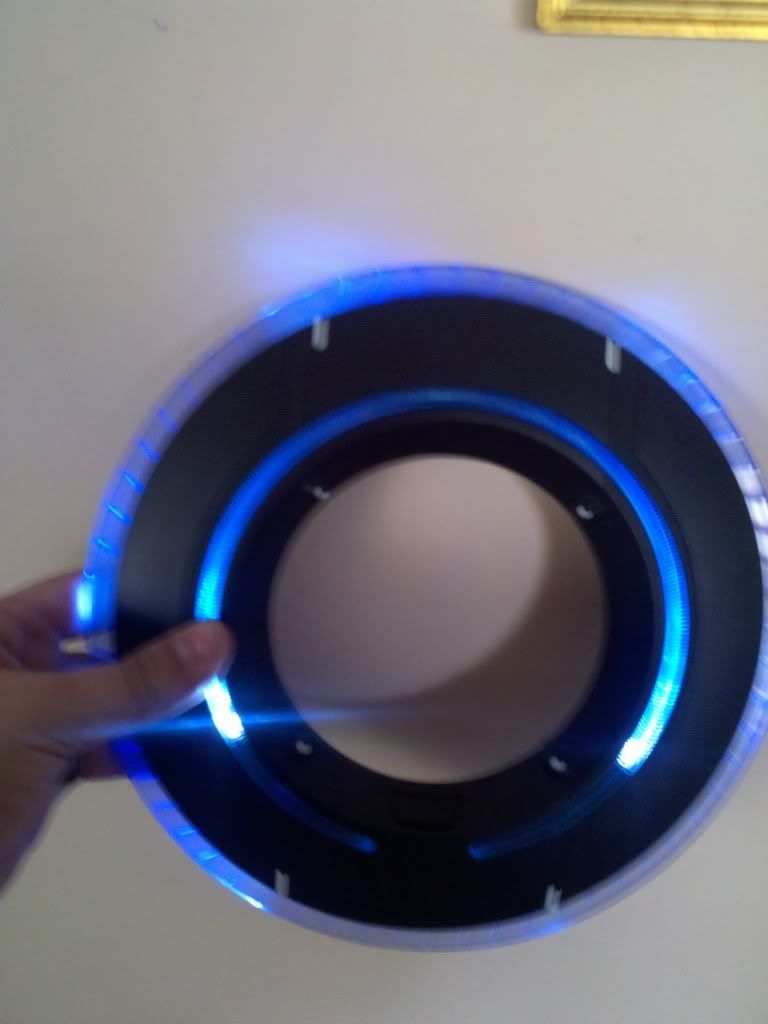
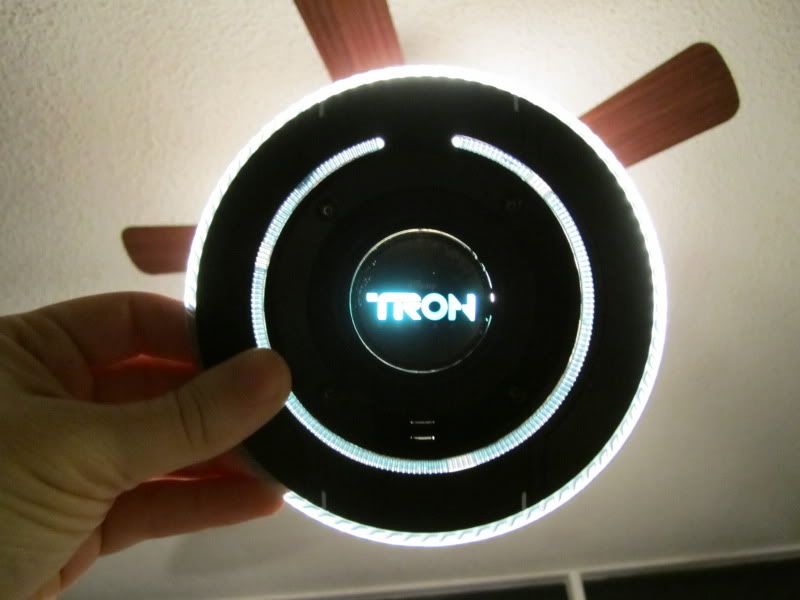
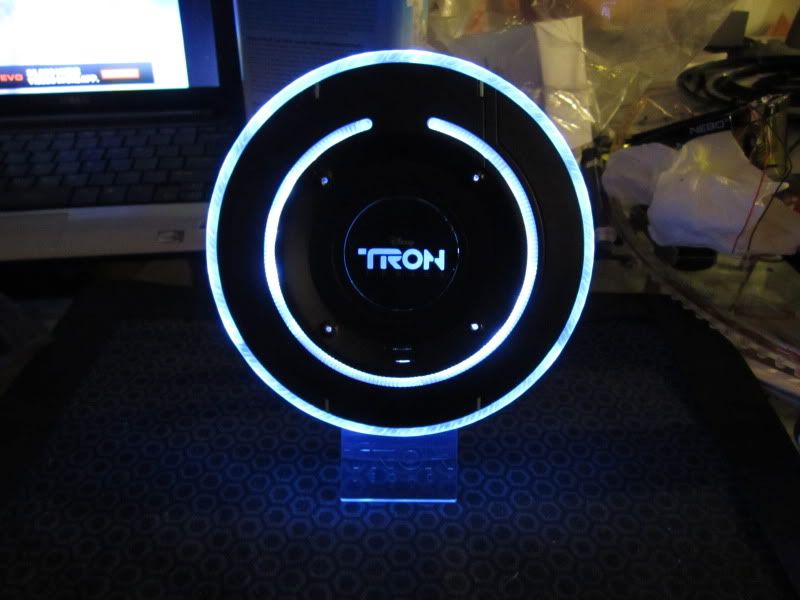
So I decided to mod my Ultimate Tron Experience blu ray disc set.

The 6 existing LED's just weren't cutting it.
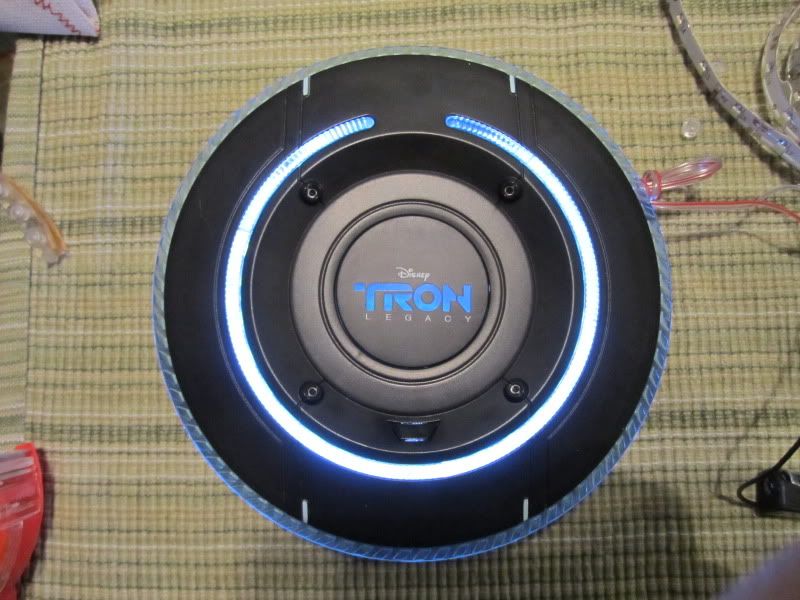
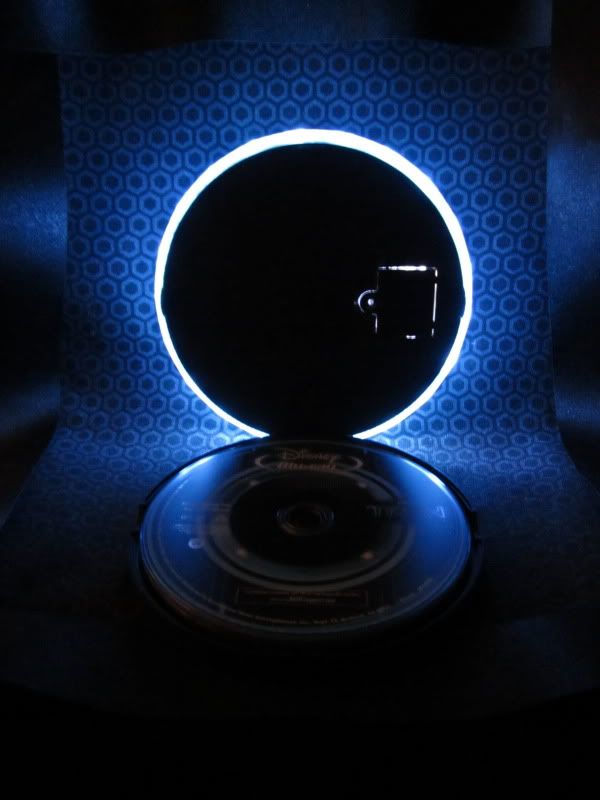
Stock disc:
tumblr_lj6q2sdkrz1qhqcxv.jpg


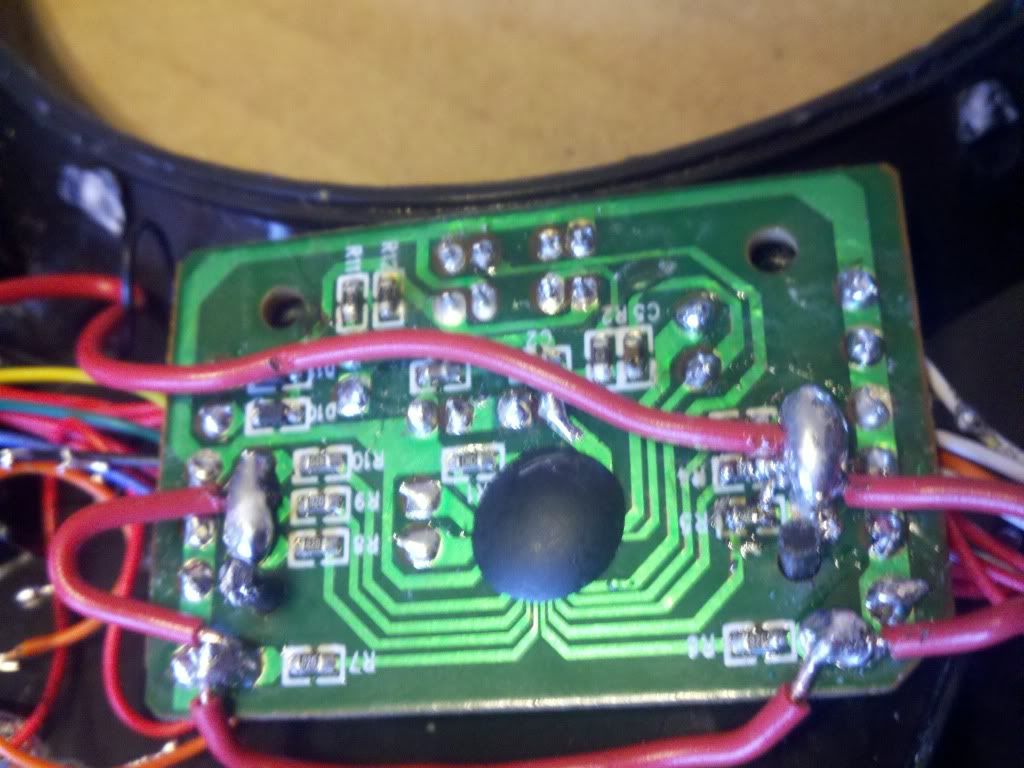
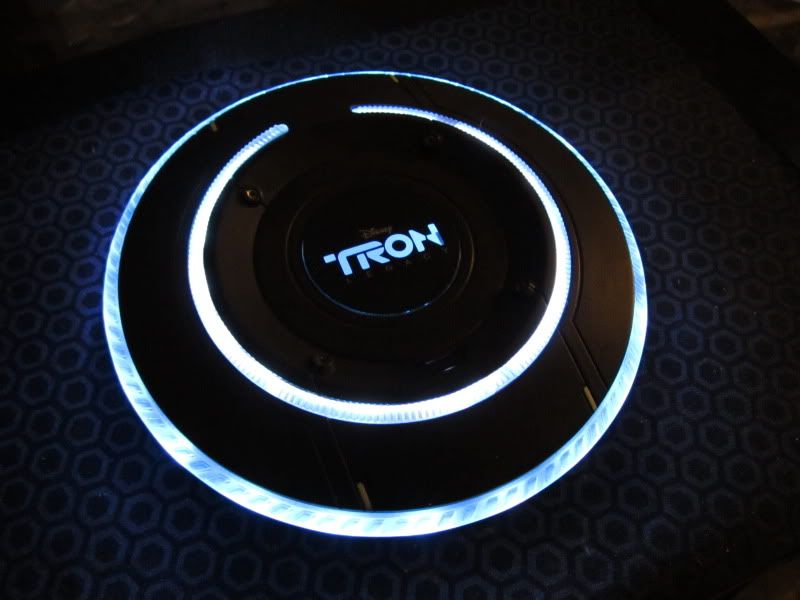
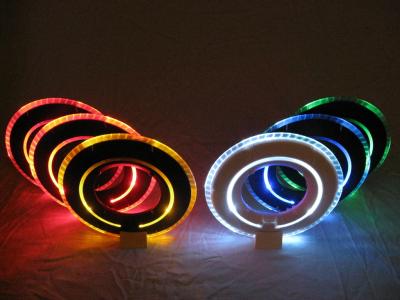
So I tore out all existing electrical components and replaced them with 42 new SMDs!
IMG_0006.jpg


How I did it:
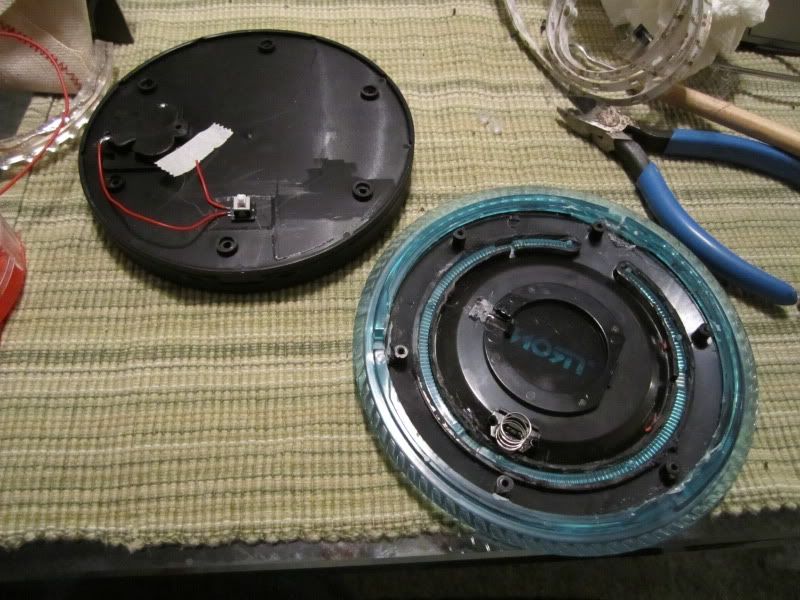
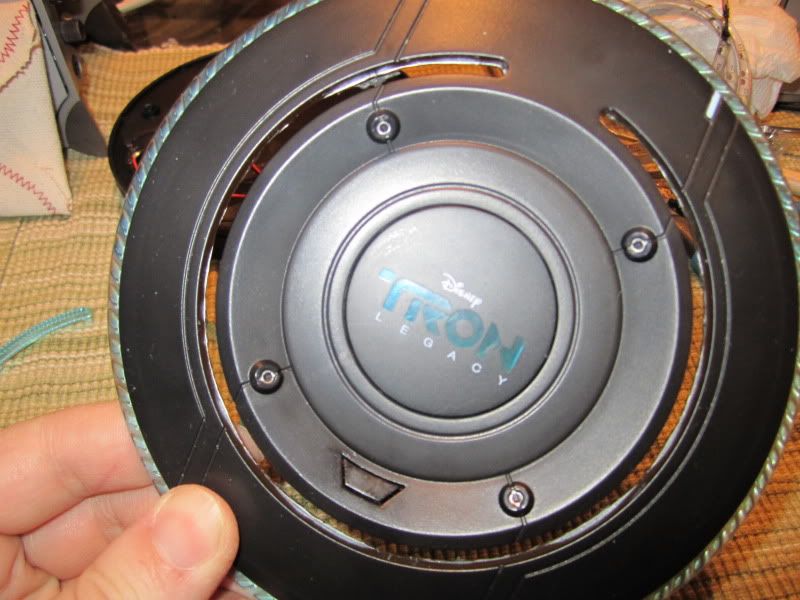
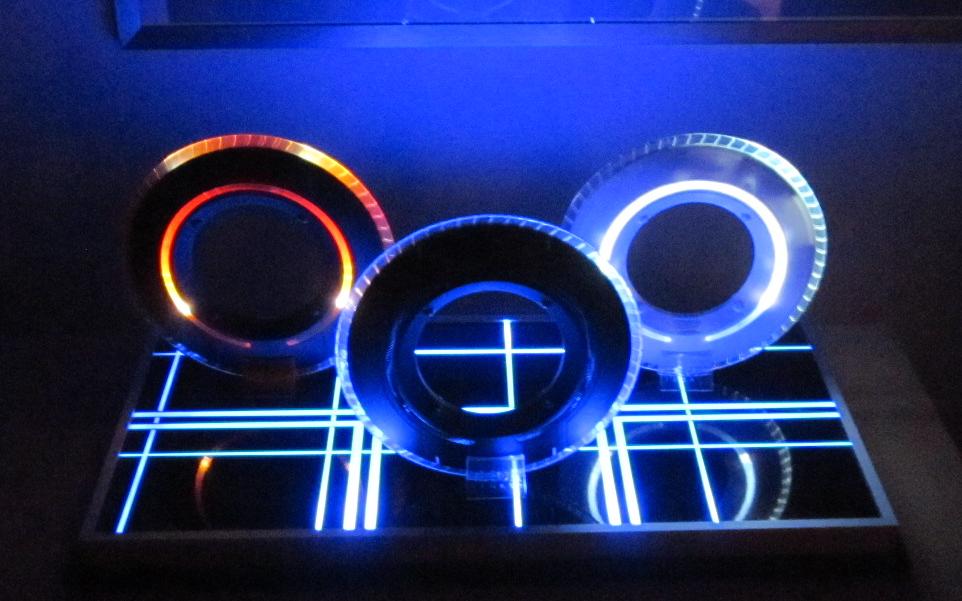
I started by taking the disc apart, removing everything and cutting out the black plastic backing behind the C ring.
IMG_0199.jpg

IMG_0201.jpg

IMG_0202.jpg


The plastic rings have a blue tint to them, just like the toy but with enough light it's a pretty light blue so I decided to leave them, besides I didn't want to deal with casting new rings.
IMG_0203.jpg


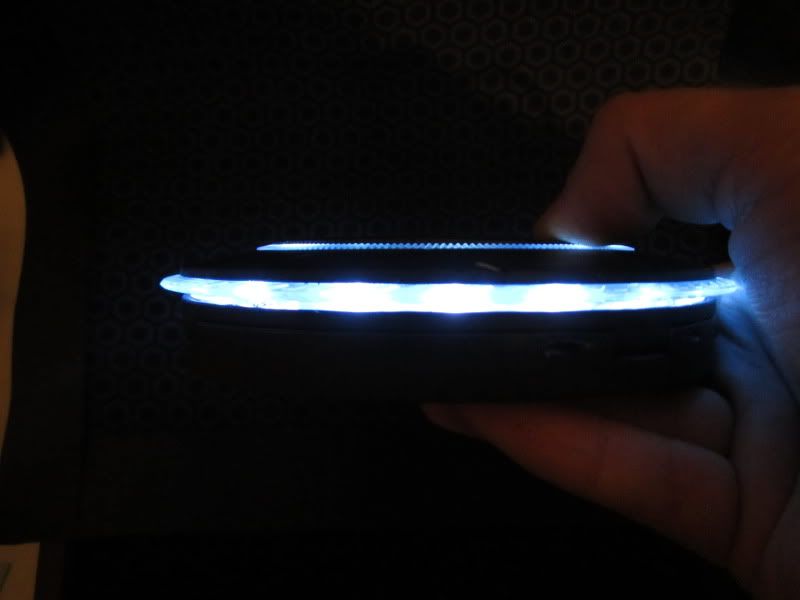
First I tried some front firing LEDs, but they were actually too bright!
IMG_0205.jpg


They were also too thick to fit in the compartment and still allow room for the discs.
IMG_0211.jpg


So I went with two separate SMD strips, 21 diodes on each strand mounted back to back so it would fire around the outside of the disc and towards the center to illuminate the C ring and the TRON logo in the middle.
IMG_0224.jpg


The next obstacle was figuring out how to get enough power to the SMDs in a small enough space to fit inside the compartment. An A23 12v battery did the trick. I removed the existing battery compartment so I could access the new battery from the same door.
IMG_0225.jpg


IMG_0012.jpg


IMG_0010.jpg


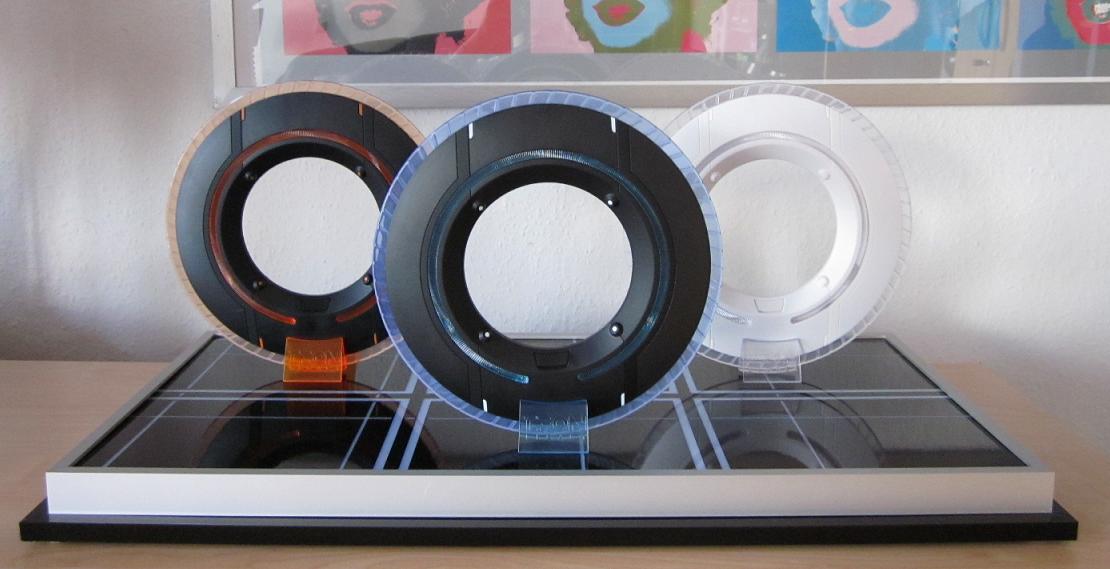
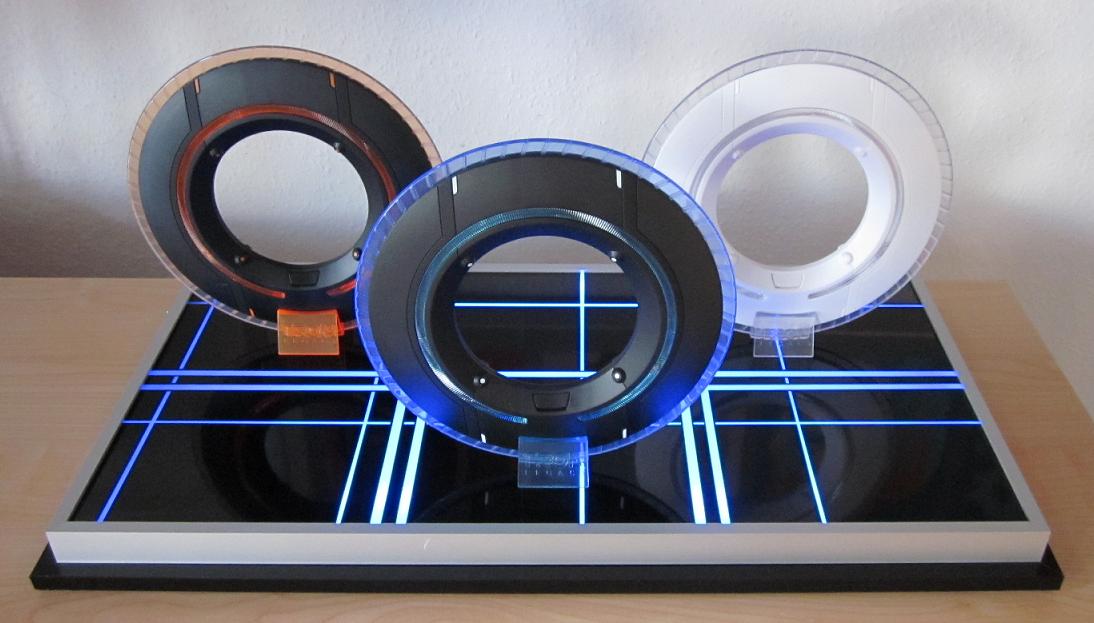
I also drilled 4 holes in it for the holographic projectors. I wasn't too crazy about the stand it came with since it blocked off part of the outer ring so I modified two of the stands that came with the deluxe disc toys and combined them to make a new one.
IMG_0233.jpg
 
Most excellent SI!!(y)thumbsup:thumbsup

If you don't mind - source for the SMDs? I had a similar reaction and idea when I first turned on the disc holder.

Thanks!!!

-C
 
You can get SMD strips many places. I use a number of different wholesalers since I buy mine in bulk, but ebay is probably your best bet. You can find some USA re-sellers if you want it quick, but pretty much all of this stuff comes from china. I used 3528 size SMD strips with the water resistant silicon coating and 3M sticky backing.
 
Those are un modified Discs yes? If so then Really Cool Base and I would wonder how modded discs would look on it.
 
Back
Top