You are using an out of date browser. It may not display this or other websites correctly.
You should upgrade or use an alternative browser.
You should upgrade or use an alternative browser.
The Nylon Gag MK2 F1 Magneto Skimmer
- Thread starter TheNylonGag
- Start date
Evenin Everyone,
Thanks for the comments
Slow week this week, just didn't have the energy to do anything.
But i did manage a bit......
Here we go....
PIX
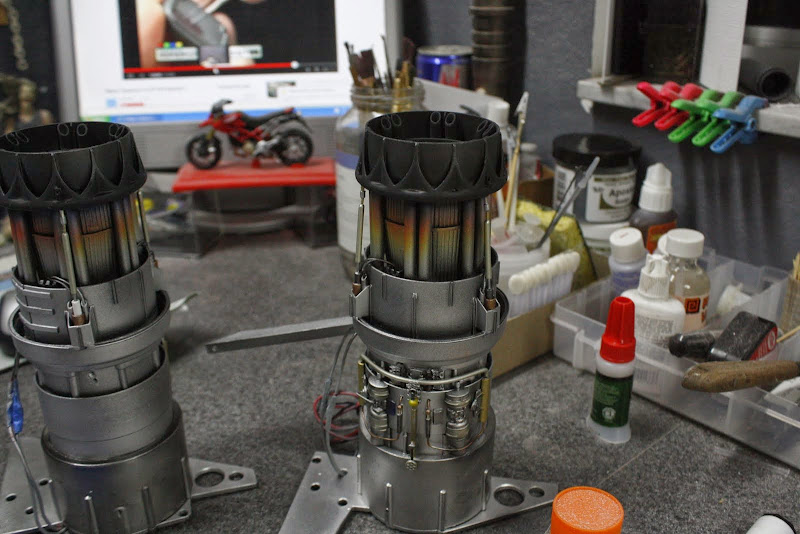
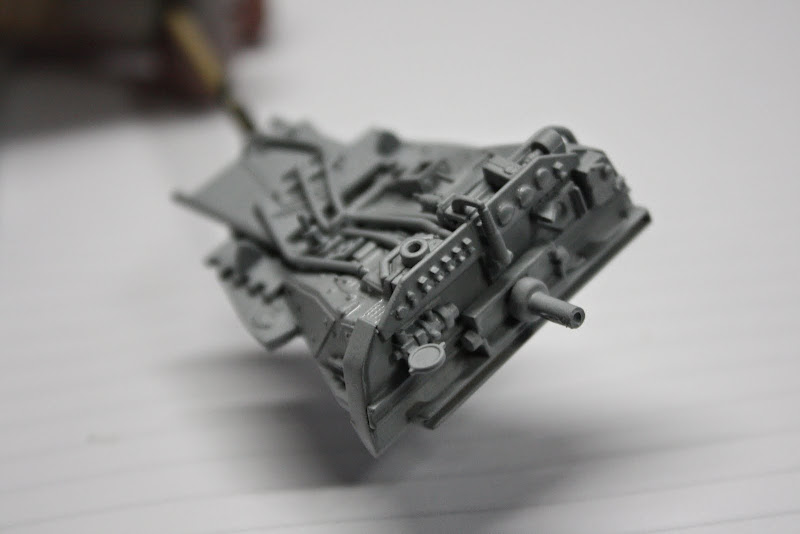
Got a couple of different silver's on the engines including alclad Magnesium on the nozzles, it's not all shiny like alclad should be but i got the effect i wanted

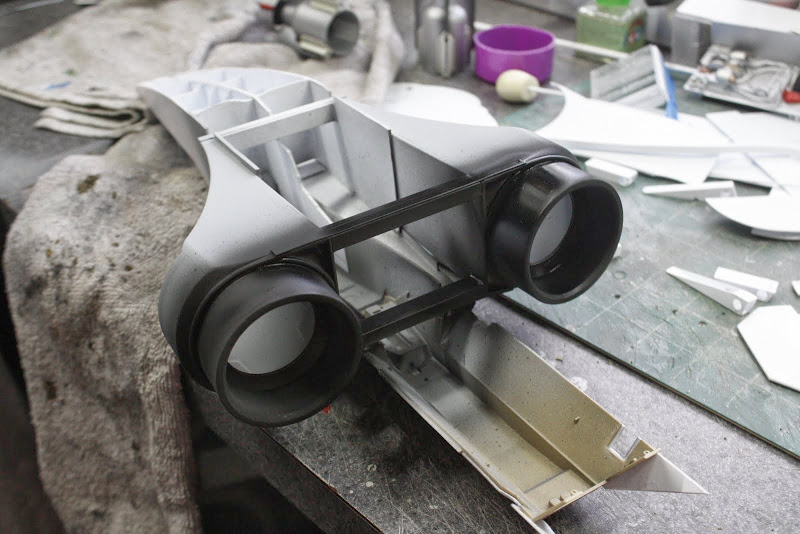
Matt Black on the intake innards.
Added some colour to the detail
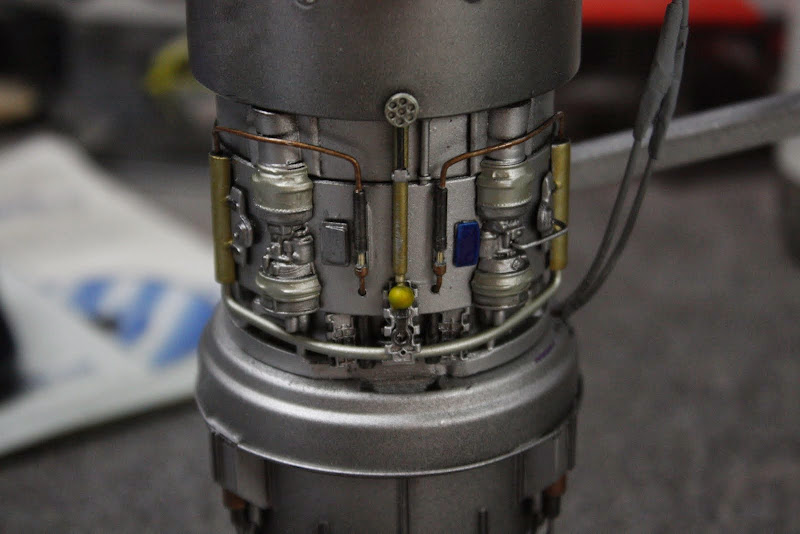
Used yellow, red and blue to add some heating effects

In position on the main frame

Primered up the side neon floaty thingys, mmmmmmmmmmmm Primer

So far


Underside

I've given Colin arms and will be fitting him into the cockpit soon.
I need to even up the paint a bit but thats no problem.
I think i know what the front end will look like, think Manta Ray?
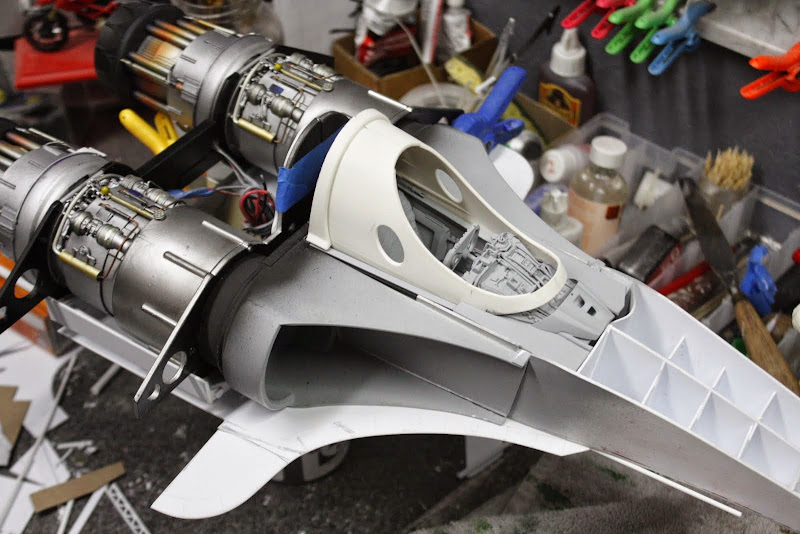
I don't even know how you are going to be able to see the engine detail, if at all, i was tempted to do a fully detail interior but as i don't know what the final profile will look like, thats difficult to figure out.
Going to do a quiz/competition for the colour scheme so stay tuned....
Take care
Gag
Thanks for the comments
Slow week this week, just didn't have the energy to do anything.
But i did manage a bit......
Here we go....
PIX
Got a couple of different silver's on the engines including alclad Magnesium on the nozzles, it's not all shiny like alclad should be but i got the effect i wanted
Matt Black on the intake innards.
Added some colour to the detail
Used yellow, red and blue to add some heating effects
In position on the main frame
Primered up the side neon floaty thingys, mmmmmmmmmmmm Primer
So far
Underside
I've given Colin arms and will be fitting him into the cockpit soon.
I need to even up the paint a bit but thats no problem.
I think i know what the front end will look like, think Manta Ray?
I don't even know how you are going to be able to see the engine detail, if at all, i was tempted to do a fully detail interior but as i don't know what the final profile will look like, thats difficult to figure out.
Going to do a quiz/competition for the colour scheme so stay tuned....
Take care
Gag
IEDBOUNTYHUNTER
Sr Member
Sweet. Its looking great.
Evenin Everybody,
Thanks for the feedback and very positive encouragement.
Just for the record, some people have commented on my choice of viewing in the back ground, i think Bottom is one of the best TV shows of the 90's and still stands up today.
But............moving on,
I'm still finding it very difficult to come up with ideas this week, I've only managed to squeeze in a little bench time, and what I have done is a bit Meh, in my opinion
But lets get to it anyhoooo
Pix..
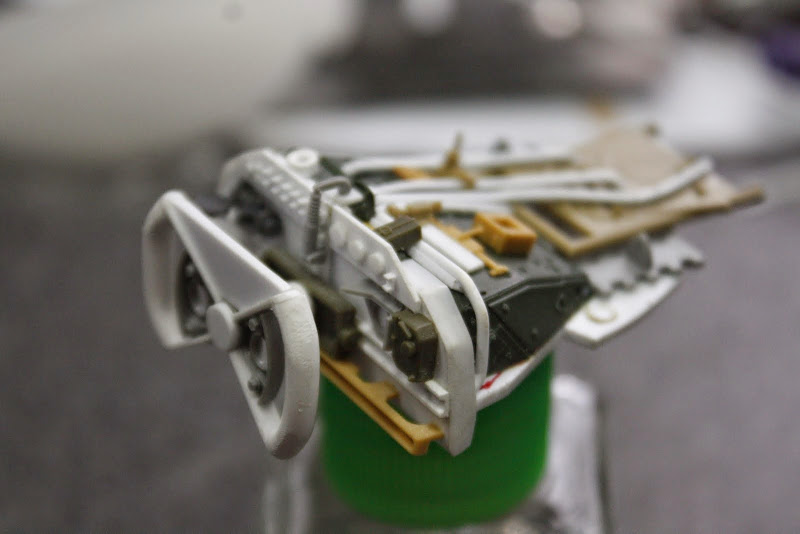
I had an aftermarket helmet in my stash and i wanted to make Colin's helmet a bit Stig-E-fyed so i added this nose piece and some filler to be shaped later

Very basic Colin fit with arm's.

Started the basic cockpit structure

Started detailing the dash board area


Stearing wheel, trimmed down a tank wheel


Everything dry fit together


Everything ready for........?

Primer, Mmmmmmmmmmmmmmmmmmm.


And that's about the size of it so far,
So stay tuned until next time,
Take care
Gagsterman
Thanks for the feedback and very positive encouragement.
Just for the record, some people have commented on my choice of viewing in the back ground, i think Bottom is one of the best TV shows of the 90's and still stands up today.
But............moving on,
I'm still finding it very difficult to come up with ideas this week, I've only managed to squeeze in a little bench time, and what I have done is a bit Meh, in my opinion
But lets get to it anyhoooo
Pix..
I had an aftermarket helmet in my stash and i wanted to make Colin's helmet a bit Stig-E-fyed so i added this nose piece and some filler to be shaped later
Very basic Colin fit with arm's.
Started the basic cockpit structure
Started detailing the dash board area
Stearing wheel, trimmed down a tank wheel
Everything dry fit together
Everything ready for........?
Primer, Mmmmmmmmmmmmmmmmmmm.
And that's about the size of it so far,
So stay tuned until next time,
Take care
Gagsterman
Evenin All,
Thanks Mike, it really does mean a lot to me that you are here with me because most of my greeblies are from you mate
Your positive feedback tells me that i'm going in the right direction buddy.
Pix..
Decided three big sticking points i was having........
1. Decided, unfortunately, to loose everybody's favourite driver, Colin, because i was losing so much time trying to fit the car around him, instead of him fitting into my car, plus he's modelled on a big fat 70's era driver, it's like when fat boy Micheal Andretti drove for McLaren and he couldn't fit in the car properly, well that was the reason he gave for his poor performance, anyhoo Colin was fighting me so i binned him, don't panic, i didn't literally bin him i just decided to take the oppertunity to detail the cockpit a bit more.
2. Decided that, yes, i was going to rob the williams seat belts. I will buy a an after market set.
3. Decided to cut the cockpit module in half so i had better access.

Gave the halves a quick sand

Installed the seat frame in the lower cockpit module.

Borrowed the front of a tank for the foot well

Also added side rails to the tub

Slotted the square stock to recieve the cockpit cover.
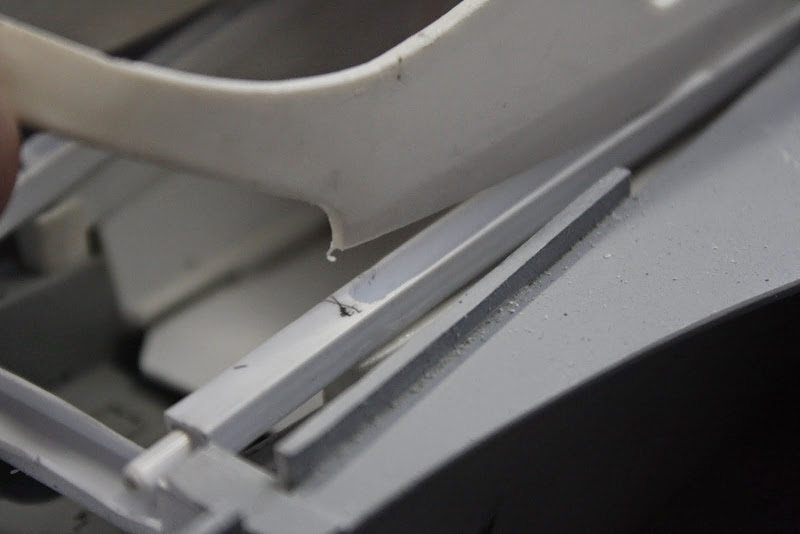

Cut a top plate and added some slots to also recieve the cockpit cover

Side plates

Added a few more wires to extend the detail panel a bit

Dry fit

Put some 'T' stock along the top edges of the slotted square stock


Epoxie sculpt seat and head rest


Another dry fit

Some side details

Rear bulkhead and fire prevention system
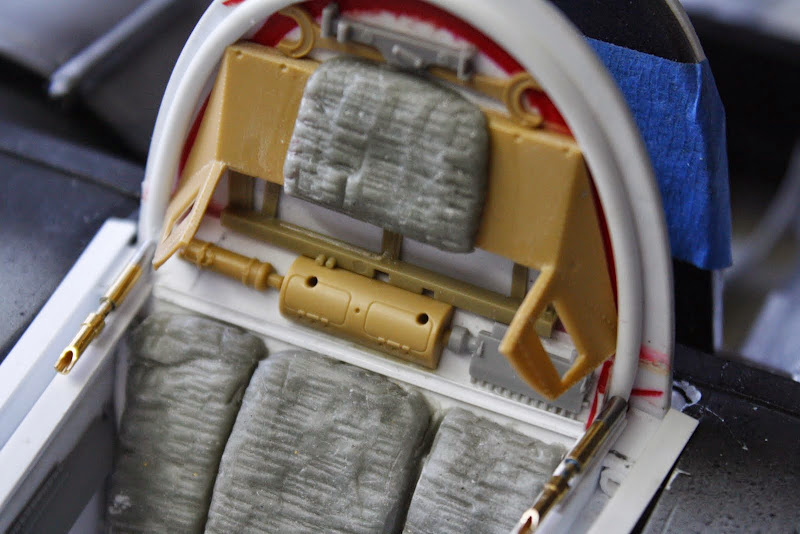
Dry fit with all cockpit components

Ready for............


You guessed it, Primer
Mmmmmmmm primer, my favourite season


And that is the story so far,
Next, who knows, i suppose i should paint the cock pit. Still intend to put some details on the inside of the cockpit cover and i still haven't figured out how i'm going to make the windscreen.
But, that's for another day
Take care
Gagster
Thanks Mike, it really does mean a lot to me that you are here with me because most of my greeblies are from you mate
Your positive feedback tells me that i'm going in the right direction buddy.
Pix..
Decided three big sticking points i was having........
1. Decided, unfortunately, to loose everybody's favourite driver, Colin, because i was losing so much time trying to fit the car around him, instead of him fitting into my car, plus he's modelled on a big fat 70's era driver, it's like when fat boy Micheal Andretti drove for McLaren and he couldn't fit in the car properly, well that was the reason he gave for his poor performance, anyhoo Colin was fighting me so i binned him, don't panic, i didn't literally bin him i just decided to take the oppertunity to detail the cockpit a bit more.
2. Decided that, yes, i was going to rob the williams seat belts. I will buy a an after market set.
3. Decided to cut the cockpit module in half so i had better access.
Gave the halves a quick sand
Installed the seat frame in the lower cockpit module.
Borrowed the front of a tank for the foot well
Also added side rails to the tub
Slotted the square stock to recieve the cockpit cover.
Cut a top plate and added some slots to also recieve the cockpit cover
Side plates
Added a few more wires to extend the detail panel a bit
Dry fit
Put some 'T' stock along the top edges of the slotted square stock
Epoxie sculpt seat and head rest
Another dry fit
Some side details
Rear bulkhead and fire prevention system
Dry fit with all cockpit components
Ready for............
You guessed it, Primer
Mmmmmmmm primer, my favourite season
And that is the story so far,
Next, who knows, i suppose i should paint the cock pit. Still intend to put some details on the inside of the cockpit cover and i still haven't figured out how i'm going to make the windscreen.
But, that's for another day
Take care
Gagster
Peripheral what now? :confused
WHUHHHHHHHHHHH... Love it! ")
I love watching your process. Very much digging the cockpit.
Is that a little cupholder I see on the dash?
Evenin All,
Thanks guys. I really appreciate the comments. Thanks for stopping by.
Glad your having as much fun as me
Onward,
Started to get the undertray sorted out. First I assembled the frame work.


Fitted end plates

Ready for the under tray

It took a while to get it fixed

Filler rod


Took alot of clamping to stick in every place i wanted


Plan view

Vent thingy

Still a few areas to attach, lots of filling and sanding to do, and maybe some skinning but overall I like the shape.


Thats all for now
Take care,
Cheerio
Gag
Thanks guys. I really appreciate the comments. Thanks for stopping by.
Glad your having as much fun as me
Onward,
Started to get the undertray sorted out. First I assembled the frame work.
Fitted end plates
Ready for the under tray
It took a while to get it fixed
Filler rod
Took alot of clamping to stick in every place i wanted
Plan view
Vent thingy
Still a few areas to attach, lots of filling and sanding to do, and maybe some skinning but overall I like the shape.
Thats all for now
Take care,
Cheerio
Gag
yuumi2891103
Master Member
Super!
Similar threads
- Replies
- 2
- Views
- 473