The 89 MattMobile Build Thread.

lol. appreciate the feedback and insight, though worth mentioning that in my blog, i specifically reference that photo and point out that it needs reinforcement, and gave explanation about why I did it that way :D

BUT, please don't let that thwart you from giving feedback. For everything I catch, there will be a million and one things I miss.

A lot of the fabrication work I'm doing right now is limited by the fact that the shell is ON the car. Once I get everything worked out, I'm going to pop the shell off and do more welding (most of the outside seams are untouched) and adding in of structural support.

- - - Updated - - -

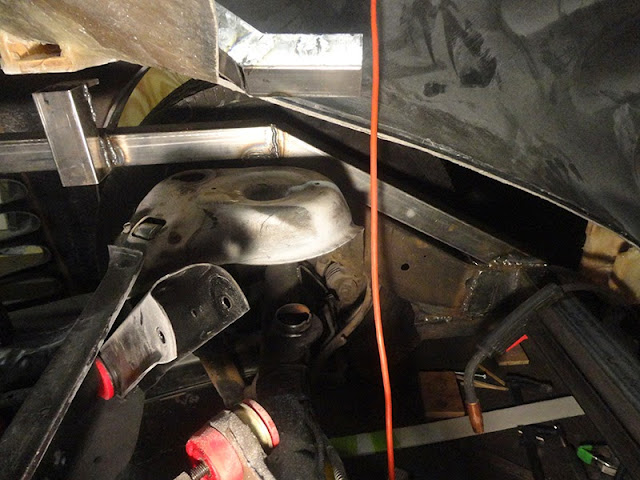
Here's a jig I put together to hold one of the side supports steady while I welded.

http://2.bp.blogspot.com/-gptSeMdoJI0/Uuo1XiTUODI/AAAAAAAAHdA/6TdSYO1b8-Y/s640/drivers+side+jig.jpg

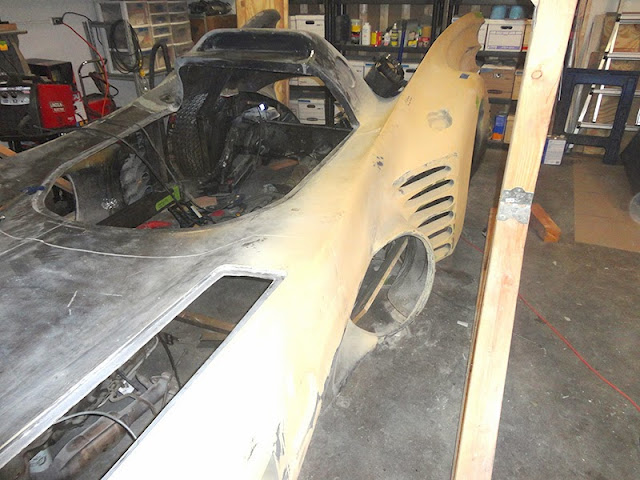
Here's how the drivers side looks right now.

http://2.bp.blogspot.com/-AhfC22NFv...NaMHfYiyA/s640/drivers+side+support+posts.jpg

And a good aerial shot.

http://3.bp.blogspot.com/-tEwVC0UHF...0/C_HL7sQPTbE/s640/aerial+view+mattmobile.jpg

Ahhh...yeah I missed the part where you pointed it out *embarrassed*
 
Ahhh...yeah I missed the part where you pointed it out *embarrassed*

No worries man and all good. Like I said, for every time I catch something, there's probably going to be fifty thousand things I missed.

In other news, today I finished mounting the shell to the chassis!!! All of the mounting points are now attached. I removed all of the wooden blocks that were under the shell, and it stayed PERFECTLY in position.

Bo the Welder also came by and we figured out how we are going to make the front hood attach and detach. I ordered parts for it tonight.
 
The shell is now mounted on the body! I finished fabricating all of the remaining support arms for the mounting points, and then removed all of the wooden blocks that were holding the thing in place. Once I get the rear axle re-connected, she will officially be a roller!

drivers+side.jpg


passenger+side.jpg


Here is the last support arm after installation:
rear+mount+passenger+side.jpg


More on the blog, here:

The Project Workbench: MattMobile Shell is Now Mounted
 
Your build is looking great! I can't wait to start one, I'm about to pick up a 95 Buick Roadmaster wagon. But its still a good year before I can order my body.
 
I have never seen anyone do a build off a Roadmaster, but that by no means proves it can't be done :D I chose to do the Chevy Caprice because MANY builds have been succesfully done on top of one, and they have been extensively blogged. that means I can learn from the mistakes of others, not have to reinvent the wheel, and often leverage much of the work and thought leadership that has taken place before me.

PLEASE be sure to blog your build, or start a thread documenting it. As much as I winge and moan in this thread about people calling me out on stuff I already knew about, the insight of members on this forum has been of immense value. Getting a few extra set of eyes on your project can be of great help.

Looking forward to seeing your build!
 
Rear Bumper is now installed!


A few more pics and detailed walkthrough is on the blog:
The Project Workbench: MattMobile - Rear Bumper and Support Arms

Here's how it looks getting it into place, prior to welding:

bumper+in+place.jpg


And here it is all welded in place. I added a support arm from the tip of the bumper up to the frame I'm building inside the shell. I reinforced the welds from the bumper to the frame with strips of steel over them, which were also welded into place.

passenger+side+support.jpg
 
I can't wait until you get to the details of this thing. Are you planning on doing the flip flop paint job as per the original cars?
 
Matt just saw your youtube video about your face, I had no idea, realy sorry to see you had the problem, but truely happy to see that you got it sorted.
All the best stay well
 
thanks guys! all good and on the mend.

Hey Matt - I had no idea that was going on otherwise I would have sent you my well wishes MUCH sooner!! I'm so glad that after seeing your video that you've had such a strong support net during this time and I'm glad that everything went so well.

All the best to you!

Dave
 
Finally, a new video!

If anyone is interested in providing some feedback, I'm curious if you think this video would be better broken into two separate ones. The first being the update on the work, the second being the bodywork tutorial.

 
Last edited by a moderator:
Great video - nice to see the progress. It seems fine as one video - loved the section on using the primer and marker pen - nice tip for us pepakura modellers, so thanks for that. :thumbsup

Only criticism - the breaks between videos are too long! :D
 
Matt, would an orbital or belt sander on low speed do too much damage too quickly? Is it necessary to do all the sanding by hand?

Great to see you back on it!

D
 
Back
Top