Studio scale klingon bird of prey landing config mods and accurate paint

More today. Other areas weathered back more and now the beasty is reassembled before the final pass of the airbrush to tie it all together. There will be other detailing to do as well , scratches and the like in the final touches. Then disassembly and painting the stand and he interior of the landing gear bays...etc. I used the wifes tablet for these images and it shows the blues a lot more like they are in real life. There are a couple from my phone in the batch which still give the blue glow, but the pictures showing he lighter blues show them as they are.
Andy Preston Bird of prey paint8.jpg
this ones from my phone, super blue
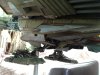
Andy Preston Bird of prey paint7.jpg
tablet imageAndy Preston Bird of prey paint.jpgAndy Preston Bird of prey paint2.jpgAndy Preston Bird of prey paint5.jpgAndy Preston Bird of prey paint3.jpg
phone againAndy Preston Bird of prey paint6.jpg
 
It is stunning with the wings up landing position, undercarriage out ready to land. Colours and weathering. Nothing more to be said. Just looks superb and only one I have seen this configuration this scale this colour scheme. What a piece of artwork and worthy to be shown in the movie I believe.
 
Yesterday was a technique tester for the rear weathering. I tested out a couple of methods to achieve the same results, (or close to) the look of the original. I ended up using three shades of grey getting progressively darker with each pass to shade the wings into the right kind of look, I hit each pass with some aggressive thinners splattered onto the newly applied grey/brown mix and immediately removed it with a soft cloth with a decent weave, ( no soft fluff or lint on its surface), to reveal the underneath colours. I did this three times in total allowing the paint to dry between each application. You need to be fast if you choose to do this, don't let the thinners hang about on the surface ! The final result looks pretty good I think, not quite as large splatters as the original, but no lack of visual texture.
Also I wasn't happy with the feet position, as they needed to come further forward to balance the look, so I made some extensions for the feet mechanism, and I will be refining these today as well as finishing the detailing in the doors, and painting the undercarriage.
More updates in a few days as I have another job for a little while. Take care.
e1.jpgandy preston bird of prey weathering engine 2.jpgandy preston bird of prey weathering engine 3.jpgandy preston bird of prey weathering engine 4.jpgandy preston bird of prey weathering engine 5.jpgandy preston bird of prey weathering engine 1.jpgandy preston bird of prey feet modification .jpg
 
That is beautiful and the colours coming through are amazing. Undercarriage looks superb. A lot of effort has been spent on this project and it really does show now it is so close to completion, Wonderful project to follow and a unique piece of work at this scale.
 
Thanks guys, your comments keep me wanting to go for it on this job. Its true you've made a movie monster an awesome reality Steve. What can I say, killer kit deserves as much a killer paint job as I can muster. Still more to come yet as well, with the next few detail touches, rust runs and paint chips etc. The final phase is here at last. Hope to get some cool pics by a photographer friend before it goes back home. I'm kind of getting attached to this model !!
Heres a quick overview of the undercarriage fitted before final strip down and paint.
andy preston bird of prey landing gear 3.jpgandy preston bird of prey landing gear 1.jpgandy preston bird of prey1 .jpgSAM_1652.JPG
sorry about the last image, great angle, bad picture !!!!
 

Attachments

  • 20160413_171550.jpg
    20160413_171550.jpg
    781.1 KB · Views: 194
The undercarriage looks bang on. You would never believe it has been scratch built as an add on to this model. It looks like it has always belonged there and makes a massive difference to the overall look of this epic model.
 
Well, its finally finished and lit up. Stand has been finished off with a plaque and the logo.
Big thanks to everyone who helped me out during this job and all the kind comments. Awesome kit this, get one if you can. Thanks to Wayne Middleton for the chance to work on this big boys toy and for choosing such a great colour reference Thanks to Steve at SWPropmaker for the bits I needed and other info I thought I didn't.

Next up another MR-Y wing repaint as gold leader. Ill post on that as I go next week.
 
Last edited:
seem to have issues with the postings here, if he images are not visible could someone let me know please.
Thanks folks
 
I would blame that fact on the owner of this piece no doubt wanting it back as soon as possible to be the centre piece and pride of his collection,
 
This thread is more than 7 years old.

Your message may be considered spam for the following reasons:

  1. This thread hasn't been active in some time. A new post in this thread might not contribute constructively to this discussion after so long.
If you wish to reply despite these issues, check the box below before replying.
Be aware that malicious compliance may result in more severe penalties.
Back
Top