You are using an out of date browser. It may not display this or other websites correctly.
You should upgrade or use an alternative browser.
You should upgrade or use an alternative browser.
STAR WARS - Skeleton Crew props & costume
- Thread starter TK41434
- Start date
Modery
Member
Just catching up on the thread, and had a look at some reference photos again that I saved yesterday. Noticed something that looks more like an actual simple belt buckle (shown in episode 4 and 5) towards his right hip

So I'm starting to think the belt buckle at the front is more for decoration.
Looking at the belt holes, it seems to approximately match - so the buckle might have one "pin" going through a hole (indicated via red dots for holes, and red lines to show approximate distance between holes), and at both sides you have these "lines" that go behind the belt (green)
pburgess
Active Member
Brutus has something similar going with his right hip holster. A friend and I searched the earth to find the buckle they used, to no avail. When I finally got ahold of the Black Series action figure, there was the answer: there’s a second functional buckle at the back. The one up front is probably just for show.
I believe I have found the correct buckle for Captain Brutus! It is a quick release buckle used on a military style belt you can find on ebay and
AliExpress.com. There are a couple of variations with the center button so watch out for that. I have ordered four of the belts and will provide photos once they arrive.

AliExpress.com. There are a couple of variations with the center button so watch out for that. I have ordered four of the belts and will provide photos once they arrive.
Last edited:
With the functional buckle to the side (a truly standard roller buckle) and with the fact that it moves all over comparedto the one in front (meaning the front slides around) the only answer for the mismatched gaps in the on-screen buckle is that it is broken or comes apart for some other reason.

And for it to simply slide along, being truly ornamental, means you have to purposely adjust it, constantly, to the front..... hinting, strongly, at "LOOK AT THIS BUCKLE WE WANT YOU TO THINK IT MEANS SOMETHING!!!!!".
In addition, it indicates the to points that look like plates on the scale or eyes on the Orca/dragon/horse/force were not functional but artistic and are intended to be there.
Finished my walkie talkie build! Massive thanks to nickytea for posting the replacement graphic which prompted this process! It's a really quick build overall since you really just need to print and paint a few small greebles, and cut out two stickers.


I designed the antenna-related parts to be used with a generic magnetic pick-up tool as replacement antenna - other sizes of antennae or tools might not fit these parts, but the axial holes can be enlarged to size with a drill bit. To mount the antenna, I flipped the pocket clip around, shortened it, and drilled a hole for the original mounting screw (see pic). With this method, the end of the first section sticks out about 1/4 inch further than in reference photos; Dremeling out the original antenna mounting threaded post would allow it to be inset further. This is the pick-up tool I used: Amazon.com
The vintage walkie's plastic can be a little brittle, so I reinforced the antenna mounting further inside the shell using a section of tube cut from the regular bushing part. This reduces stress on the thin plastic around the antenna (mine was cracking), and the tubeless bezel part has the benefit of allowing the bezel to sit flat against the slope of the shell. It looks like there are two versions of this detail on the show - a painted one as in the display, and a polished or chromed metal version as in some screencaps.
There are two versions of the bar slider greeble - one is a single piece and one is split so that the bar and slider are separate pieces. Note the bar greeble on my finished walkie talkie is an older draft where the bars are just a little too thick – the STL uploaded below is thinner.
The red LEDs are backlit with one of these flashing COB circuits: https://www.aliexpress.us/item/3256806171752709.html I had to trim it a little shorter to fit. A latching power switch was glued just below the push-to-talk switch, with a CR2032 battery holder located in the original battery compartment. I was really tempted to try the Arduino code that gmrhodes13 kindly shared in post #167 but Arduino is still new to me so that will have to wait for another time")
I posted the files here: Conversion parts for Skeleton Crew Walkie Talkie by mooslug | Download free STL model | Printables.com
Also included is a PDF for the lower label (following nickytea's layout).
I designed the antenna-related parts to be used with a generic magnetic pick-up tool as replacement antenna - other sizes of antennae or tools might not fit these parts, but the axial holes can be enlarged to size with a drill bit. To mount the antenna, I flipped the pocket clip around, shortened it, and drilled a hole for the original mounting screw (see pic). With this method, the end of the first section sticks out about 1/4 inch further than in reference photos; Dremeling out the original antenna mounting threaded post would allow it to be inset further. This is the pick-up tool I used: Amazon.com
The vintage walkie's plastic can be a little brittle, so I reinforced the antenna mounting further inside the shell using a section of tube cut from the regular bushing part. This reduces stress on the thin plastic around the antenna (mine was cracking), and the tubeless bezel part has the benefit of allowing the bezel to sit flat against the slope of the shell. It looks like there are two versions of this detail on the show - a painted one as in the display, and a polished or chromed metal version as in some screencaps.
There are two versions of the bar slider greeble - one is a single piece and one is split so that the bar and slider are separate pieces. Note the bar greeble on my finished walkie talkie is an older draft where the bars are just a little too thick – the STL uploaded below is thinner.
The red LEDs are backlit with one of these flashing COB circuits: https://www.aliexpress.us/item/3256806171752709.html I had to trim it a little shorter to fit. A latching power switch was glued just below the push-to-talk switch, with a CR2032 battery holder located in the original battery compartment. I was really tempted to try the Arduino code that gmrhodes13 kindly shared in post #167 but Arduino is still new to me so that will have to wait for another time
I posted the files here: Conversion parts for Skeleton Crew Walkie Talkie by mooslug | Download free STL model | Printables.com
Also included is a PDF for the lower label (following nickytea's layout).
gmrhodes13
Active Member
You would have to be happy with that, nice work, thanks for the share of files too, thank goodness my brain just can't handle STL creation, although I have had some success editing existing files.Finished my walkie talkie build! Massive thanks to nickytea for posting the replacement graphic which prompted this process! It's a really quick build overall since you really just need to print and paint a few small greebles, and cut out two stickers.
View attachment 1894948
Not sure if I mentioned with the Arduino I used a voltage step down board to reduce power from 9V to 5V and took the power directly from the walkie circuit board and on/off volume switch so no extra batteries needed, I will try to remember to take a photo with the next pair I put together.
I am still a newbie with Arduino and I put off using it for some years fearing my brain wouldn't be able to compute the data, but once I got into it I found a lot of code is already out there and quite easy to modify for your own uses (you just have to find it
), it's well worth taking that step into Arduino, amazing what you can do with these little boards, just took my prop builds up another level.pburgess
Active Member
I am SCREAMING. You are my hero!I believe I have found the correct buckle for Captain Brutus! It is a quick release buckle used on a military style belt you can find on ebay and
AliExpress.com. There are a couple of variations with the center button so watch out for that. I have ordered four of the belts and will provide photos once they arrive.
Darthikari
New Member
Hoping to get some good info on Captain Silvo’s coat, but even getting reference pictures is tough. I’m currently printing his helmet using the PewPew Crafts files. Hopefully I can have it printed out before the finale next week…
For me to move forward with this sculpt, I need to accept that it is not perfectly symmetrical. The small differences from left to right (the reason it seemed to come apart) are likely just evidence of it being a hand sculpted piece, not mirrored in a 3d program. With that said I will likely make mine like his, rather than making it symmetrical.

I don't want to jam up this thread with all my questions but would not have had a chance of wrapping my brain around this project without the input so far, so just a few more steps done here...
Oh and let me know if someone is already done 3d sculpting this piece. Lots of zbrush folks could kick this out in a day but I am low skill, high hope with a dash of ocd optional inspiration.
Because I live in my head and cannot get away from manufacturing processes, I continue to go back to doing things like moulding and casting instead of 3d. My current plan is to sculpt with a completely flat back on a plastic surface (like a notebook cover. When finished, I can lift it off the table and lay it on a rounded surface like a barrel (keeping to the human curve at the waist). Build mould walls around that, high enough to poor a mould to cover the entire buckle (with a final flat mould back). What this should accomplish is the creation of a curved mould (on the face) but the front then should look like his buckle including the proper curve.
From there, I have the option to create my first hard positive from which I can scan with the 3d scanner for sharing.
The other possibility is making the original sculpt with a bakable clay and put it on a metallic curve surface for baking.... that feels unstable with posiible movement during heating but I know super sculpy is used this way on standing statues so it must work, right?.....?
Am I really seeing the side to side differences or is this a light on metal illusion? I simply can't personally get around it, especially how one "animal" looks like an Eskimo depiction of an Orca and the opposite side does not. Help me Obi Wan, you're my only hope. As in, seriously, I need someone to just foot down lay out their opinion so I can get out of this decision spiral.
TK41434
Well-Known Member
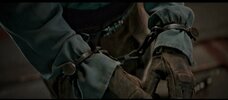
Some of the Troiks in Star Wars: Skeleton Crew are using the M1 steel helmet, and Hayna is only wearing the M1 liner...

.jpg")
Check the following thread Post in thread 'Military equipment props & costume parts used in Star Wars movies & series' Military equipment props & costume parts used in Star Wars movies & series
Check the following thread Post in thread 'Military equipment props & costume parts used in Star Wars movies & series' Military equipment props & costume parts used in Star Wars movies & series
GreyGuard38
Active Member
That belt buckle looks like Kim, the owl!
Modery
Member
I think you're right - it doesn't seem to be perfectly symmetrical, but looks more like it was hand-sculpted (or "deformed" over the years). Was looking at my picture collection again, and while the angles and lighting might play a role in how the buckle looks like, overall it still seems to be "slightly imperfect".For me to move forward with this sculpt, I need to accept that it is not perfectly symmetrical. The small differences from left to right (the reason it seemed to come apart) are likely just evidence of it being a hand sculpted piece, not mirrored in a 3d program. With that said I will likely make mine like his, rather than making it symmetrical.
View attachment 1895301
I don't want to jam up this thread with all my questions but would not have had a chance of wrapping my brain around this project without the input so far, so just a few more steps done here...
Oh and let me know if someone is already done 3d sculpting this piece. Lots of zbrush folks could kick this out in a day but I am low skill, high hope with a dash of ocd optional inspiration.
Because I live in my head and cannot get away from manufacturing processes, I continue to go back to doing things like moulding and casting instead of 3d. My current plan is to sculpt with a completely flat back on a plastic surface (like a notebook cover. When finished, I can lift it off the table and lay it on a rounded surface like a barrel (keeping to the human curve at the waist). Build mould walls around that, high enough to poor a mould to cover the entire buckle (with a final flat mould back). What this should accomplish is the creation of a curved mould (on the face) but the front then should look like his buckle including the proper curve.
From there, I have the option to create my first hard positive from which I can scan with the 3d scanner for sharing.
The other possibility is making the original sculpt with a bakable clay and put it on a metallic curve surface for baking.... that feels unstable with posiible movement during heating but I know super sculpy is used this way on standing statues so it must work, right?.....?
Am I really seeing the side to side differences or is this a light on metal illusion? I simply can't personally get around it, especially how one "animal" looks like an Eskimo depiction of an Orca and the opposite side does not. Help me Obi Wan, you're my only hope. As in, seriously, I need someone to just foot down lay out their opinion so I can get out of this decision spiral.
Sadly I don't have any 3D sculpting experience, otherwise I would've started on it by now
I just need to break out the clay and get started. I am hoping for a concensus on belt width... 1.5 inch or 1.75?? joberg any guess?I think you're right - it doesn't seem to be perfectly symmetrical, but looks more like it was hand-sculpted (or "deformed" over the years). Was looking at my picture collection again, and while the angles and lighting might play a role in how the buckle looks like, overall it still seems to be "slightly imperfect".
Sadly I don't have any 3D sculpting experience, otherwise I would've started on it by now
View attachment 1895705

Modery
Member
I'm voting for 1.75inch. Tried to check the belt height by comparing Jude Law's height (1.82m) from the cutout against a screenshot from episode 7 where the belt is visible and he stands relatively straight. Green bar is approximately 1.82m, and I then compared this with the approximate belt height (red bar). Higher res pictures gave me lots of pixels to do some calculations, ended up somewhere around 4.8cm (~1.89 inches). Considering that this is only approximate (think a few pixel less for the red bar make a big difference), and this number is heigher than 1.75in, I feel quite comfortable with this guess.I just need to break out the clay and get started. I am hoping for a concensus on belt width... 1.5 inch or 1.75?? joberg any guess?
Also, here's the belt screenshot from this scene:
Similar threads
- Replies
- 179
- Views
- 16,657
- Replies
- 4
- Views
- 845
- Replies
- 16
- Views
- 2,836