james kirk
Active Member
Re: Star Trek TOS Wand Company Communicator Modification Project! Alpha To Beta Vers
Can't wait to see which one works out for you.
Mike
Can't wait to see which one works out for you.
Mike
Can't wait to see which one works out for you.
Mike
") I'm going to test it on my other communicator and see how the light looks. If it looks bright enough then it's a go.
I'm going to test it on my other communicator and see how the light looks. If it looks bright enough then it's a go.Some people have been using sandpaperMe too!
Still debating on whether to do anything with shells appearance or leave them the way they are.:unsure
Some people have been using sandpaper
and another is using a cotton t-shirt.
I think the t-shirt looks the best.
Just buff it till it is right.
He used a rounded tool with the t-shirt for in the wells of the top she'll.
Mike


Tim
Here are several pic's for the jewels and removel from thegooj at the TPZ.
First is the removal of the mirror coating from the backs of the Swarovski crystals.
View attachment 642998
He gave premission to repost this.
Hope it helps.
Mike
Tell him thanks as well! I will give that a try and see how it works.
Great job on the Wand Co comm mod!
I've drilled/tapped mine and installed 2-56 brass pateena slotted screws.
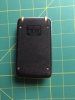
One thing I'd love to do is replace the back comm shell. This would get rid of the FCC indent which is a real buzz kill for me. Anyone up for vac forming a replacement back shell as an upgrade for these?
http://i1041.photobucket.com/albums/b419/DigiGal_taper/Star Trek/IMG_0643_zps19dtfbps.jpg
Outstanding job! Looks fantastic!!