You are using an out of date browser. It may not display this or other websites correctly.
You should upgrade or use an alternative browser.
You should upgrade or use an alternative browser.
Space 1999 Eagle Transporter Build Club (PIC HEAVY!)
- Thread starter Atlanthia
- Start date
Re: Space 1999 Eagle Transporter Build Club UPDATED Sept 26th (PIC HEAVY!)
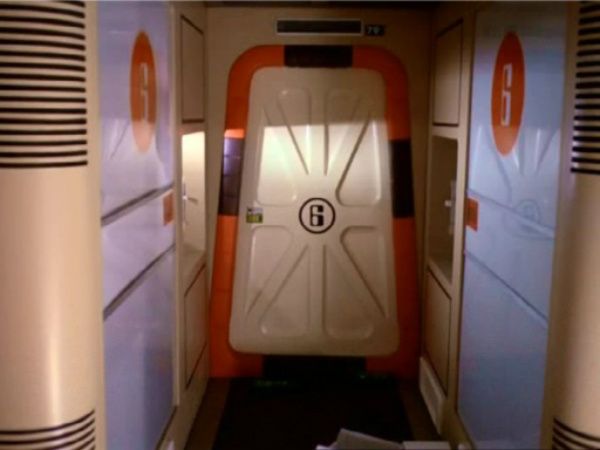
Cheers, Randy! I am hoping that when it is all painted up, it will look a lot better than it does at present. I have to also make the rope coil, the grappling hook etc to put in the cubbyholes, either side of the door, too.
Those details are amazing! At first glance, they look like stills from the set.
Cheers, Randy! I am hoping that when it is all painted up, it will look a lot better than it does at present. I have to also make the rope coil, the grappling hook etc to put in the cubbyholes, either side of the door, too.
LMFAOSchwarz
Sr Member
Re: Space 1999 Eagle Transporter Build Club UPDATED Sept 26th (PIC HEAVY!)
You gonna add a Tony Cellini hatchet?")
You gonna add a Tony Cellini hatchet?
Re: Space 1999 Eagle Transporter Build Club UPDATED Sept 26th (PIC HEAVY!)
Si, si! Lika thisa one!

You gonna add a Tony Cellini hatchet?
Si, si! Lika thisa one!
Last edited:
LMFAOSchwarz
Sr Member
Re: Space 1999 Eagle Transporter Build Club UPDATED Sept 26th (PIC HEAVY!)
"Don't call me Darren...call me Tony."
Si, si! Lika thisa one!
"Don't call me Darren...call me Tony."
LMFAOSchwarz
Sr Member
Re: Space 1999 Eagle Transporter Build Club UPDATED Sept 26th (PIC HEAVY!)
Sorry...it was easier to sit here and crack jokes!:lol
Just hurry up and get that eagle unboxed! :lol
Sorry...it was easier to sit here and crack jokes!:lol
greylocke
Sr Member
Re: Space 1999 Eagle Transporter Build Club UPDATED Sept 25th (PIC HEAVY!)
You're right about the color looking better. And the scaling with your astronaut looks good as well.
Well Here is today's update!
I have been concentrating on pushing the front walkway along towards completion and I have made some progress to that effect. I have cut and glued the walls in place and they are solid and strong.
I also made a start on the shelving units that take up the rest of the wall space in this compartment. As always, the T.V. Set is nowhere near as long as the the Eagle Dimensions, so I have had to stretch the shelves by about 10 mm to take up the gap. I will construct a mirror image of this unit tomorrow, for the other side.
At the moment, the internal units and shelves are just placed for test fitting.
I have also decided on the colour I shall be using to paint the interior. It's a sort of sand/beige colour which is way more accurate than the cocoa colour that you can see on the left hand unit. Suffice to say that I shall be repainting it to match the other.
I also marked out the floor markings and put a coat of paint down, as you can see.
What a difference a coat of paint makes!
Thank you for looking in and I hope you enjoyed seeing the progress.
All comments/critiques are, as always, very welcome
Darren
You're right about the color looking better. And the scaling with your astronaut looks good as well.
Re: Space 1999 Eagle Transporter Build Club UPDATED Sept 26th (PIC HEAVY!)
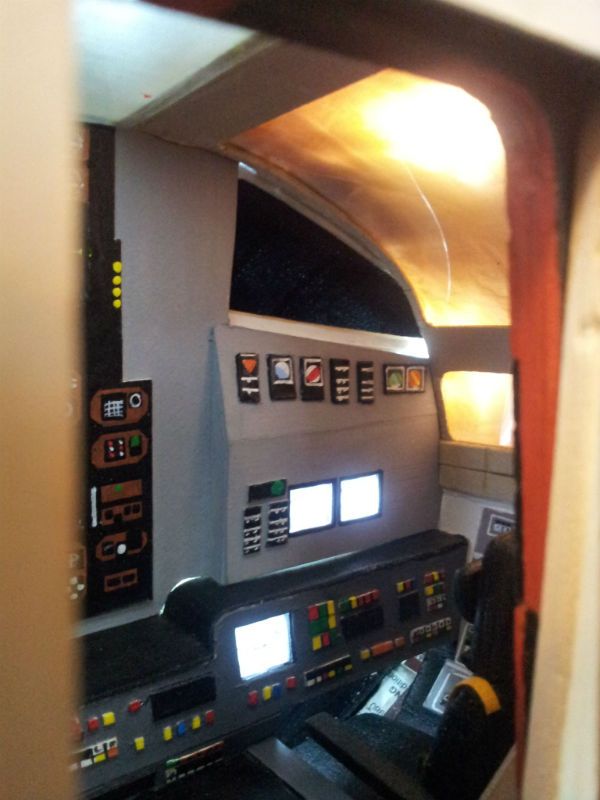
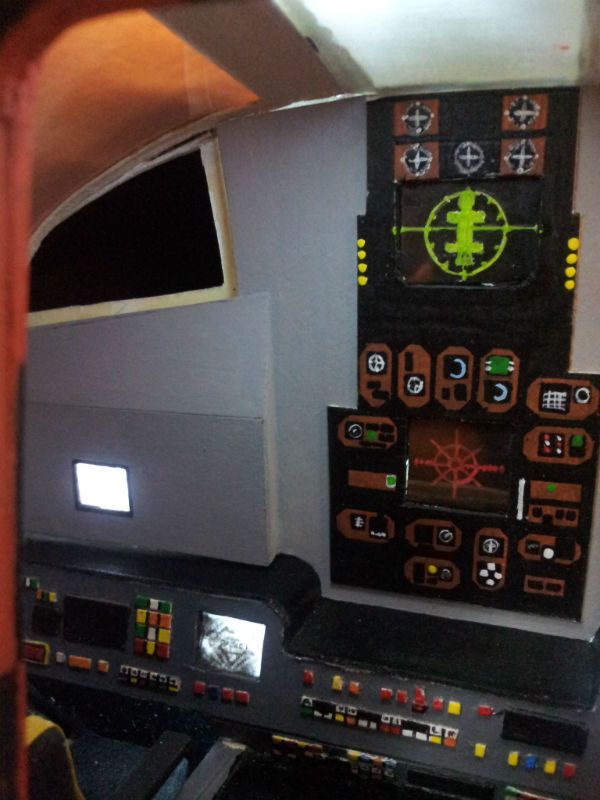
I have been working a little on trying to advance the missing consoles etc in the CM cockpit. I have made a start on the co-pilot's side, although it still needs tidying and finishing. I also have started work on the front wall of the cockpit and I have decided to go with Roberto Baldassari's rendering.
I have made a start by constructing the two raised panel areas below the windows and have installed the screens, ready for lighting, if I decide to do so.
I have also painted the centre section as per the original, or as close as I can get it at this scale.
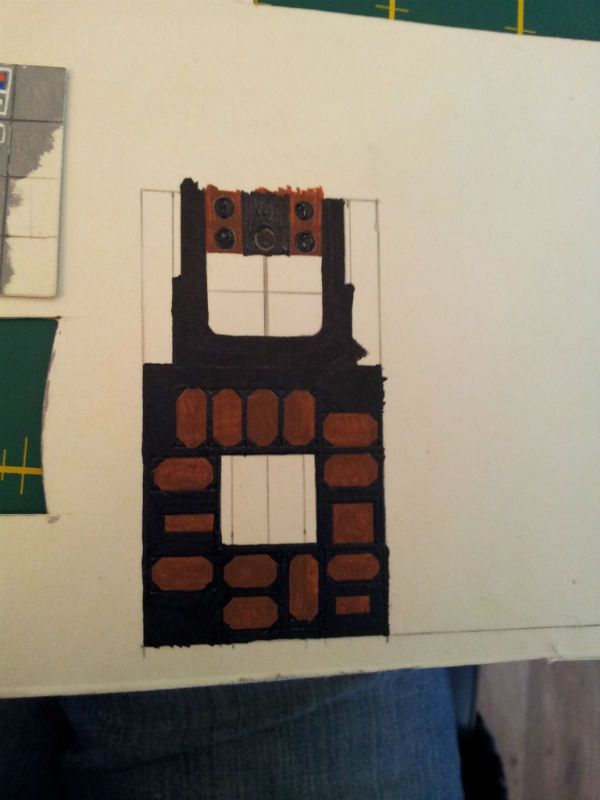
I then painted it all grey and applied the centre console.

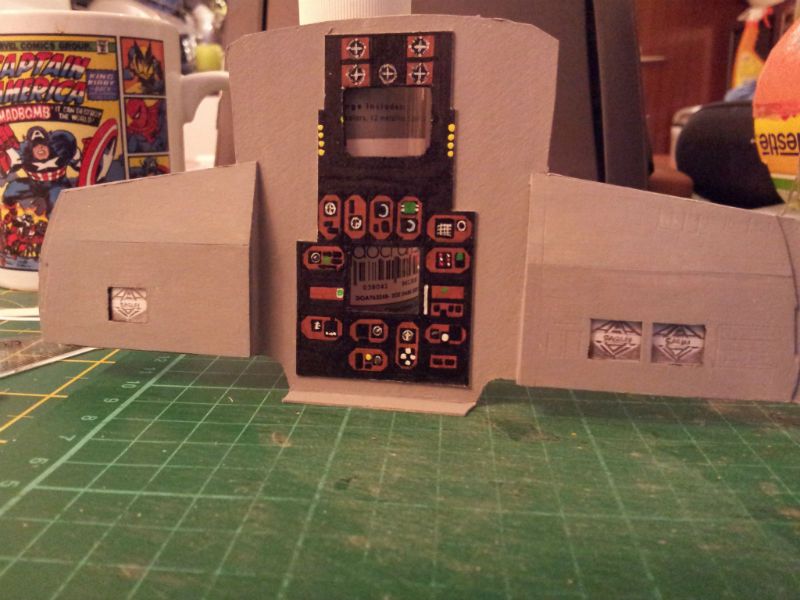
The fitting to the Cockpit is where the time has gone but it payed off in the end.
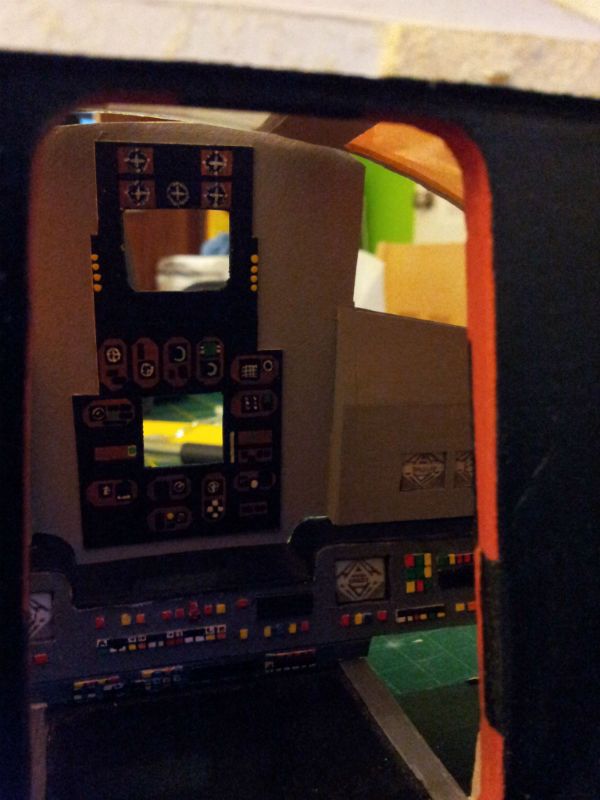
Obviously, there are more instruments to draw, paint and glue on but at least the main structure is up and running.
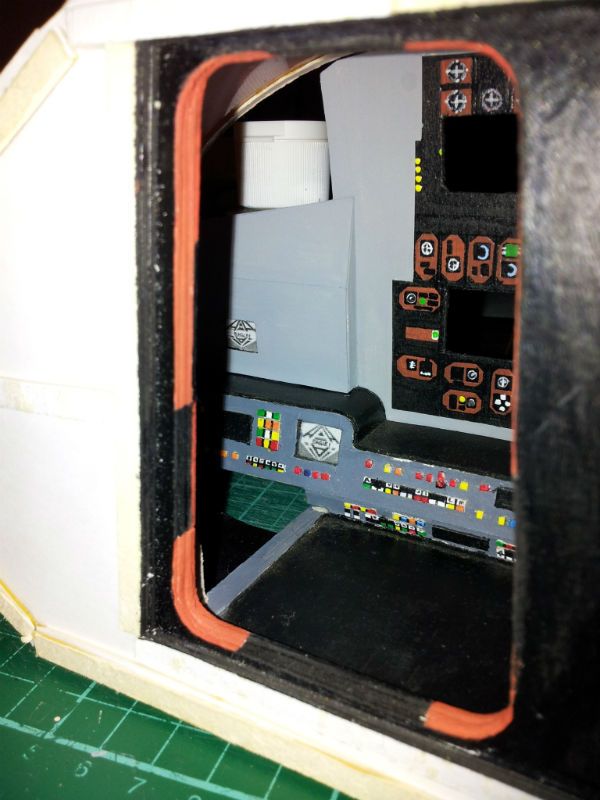
There is still a lot of work to do here before this is even close to where I want it to be but it's a darned sight further on than it was this time yesterday.
Slow work....
I have been working a little on trying to advance the missing consoles etc in the CM cockpit. I have made a start on the co-pilot's side, although it still needs tidying and finishing. I also have started work on the front wall of the cockpit and I have decided to go with Roberto Baldassari's rendering.
I have made a start by constructing the two raised panel areas below the windows and have installed the screens, ready for lighting, if I decide to do so.
I have also painted the centre section as per the original, or as close as I can get it at this scale.
I then painted it all grey and applied the centre console.
The fitting to the Cockpit is where the time has gone but it payed off in the end.
Obviously, there are more instruments to draw, paint and glue on but at least the main structure is up and running.
There is still a lot of work to do here before this is even close to where I want it to be but it's a darned sight further on than it was this time yesterday.
Slow work....
Last edited:
LMFAOSchwarz
Sr Member
Re: Space 1999 Eagle Transporter Build Club UPDATED Sept 26th (PIC HEAVY!)
Looking good!!
I'm kind of in the mood right now to join in, but sadly my work week has kicked in, and I've just enough time between shifts to sleep, shower, and if I'm lucky, eat! But rest assured it won't be long now!
Nice coffee mug! Wasn't that image from Cap's 100th issue?
No, wait..it was the 200th issue, 1976!
LMFAOSchwarz
Sr Member
Re: Space 1999 Eagle Transporter Build Club UPDATED Sept 26th (PIC HEAVY!)
Well, according to my research, there was an Easter in 1976..so I must be right after all!:cool
I have no idea, Mate. It came with an Easter egg on it! :lol
Well, according to my research, there was an Easter in 1976..so I must be right after all!:cool
Re: Space 1999 Eagle Transporter Build Club UPDATED Sept 26th (PIC HEAVY!)
That would indeed be nice and thank you for the vote of confidence!
Well, finally, an update for you all and I apologize for the delay.....:$
I have been doing a little bit of everything these last few days and although no single area has progressed massively, I have quietly made progress, nonetheless. :confused
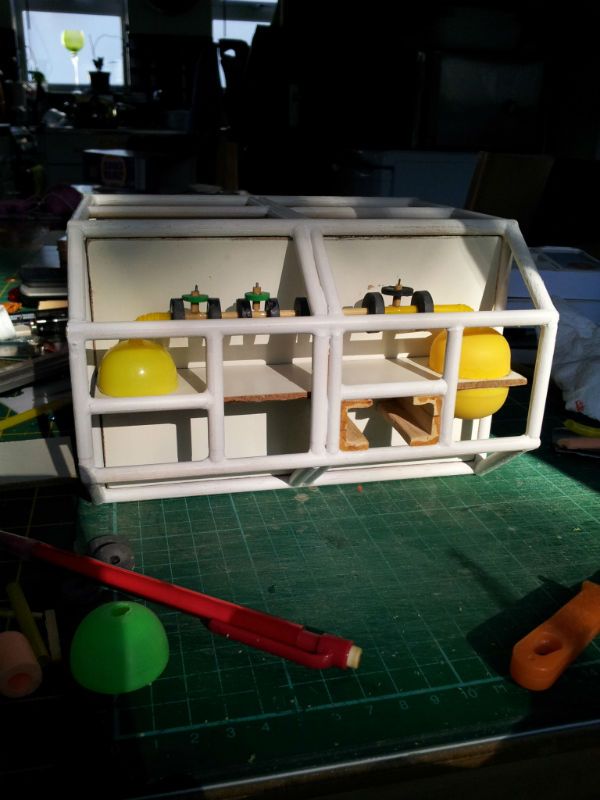
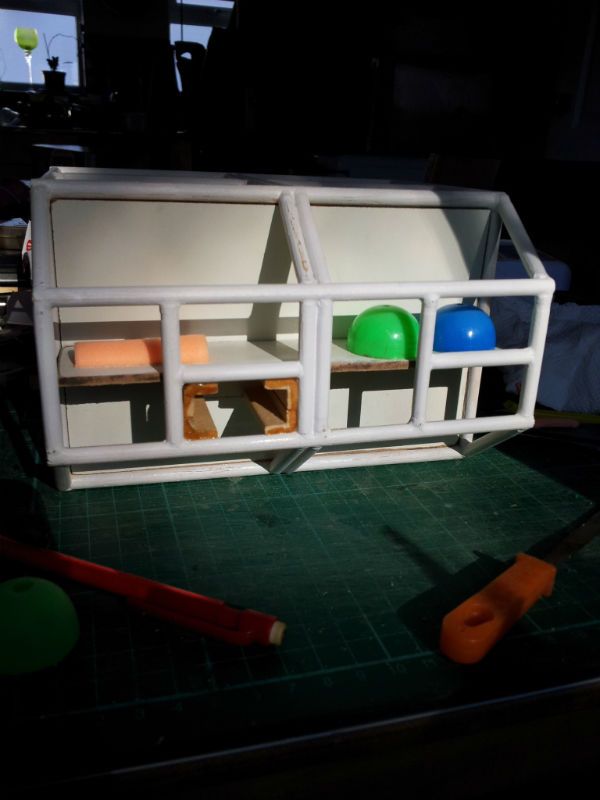
I have installed the shoulder pod connectors to the forward walkway cage. I will be bracing these, both above and below for extra strength, but I am already happy with the load bearing strength as it stands.

As you can see, I have finally glued the shelves into position and started to build the greeblies. I m trying to make them as accurate as I can considering my budget but I have absolutely no views of the underside of these shelves. Can anyone identify which Eagle they are from and offer some reference pics to help me out of this little fix? In the meantime, here are a couple more pictures to show how it is progressing:
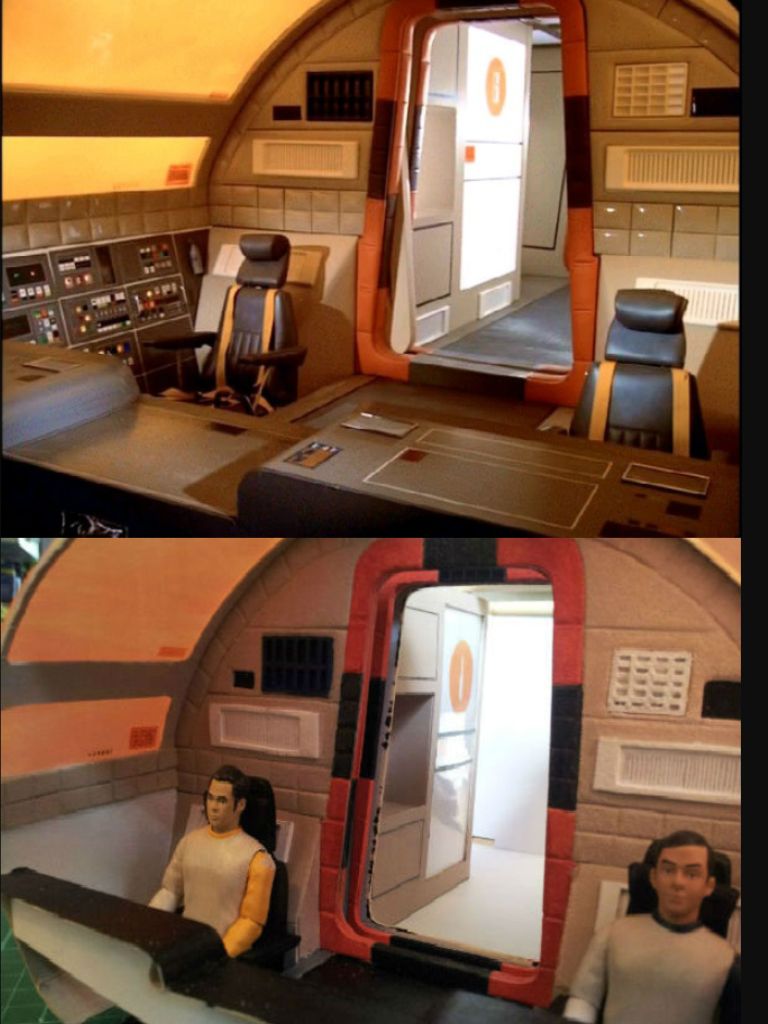
I have made some progress on the front wall of the cockpit and am almost ready to install the lighting. Here is the state of play. Obviously, I will need to finish the front wall and rectify any light bleeds before final fixing etc.
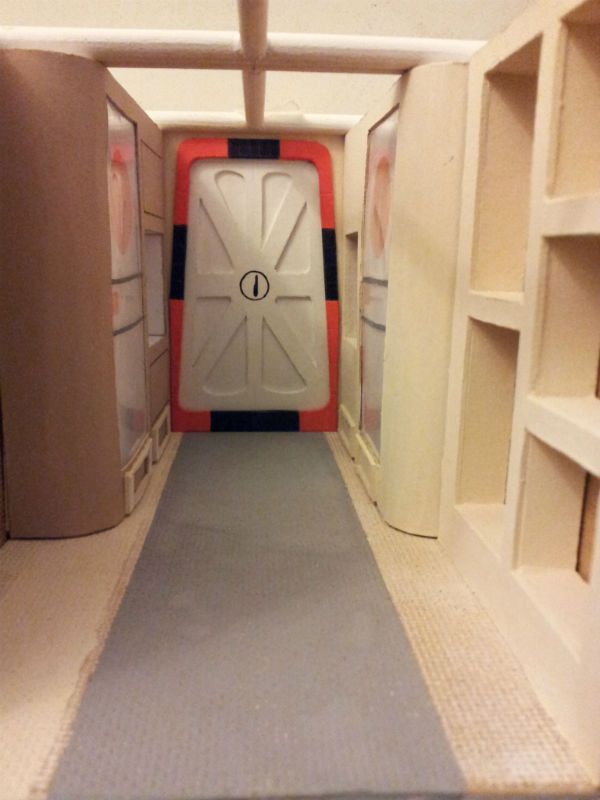
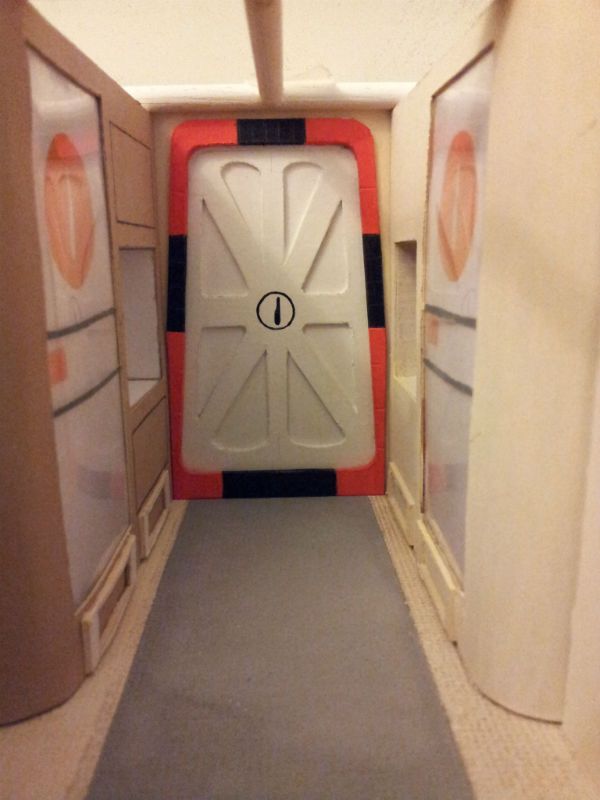
Here's how the front walkway is progressing with lighting. I have put in a comparison picture.
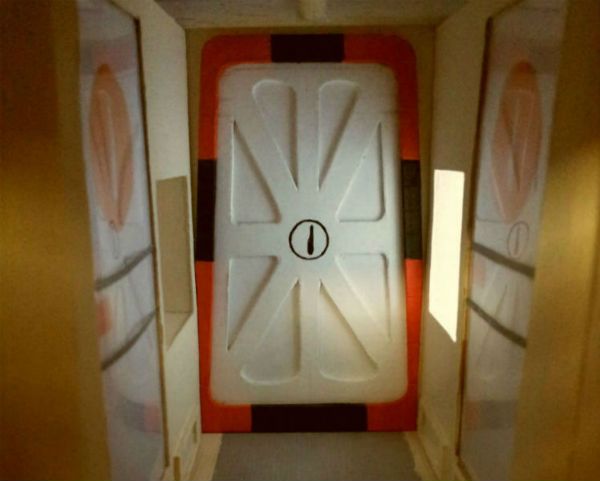
Since taking these photos, I have finished all the tramlines on the units and finished up the white air vents at floor level. I have also temporarily attached the two shoulder pods and I am wondering if I should not attach them permanently, or keep them removable as on the 44" Eagles...The walkway end walls with sliding doors and pockets have also been built and painted, ready for final installation, once the wiring loom has been installed.
I will take some pics and post ASAP. but apart from that, it's all been about running the wires for the lighting loom and working out how to connect/disconnect the loom between modules....
So, as I say, lots of work completed but little to really show for it at this moment in time. Hopefully, in a few days, these bitty jobs will all culminate in a massive jump forward and I will have an update that is actually worth reading!
Well Thanks for looking in and all comments welcome!
Darren
Those control panels are awesome. Even though you are having a scaling problem, I think when it's done you will have the closest to screen used as possible to get.
That would indeed be nice and thank you for the vote of confidence!
Well, finally, an update for you all and I apologize for the delay.....:$
I have been doing a little bit of everything these last few days and although no single area has progressed massively, I have quietly made progress, nonetheless. :confused
I have installed the shoulder pod connectors to the forward walkway cage. I will be bracing these, both above and below for extra strength, but I am already happy with the load bearing strength as it stands.
As you can see, I have finally glued the shelves into position and started to build the greeblies. I m trying to make them as accurate as I can considering my budget but I have absolutely no views of the underside of these shelves. Can anyone identify which Eagle they are from and offer some reference pics to help me out of this little fix? In the meantime, here are a couple more pictures to show how it is progressing:
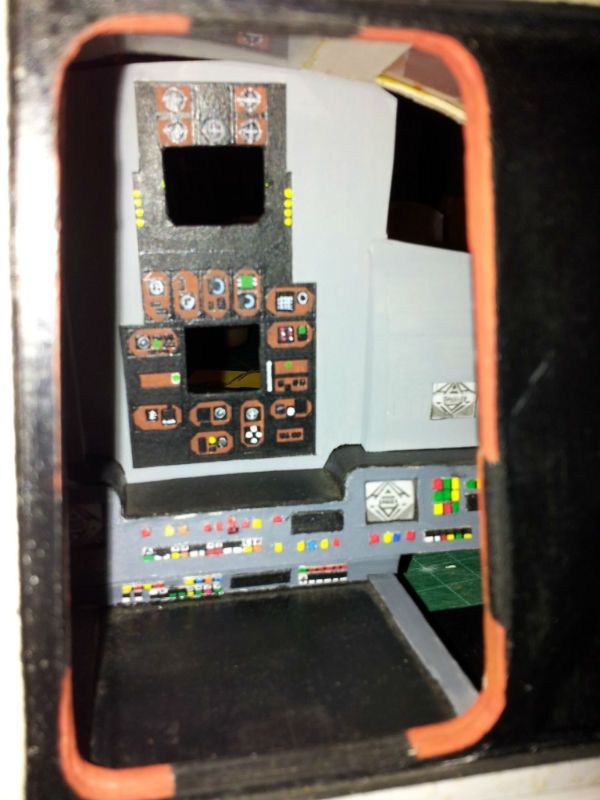
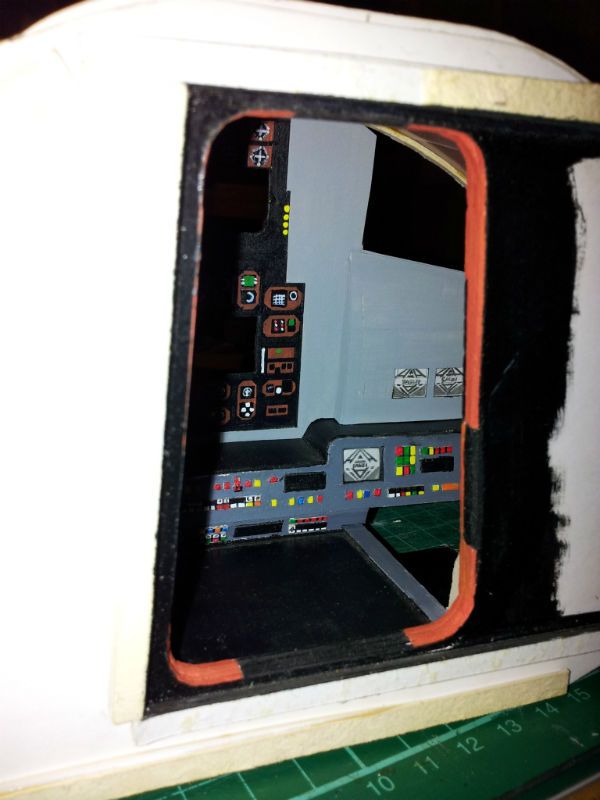
I have made some progress on the front wall of the cockpit and am almost ready to install the lighting. Here is the state of play. Obviously, I will need to finish the front wall and rectify any light bleeds before final fixing etc.
Here's how the front walkway is progressing with lighting. I have put in a comparison picture.
Since taking these photos, I have finished all the tramlines on the units and finished up the white air vents at floor level. I have also temporarily attached the two shoulder pods and I am wondering if I should not attach them permanently, or keep them removable as on the 44" Eagles...The walkway end walls with sliding doors and pockets have also been built and painted, ready for final installation, once the wiring loom has been installed.
I will take some pics and post ASAP. but apart from that, it's all been about running the wires for the lighting loom and working out how to connect/disconnect the loom between modules....
So, as I say, lots of work completed but little to really show for it at this moment in time. Hopefully, in a few days, these bitty jobs will all culminate in a massive jump forward and I will have an update that is actually worth reading!
Well Thanks for looking in and all comments welcome!
Darren
LMFAOSchwarz
Sr Member
Re: Space 1999 Eagle Transporter Build Club UPDATED Sept 26th (PIC HEAVY!)
I'd say you have a lot to show! It's really beginning to transform into what it's ultimately going to be...if that makes sense.
From what I can see, your pod struts will be load-bearing like mine. I'm hopeful this will take a lot of work off the spine!
Cockpit is looking awesome!:cool
I'd say you have a lot to show! It's really beginning to transform into what it's ultimately going to be...if that makes sense.
From what I can see, your pod struts will be load-bearing like mine. I'm hopeful this will take a lot of work off the spine!
Cockpit is looking awesome!:cool
Chrisisall
Master Member
Re: Space 1999 Eagle Transporter Build Club UPDATED Sept 26th (PIC HEAVY!)
So colourful!!
So colourful!!
Re: Space 1999 Eagle Transporter Build Club UPDATED Sept 26th (PIC HEAVY!)
Thank you, Guys.
I know that once I overcome the phobia about installing the lights, (having never done it before,) that sections can suddenly be finally assembled and finished. Do I run the wiring through cavities and under the floor etc or do I simply run it down the length of the spine and spray it white with the model? How and where do I fit connectors between sections so that the model can be easily broken down into its composite sections? These are some of the issues that have been plaguing this build and have dictated how certain aspects of the build are constructed. In short, lighting this thing up has become a right royal pain in the butt! :lol
As I say, I hope that very soon, it will suddenly make a huge step forward, when all these still un-assembled sections, finally go together.
Thank you for the ongoing support; I really appreciate it, although I do miss my Build Buddy's contributions....I just hope that my eagle isn't too far along by the time Bob gets his build back on track, or he may lose interest....
Last edited:
LMFAOSchwarz
Sr Member
Re: Space 1999 Eagle Transporter Build Club UPDATED Sept 26th (PIC HEAVY!)
I miss my contributions, too: mainly because I feel less lazy trying to keep up with you! Trust me, though, I will be joining back in very soon. Sooner than you think, 'cause if I get intimidated now by your fine work I'll hate myself until the end of time.:cry
I miss my contributions, too: mainly because I feel less lazy trying to keep up with you! Trust me, though, I will be joining back in very soon. Sooner than you think, 'cause if I get intimidated now by your fine work I'll hate myself until the end of time.:cry
Similar threads
- Replies
- 2
- Views
- 110
- Replies
- 3
- Views
- 217
- Replies
- 19
- Views
- 1,137