Captured photos were obtained from the Skeleton Crew props thread to first sculpt then mould and cast a replica buckle for Jude Law's Star Wars Skeleton Crew character, Jod Na Nawood. (Thanks to many in that thread):
Thread 'STAR WARS - Skeleton Crew props & costume' STAR WARS - Skeleton Crew props & costume
and the original show thread:
Thread 'Star Wars: Skeleton Crew' Star Wars: Skeleton Crew
(Update 2-9-25 This is the link for Modery's full Jod cosplay and props thread, a sub of the above but specific to Jod Jod Na Nawood | Captain Silvo Costume - Skeleton Crew)
Last edited:


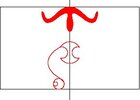
 )...The left lips are pretty much equal in spacing but for the last inside one.