dragonwind2000
New Member
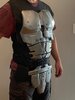
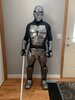
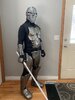
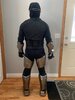
Hello RPF denizens. I've been lurking around for a loooong time and finally decided to register...and to post a WIP thread. I've been making things for years, from a Full-Scale r/c R2-D2 to giant Lego heads to halloween costumes for me and my kids. More lately, I've become a 501st member and have a realistic Phase II Clone trooper as well as ROTS Commander Bacara that I've completed and trooped in.
Right now, I'm working on a sith acolyte. I've had my eye on this one for a while--since SWTOR came out, actually, but I'm finally getting it underway. By the time I started this thread, I had already ordered and received some TOR Jedi armor from Kevin Weir at Imperial Surplus. That was before Mynock's den and a lot of others made their acolyte armor kits or 3D files available. Oh, well, what's a little time and Bondo, am I right?
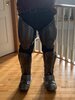
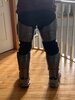
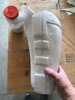
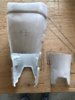
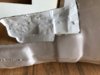
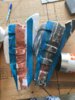
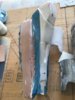
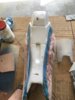
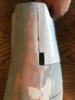
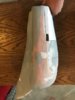
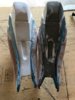
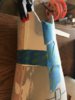
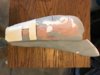
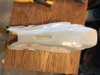
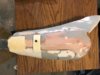
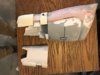
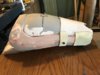
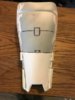
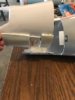
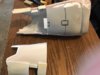
Anyway, the first few photos are of the greaves. I decided to make them more "sith" because the Jedi armor seems a bit too rounded and organic. Sith armor on the other hand, is often more angular and industrial-looking.
To begin, I'm building up the medial and lateral edges of the greaves, as well as putting in some "spoons" so that I can slip them on and then just put the "spoon" bit in place. I realize that most of the builds available have theirs in two split halves (like my greaves too) and then just cinch them together with elastic straps or the like. Since I'm going to be rebuilding a substantial part of mine, it seemed like an extra step to do that and then have to match both halves together, especially as mine fit together at an odd angle. Having to build up the sides and then create matching seams was not something I was looking forward to. So, having done spoons for my clone armor calves (as is the usual way to make them) I thought I'd try that approach. I will make them appear to be two halves, but they'll be solid greaves with the "spoon" type of opening at the back just about where the achilles tendon is located.
Right now, I'm working on a sith acolyte. I've had my eye on this one for a while--since SWTOR came out, actually, but I'm finally getting it underway. By the time I started this thread, I had already ordered and received some TOR Jedi armor from Kevin Weir at Imperial Surplus. That was before Mynock's den and a lot of others made their acolyte armor kits or 3D files available. Oh, well, what's a little time and Bondo, am I right?
Anyway, the first few photos are of the greaves. I decided to make them more "sith" because the Jedi armor seems a bit too rounded and organic. Sith armor on the other hand, is often more angular and industrial-looking.
To begin, I'm building up the medial and lateral edges of the greaves, as well as putting in some "spoons" so that I can slip them on and then just put the "spoon" bit in place. I realize that most of the builds available have theirs in two split halves (like my greaves too) and then just cinch them together with elastic straps or the like. Since I'm going to be rebuilding a substantial part of mine, it seemed like an extra step to do that and then have to match both halves together, especially as mine fit together at an odd angle. Having to build up the sides and then create matching seams was not something I was looking forward to. So, having done spoons for my clone armor calves (as is the usual way to make them) I thought I'd try that approach. I will make them appear to be two halves, but they'll be solid greaves with the "spoon" type of opening at the back just about where the achilles tendon is located.
Attachments
-
 IMG_3011.jpg62.6 KB · Views: 189
 -
 IMG_3012.jpg65.6 KB · Views: 179
 -
 IMG_3013.jpg47.3 KB · Views: 182
 -
 IMG_3014.jpg36.2 KB · Views: 187
 -
 IMG_3017.jpg73.3 KB · Views: 183
 -
 IMG_3018.jpg61.8 KB · Views: 190
 -
 IMG_3019.jpg61.9 KB · Views: 176
 -
 IMG_3037.jpg43.3 KB · Views: 168
 -
 IMG_3036.jpg52.8 KB · Views: 170
 -
 IMG_3021.jpg77.9 KB · Views: 178
 -
 IMG_3020.jpg70.1 KB · Views: 183
 -
 IMG_3038.jpg78 KB · Views: 189
Last edited:

")