Okay so I've found a solution for those of you who, like me, don't want to glue the LEDs inside the bezels to leave their saber fully (and easily) dismantable. And as a bonus it allows you to orient the LEDs any which way you want (if you wish to clock the electronic components embedded inside the clear acrylic a certain way, you maniac).
The idea is simple : using a small spring to push the LED up inside the bezel. But finding the right kind of spring took me some time.
I've been expertimenting and taking apart ball point pens and clothespins, but I ended up finding the perfect fit on Amazon.
They are stainless steel micro-springs with an OD of 5mm, a wire diameter of 0.4mm and length of 10mm. They took forever to come from China but they finally showed up and they are perfect. As a side note, you can also get 6mm OD springs which is almost exactly what the ID of the bezels is, but they don't fit (I tried).
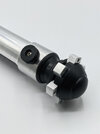
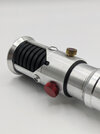
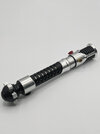
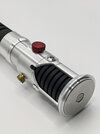
Installation is a breeze, you just need to cut the solder legs of the LEDs flush, drop the LED inside the bezel, put the spring on top and carefully screw the whole assembly on the hilt.
The spring will rest against the aluminum emitter core, and its tension will push the LED out, nesting it nicely in place. It also makes the LEDs "springy" which is kind of cool. That also means you can rotate the LED inside the bezel simply by pushing on it slightly and twisting.
I chose those springs specifically because aside from the OD of the spring itself (which is imposed by the ID of the bezel), I picked a length of 10mm and a wire diameter of 0.4mm to get the tension of the spring "just right".
If the spring was too short the LED would drop down and it wouldn't work. If the spring was too long, it would twist and bend all over the place, making installation difficult. Same thing for thickness : you could probably get away with a thinner spring but a thicker one would be very difficult to compress, again making installation difficult or impossible.
Obviously you could just use a drop of E6000 inside the bezel instead... But I've always liked mechanically connecting parts rather than gluing them together whenever possible. And I find it looks and feels more professional. Although I do realize the prop makers certainly didn't do it this way in 1998!
Just thought I'd share.
Here is the link for those interested :
View attachment 1727516
View attachment 1727515