Gojira72

New Member
So in preparation for Shin Kamen Rider coming out next year I have been over the past little while have been trying to replicate the helmet.

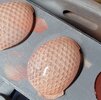
The base of the Helmet was a 3D print from RAProduct3D on Etsy. The files came with forms for the eyes that I am currently smoothing out and preparing to mold for Vacuum forming.


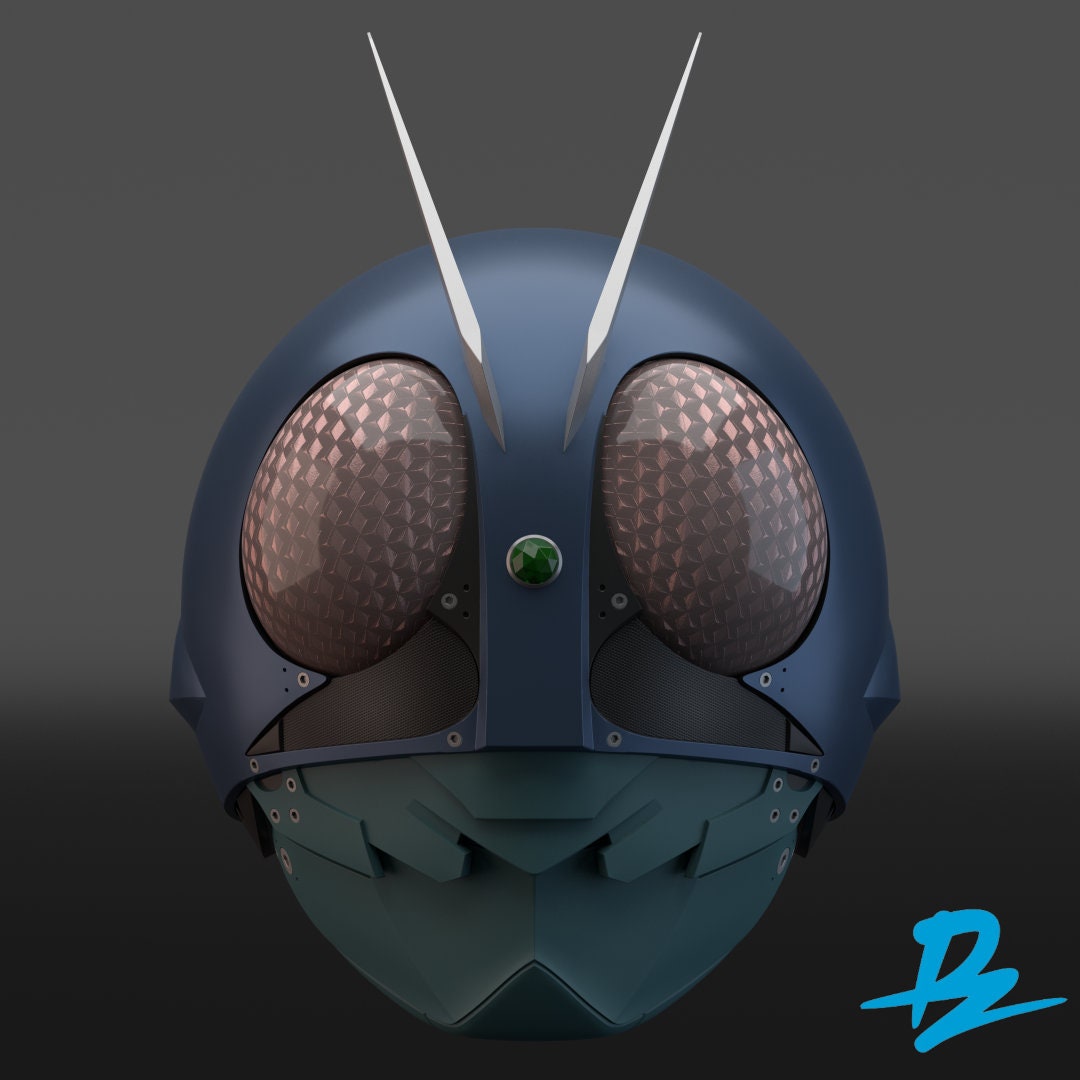
So Far the helmet has been smoothed apart from the antennae and the forehead gem.


The biggest thing I need help on is the paint colors. The render above this link are in my opinion the closest neutral colors to that of the real suit. I've been trying to color match this as best as I can but I am having some trouble with it. If anyone has an solutions please let me know.
 
Hey, I Was wondering how this turned out? I'm looking to do a Shin kamen rider cosplay as well. I personally don't have a 3d printer but I'm guessing I might have to the stl file and get someone else to print it.
 
Hey, I Was wondering how this turned out? I'm looking to do a Shin kamen rider cosplay as well. I personally don't have a 3d printer but I'm guessing I might have to the stl file and get someone else to print it.
So when I made this post I then got hit with a bunch of other things. I actually just started reworking on this project for a con in October.
The Helmet I showed off here was from a file that was made before the movie came out. I have since switched over to a new file that is more accurate to the movie.

I have also started modeling the chest in Blender with so far, little luck.
 
oh my god thank you for that new file location, I fully made rider 2 using first file and had issues with the actual jaw aligning smoothly without jamming half of it in my face and realign. the new file looks waay better. I have the chest files that I am currently printing. I forgot where I got them, they could be from the initial file or somewhere on cult.
shinchest.png
 
oh my god thank you for that new file location, I fully made rider 2 using first file and had issues with the actual jaw aligning smoothly without jamming half of it in my face and realign. the new file looks waay better. I have the chest files that I am currently printing. I forgot where I got them, they could be from the initial file or somewhere on cult.View attachment 1813581
I've been looking for chest for so long, cannot find anywhere. You don't have any clue where you might've gotten them from? D: Feel bad for asking but I don't suppose there's any chance of sharing?
 
Last edited:
oh my god thank you for that new file location, I fully made rider 2 using first file and had issues with the actual jaw aligning smoothly without jamming half of it in my face and realign. the new file looks waay better. I have the chest files that I am currently printing. I forgot where I got them, they could be from the initial file or somewhere on cult.View attachment 1813581
Hey! i'm looking for this file too! like Ive been looking for days now, ive checked Cults and pretty much every other 3D modelling website but cant find it. could really use some help
 
So it appears that you can acquire the 3D file for the chest piece by messaging the seller of the Original Helmet File I used RAProduct3d directly on Etsy. The file has a few small cosmetic issues within geometry but over seems to be a solid file for 15 bucks.
 
Anyluck with color testing? also for the lens eyes on the new model do you plan on just casting them in clear resin? I noticed his file didnt have sperate lens/eye portions.
 
So I did get the eyes printed with the one piece files. I tinted them using a custom color tint I made using some clear resin and some Alcohol inks.


As for color matching I found a Blue that works well for the dark metallic blue, but I am still having trouble perfectly color matching the mouth, jaw, and torso color.
 

Attachments

  • 20240509_182420.jpg
    20240509_182420.jpg
    605.4 KB · Views: 172
  • 00.jpg
    00.jpg
    143.1 KB · Views: 345
  • 4alqziqgjsq71.jpg
    4alqziqgjsq71.jpg
    330.6 KB · Views: 281
So I did get the eyes printed with the one piece files. I tinted them using a custom color tint I made using some clear resin and some Alcohol inks.


As for color matching I found a Blue that works well for the dark metallic blue, but I am still having trouble perfectly color matching the mouth, jaw, and torso color.
Just realised I forgot to link the blue that I found.
I bought mine a little cheaper at a local automotive store.
 
I found a color that matches the Greenish color of the bottom half of Ichigo's mask and both his and Nigo's chest piece. It may be a little lighter than was actually used, but it looks the closest of any Spray can I have found here in the States.

1717168617698.png


I also had to modify and reprint the eyes because certain areas of the prints were a little thin and I was left with holes on the print. I used the same custom mix from before. I also printed a Red Copy because my friend is planning on doing a Nigo costume and well and I have been helping him out since I am essentially building the same costume.
1717168939571.png

I painted the black triangles next to the eyes and I dont have a photo of it but I also painted the triangle on the back of the head. The DZackers files includes separate bolt heads that you can print separately which are going to be added later tonight.

Here is a teaser for the Red eyes. Getting a little Ichigo Sakurajima version going.
1717169051964.png
 
Still making progress on this costume. Lots of work has been done recently.

To start, Ill mention that most everything I have made here is being doubled for my friend doing Nigo so I might only show one but I have made a second set.

The chests have been printed and are currently going through the sanding process. Don't have any photos of this, but I drilled out the sculpted in bolts on the model to replace them with real bolts.
1720740729342.png

Said friend with his chest set.
The wings were laser cut Eva Foam that I still need to cut out, seal, and paint. I also plan to use the same bolts used on the chest for the wings.
1720740802019.png

For the belt, we are using the DX toy for the main buckle for the Typhoon belts, and making every other piece ourselves. The white pad is a mix of canvas and EVA foam wrapped in a white pleather. A belt blank was bought to use and the base and main connection point for the belt. The boxes and various details were 3D modeled and printed by me. Still finalizing this piece, but I with a little cheating I can put the belt on and it is looking good if I say so myself.
1720740983795.png


The gloves are still a bit of a work in progress but I bought a leather glove that will be act a base for the gloves while the cuffs and the knuckle guards are laser cut veg tan leather that I patterned and cut. The detail pieces on the gloves were modeled by me and have now been printed in resin.
1720741201614.png

1720741218771.png


As for the helmets. My helmet is pretty much done. I am planning on using a hard hat chin strap to attach the jaw to the main helmet. LEDS have been installed into the eyes and the gem. I have also drafted up stencils and stickers for the "Batta Aug" and Kamen Rider Logo that goes on the back of the helmet. My friend's Nigo helmet on the other hand had some slight problems. I went to apply the stencil to the back of the helmet. and forgot to clear coat the silver so that messed up the paint. That combined with high humidity has given way to a slight delay on getting it repainted. That being said, we have narrowed down the paints we plan to use on his helmet.
1720741434731.png

1720741446514.png

1720741472479.png

1720741485640.png
 
Damn man those look so good!! I just finished printing the helmet only for it to be a tad to small for my wife so back to reprinting. I really need a resin printer those eyes came out super nice. Thanks for including the link to that blue it looks pretty good!
 
Also any images of fitment of bottom jaw, I just printed mine at 105% and jaw doesnt seem to line up with gap of space in each side to helmet
 
So, I recently got my bucket completed as seen here.
1723138060691.png

1723138073028.png

1723138087674.png

And here it is with the lights turned on.
1723138126599.png


As for the jaw attachment. I used a hardhat chin strap glued to the inside of the jaw and fed up to the main helmet. For comfort I also lined the inside of the jaw with felt, as well as behind the teeth to help prevent paint rub.

1723138547923.png

1723138590765.png

A small bit of extra elastic was used to help hold it in place on either side.

For the side pieces that over lap the jaw I replicated the printed part out of leather. This allows for easier movement, wearability, and prevents paint wear.

With Nigo, my friend and I experimented with keeping the jaw separate from the main helmet, strapping it around the head. This did end of up working and makes taking the helmet on and off a lot easier, however it does mean that the jaw ends up shifting around a lot more. However when we are next to each other, you would be hard pressed to spot the differences between the two, apart from color of course.
1723138988505.png

Just a cheeky little photo for both of us.
1723139055912.png
 
Back
Top