You are using an out of date browser. It may not display this or other websites correctly.
You should upgrade or use an alternative browser.
You should upgrade or use an alternative browser.
Sherlock Coat opinions/info?
- Thread starter Skippy2k
- Start date
Risu
Master Member
I'm working on catching up on all my back-logged stuff this month. I've got the run of Looper silver bars, a couple River Song diaries, and a few Etsy orders that I need to handle before I can fully commit to the coat buttons. On top of that, I'm in a job transition where I'm doing training for my new job and making just enough at my old one to pay for the gas. Add to that that I'll be out of town about 8 days this month and I've got my work cut out for me. But the buttons will happen, and I think I can even offer them in super dark brown, although it will require some additional testing.


Risu
Master Member
Well the buttons are cast in the correct color, if you used putty they'd have to be painted, which would wear off over time. Which means they really require a flawless cast to work. I've worked out a pretty good technique to minimize bubbles in the resin, but there's nothing that can be done if the bubbles under the silicone are expanding and contracting except to make a new mold. I have tons of silicone left though, so I'm not bothered by it. I just need to stop by a Lego store and get a big flat piece because building the bottom of the mold box from individual planks is a hassle and not very strong, either.
As for how they look, this picture illustrates the problem pretty well. You can see the pits on most of them pretty well.
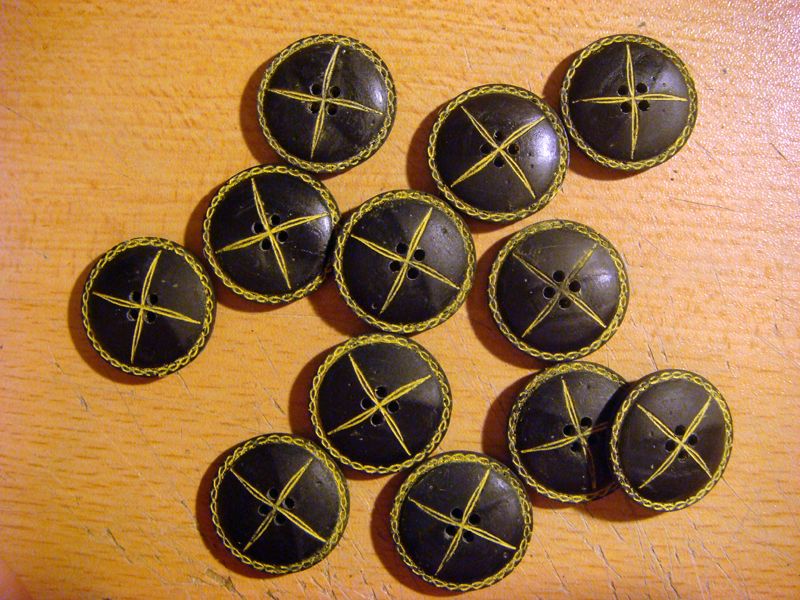
As for how they look, this picture illustrates the problem pretty well. You can see the pits on most of them pretty well.
Ruddigger
Sr Member
Ah, I didn't realize you had started casting them in the dark brown color. Even so, I think that putty and paint with a few coats of matte clear over the top should work fine, at least for my needs. Still, I understand your wanting to get it done right, I'd probably be the same way.
Ruddigger
Sr Member
Hmm. On the one hand, I understand completely the need to eliminate those pits from the surface. Casting what you intended, and so forth.
OTOH, just personally I think the pits kinda give the buttons some character.")
Ha, you posted while I was drafting my reply. I sort of agree though.
Risu
Master Member
I haven't cast any in brown yet. Those are the black prototype set I made for a friend's birthday. I need to get a better yellow paint. I have the resin and tint to pour the dark brown ones, I just haven't had the chance to do a pair of them yet. What I really wish I could do is emulate the texture on the buttons, but you can only do so much with 3D printing.
Similar threads
- Replies
- 3
- Views
- 3,079
- Replies
- 139
- Views
- 14,619
- Replies
- 0
- Views
- 1,541
- Replies
- 24
- Views
- 5,383
- Replies
- 4
- Views
- 1,282