Scopey's Buzz Lightyear Build (NOW COMPLETE)

Scopey

New Member
Hi all,

First time poster here, but long time admirer. My college background is design so I really love designing and building (and all the figuring out that goes on in between!).
My friends and I have something of a Halloween tradition, dating back to when we were in college together. These have grown in sophistication/quality over the years and the theme decided upon was Pixar for Halloween 2016.

The Sully from our group can be found here: http://www.therpf.com/showthread.php?t=274151
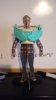
For me, it had to be a Buzz Lightyear build - which is no easy task. The wish list was extensive and there were setbacks and compromises along the way, but overall I was pretty happy with the result.

The build time was 11 weeks (up to Halloween) and I tried to capture the design process along the way. I am now trying to collate and organise this material so I can share what I built and how I did it. Before I started, I think I looked at every buzz costume on the internet, so a big shout out to everyone who shared their work before, in particular the guys who had build threads on here - I definitely drew inspiration.

So stay tuned and I hope you guys enjoy :)
 
Last edited:
Re: Scopey's Buzz Lightyear Build

For this build, I didn't want to go the pepakura or similar route. I had done some pepakura before, but for this build I didn't want to just build it, I also wanted to design it and really feel ownership of it. Overall, I personally found this more dynamic and rewarding.
So since everything was going to be designed from the ground up, I started with this guy who I had had since a child:
DSC_3671.JPG

I took photos of the Buzz toy from front and side views, as well as photos of myself from the front and side views. I overlaid these in Photoshop so I could see where Buzz's proportions differed significantly from my own. As you can see, Buzz differs quite considerably.

buzz_overlay.jpg

This helped to inform the concept stage for the build. I needed the design to adapt to my own proportions, but I also wanted to retain that top-heavy and 'squat' look that is distinctly buzz. Below is a snapshot of some of the scribbles and sketches I did early on to explore the form and proportions of the costume:

DSC_3674.JPG

After some playing around, the concept sketches were refined to the following. These really laid the blueprint for the whole build:

DSC_3676.JPGDSC_36701.jpg

These by no means were technical drawings. Of course the design developed and deviated along the way, but these concept sketches provided a proportional point of reference which I regularly referred back to. Of course, actually translating this design direction to 3 dimensions was a different matter altogether! The reference images I used for my own proportions were shrunk to a handy scale. The reason for this will become clear.
 
Last edited:
Re: Scopey's Buzz Lightyear Build

Using the same scale images, I created a primitive figurine:

DSC_0091_1.JPG

Using my concept sketches for reference, I began to design and model the chest piece at this scale:

DSC_0095_1.JPGDSC_0096_1.JPGDSC_0114_1 1.jpg

Once I had something I was relatively happy with, I cut and flattened the different sections and traced around them to create my patterns. I scanned these and since they were done to scale, I could easily scale this up to my size in photoshop. I added hatched lines to help assemble the printed sheets:
DSC_0119_1.JPG
 

Attachments

  • DSC_0114_1.JPG
    DSC_0114_1.JPG
    714.7 KB · Views: 386
Re: Scopey's Buzz Lightyear Build

I started by building the inner chest section with lower density foam to check the scale of the pattern:

DSC_01221.jpgIMG-20160810-WA0010.jpg

Once that seemed about right, I moved to the actual foam I used:

DSC_01451.jpgDSC_01421.jpgDSC_0146(1).JPG

Note:To create the curves using such large foam sections, I heated the foam with a heat gun before manually shaping the curve by hand.

Since my scale model only accounted for the large panels, the gaps that you can see in the photos above needed to be solved. I bridged these using duct tape. When the duct tape was in place I drew the outline (edges) I needed using a sharpie. I then removed the duct tape and placed on some thin scrap foam. I then cut the outline I had drawn to leave me with patterns that looked something like this:

DSC_3668.JPG

I made the elliptical section with the opening for my head in the same way (duct tape pattern). I then used that pattern as the basis for creating a collar piece, which I detailed by eye.
The visor hinge sections were done by eye/using whatever circular object I had to hand.

All together, the chest started to look like this:
DSC_3381_1.jpg
 
Re: Scopey's Buzz Lightyear Build

I started by building the inner chest section with lower density foam to check the scale of the pattern:

View attachment 711214View attachment 711218

Once that seemed about right, I moved to the actual foam I used:

View attachment 711215View attachment 711216View attachment 711217

Note:To create the curves using such large foam sections, I heated the foam with a heat gun before manually shaping the curve by hand.

Since my scale model only accounted for the large panels, the gaps that you can see in the photos above needed to be solved. I bridged these using duct tape. When the duct tape was in place I drew the outline (edges) I needed using a sharpie. I then removed the duct tape and placed on some thin scrap foam. I then cut the outline I had drawn to leave me with patterns that looked something like this:

View attachment 711224

I made the elliptical section with the opening for my head in the same way (duct tape pattern). I then used that pattern as the basis for creating a collar piece, which I detailed by eye.
The visor hinge sections were done by eye/using whatever circular object I had to hand.

All together, the chest started to look like this:
View attachment 711225


It's the wrong colour though. Buzz is usually green and white.
 
Re: Scopey's Buzz Lightyear Build

The chest piece still had some detailing to do and some of the smaller panels weren't fully fixed since I knew the backpack still had to be done, as well as the buttons etc added to the chest. At this point I knew I needed a huge visor for this (500mm diameter), which I was on the lookout for. I even played with the idea of constructing a large enough vacuum former.
Anyway, I parked the chest piece at this point and moved onto the legs.

Again, I started by building the leg pieces on a small scale and then scaling up the patterns these created and printing them off.

DSC_3403_1.jpgDSC_3402(1).jpg

I created the upper and lower leg pieces for one leg only since I knew that the design would need tweaking in terms of upper leg shape, as well as the overall size of the pieces. This was the case with most of the parts since any slight error in a scale pattern will show itself in the scaled up version. The gluing was a bit rough here too and the pieces weren't exactly shaped yet either since I knew I would be slicing them open again when tweaked to duplicate the shape for the opposite leg.

Next, I began working on the COD piece, since that would help me with the sizing of the legs. Since my scale figurine was not suited to this, I approximated the COD piece first in low-density foam:

IMG-20160904-WA0003_1.jpg

As you can see this need a bit of tweaking. Once transferred to the final foam this is how things were looking:

IMG-20160907-WA0001_1.jpgIMG-20160907-WA0002_1.jpg

This still needed a lot of work in terms of the sizing (which the feet would also dictate) and detailing, but the basic blocks were in place.
 
Last edited:
Re: Scopey's Buzz Lightyear Build

Due to a couple of different factors, I ended up working on the arms next. For the upper arm and forearm, again I designed the overall shape on a small scale and scaled up. The elbow sections were designed/built at full scale using the final foam due to their simpler shape. These started off as simple cylindrical pieces with openings for my arm to go through.

The 'chamfered' sections of the elbow were accomplished by adapting the duct tape method.
Some of the small panels on the forearms were also managed using the duct tape method.

The arms were designed relative to each other so that the elbow could sit inside the other pieces and they could move over one another as I bent my arm. Hopefully that makes sense as you look at it:

DSC_3690_1.jpg

Here is how things looked suited up at this point:

IMG-20160923-WA0002_12.jpg IMG-20160923-WA0003_1.jpg

The arms still needed some detailing (raised sections, laser opening etc).
 
Last edited:
Re: Scopey's Buzz Lightyear Build

Looks awesome so far! One question: Why the all caps "COD" instead of the regular word "codpiece"? (genuinely curious, maybe i'm missing a joke)
 
Re: Scopey's Buzz Lightyear Build

Next up was the design of the feet. I put a bit of thought into these since I wanted them to be appropriately sized to be more buzz-like i.e. bigger and wider than my own feet.
However, I still wanted these to be practical and to take a fair amount of abuse (they took an unforeseen amount of wear and were still intact).

These did not start with a scale model. Due to the shape and function it made more sense to design it all at full scale. I used an old pair of shoes and then sized around these. Again to work out my patterns/shapes, I roughed it out with scrap low-density foam:

IMG-20160926-WA0000_1.jpg IMG-20160926-WA0002_1.jpg

Once happy, I moved to the final foam. The shoe was hot glued to the foam sole. I also ended up running some cable ties through some shoe eyelets and through the foam to reinforce.

DSC_3472_1.jpgDSC_3501_1.jpg

I played with the idea of casting a sole for the foot, but ended up going low-tech: cutting out shapes from a cheap rubber mat. I also doubled these up originally but it was way too heavy so I reduced back to one piece thick. I tried hot glue first but this couldn't stick the rubber with any real conviction.

I ended up using a heavy duty glue to stick the rubber sections. I will update here when I find out what kind it was. When that was fully cured, I went around the edges with this UHU stuff to reinforce against peeling: http://www.uhu.com/en/products/all-...1.html?cHash=4bc2c66396f24622c2500f6248c9176d

The feet were designed to allow as much movement and flexing as possible when walking. This meant that they stayed intact and never split open, while I could walk very freely. The rubber on the sole prevented the foam from being worn away/badly damaged and also stayed in place (after a lot of walking including on concrete). The added volume meant they were slightly clunkier than a normal pair of shoes, but this was minimal and overall I was very pleased with the result.

DSC_3477_1.jpg DSC_3481.JPG
 
Last edited:
Re: Scopey's Buzz Lightyear Build

Because I scream the word :lol

LOL - fantastic!

Technical q: do you still have the pattern for the lower leg foam, and would you be willing to share? I'm trying to work out my boots/gaiters for Mega Man and think I want to end up somewhere between the form I already have and the form you got for your Buzz.

Thanks!
 
Re: Scopey's Buzz Lightyear Build

Thanks for the comments guys.


LOL - fantastic!

Technical q: do you still have the pattern for the lower leg foam, and would you be willing to share? I'm trying to work out my boots/gaiters for Mega Man and think I want to end up somewhere between the form I already have and the form you got for your Buzz.

Thanks!

Hey, I've actually got a photo on the way with the final lower leg design and the final pattern used. It should be useful to you.
 
Re: Scopey's Buzz Lightyear Build

Since I now had the COD, the leg pieces and the feet, I could tweak the leg pieces. These ended up varying quite a bit from the initial scaled up patterns. They got shorter, and were also tucked in tighter to my own leg at different points to achieve the shape I was after. The 'angle' of the edges also changed to clean up the pieces, while the inner thigh also had material removed.

When I was happy with the tweaking, I cut the pieces down the seams to duplicate the final patterns. I also took more time and care to heat and shape the pieces to exactly how I wanted them. Detailing on the ankle trim as well as the kneecap pieces also needed to be figured out. Some final sizing was being looked at below (I think).

IMG-20161001-WA0002_1.jpg

Also, in terms of actually gluing the pieces together, I wanted to maintain a very deliberate seam/parting line in the legs - just like the real buzz. This was a bit of a pain in terms of gluing without having it ooze out and maintain a sufficient gap. I think I spent a little bit of time cleaning these up in the end. I'll let you guys be the judge of whether it was worth it or not!

The detailing was done by eye on the first leg, before being copied over to the second leg. The first completed lower leg can be seen with the final pattern for the other leg in the photo below.

DSC_3491.JPG DSC_3484_1.jpg

Below you can see both legs completed (the COD still needed detailing).

IMG-20161010-WA0000_1.jpeg
 
Last edited:
Re: Scopey's Buzz Lightyear Build

By the time I was at this stage of the project, I was under considerable pressure to get everything completed for Halloween - and as a result I became quite efficient :D
It is worth pointing out that I was also working on a wing system which consumed time and which I will follow up on later.
For the backpack, the sizing was approximated using a quick cardboard mock up:

IMG-20160828-WA0001_1.jpg IMG-20160828-WA0002_1.jpg

The detailing was designed on a small scale and scaled up. I would have ended up using only half of this and duplicating to ensure symmetry. This was tweaked on the fly as it was assembled. Below is the final foam back piece during the priming stage.


IMG-20161023-WA0003_1.jpg

All pieces got three coats of undiluted PVA glue, applied with foam brushes/rollers. This was then primed when dry using spray cans, before painting.

received_1259793707424973_1.jpegIMG-20161026-WA0000_1.jpgDSC_3515.JPG

There was an amount of detailing either side of this stage which I will try to capture altogether in the next post.
 
Re: Scopey's Buzz Lightyear Build

In this post I'm going to give an idea of some of the other foam detailing that was done. I didn't do a great job of capturing this detailing in the unfinished foam stage, so these photos have mainly been taken after the costume had gone through two wears. Therefore there is damage and the overall finish was better for Halloween. The detailing was eyeballed on paper in terms of size/shape before transferring to foam.

The belt detailing for the COD front and back:

DSC_3723.JPGDSC_3721.JPG


Raised detailing added to the left arm (+decal)

DSC_3692_1_1.jpg

Right upper arm raised sections/recess +decal (decals had started to ripple by the time these photos were taken):

DSC_3725.JPG

For the laser forearm, I created a recess/partial opening in the arm, with a clear plastic cover, which was simply super glued in place. Inside, I housed an old laser pointer:

DSC_3706_1.jpg

The internal support for the laser took a little bit of figuring out to get the angle right. Strips of foam were used as the main support, with some thin strips of more rigid material so that the whole thing wouldn't just flex when trying to actuate the on button:

DSC_3713.JPG

The button on the laser itself was positioned 'upwards' between the two rigid pieces of material so that the laser could be turned on by applying pressure from either side of the laser to actuate the button i.e. by pushing downward with the opposite hand or by flexing the arm underneath.

DSC_3715_1.jpg

Some duct tape was added to secure the laser. Here's what it looked like operational:

DSC_3699.JPG DSC_3698.JPG


On the chest, there was some slight detailing added for a bit of depth. Recesses were added for the central 'Space Ranger' badge, as well as the wing button (a bit more detail on this to come):

DSC_3754.JPG DSC_3755.JPG

A step was added to the 'shoulders' next to the visor pivots to make it a bit more true to buzz:

DSC_3756.JPG
 
Re: Scopey's Buzz Lightyear Build

For the chest buttons, I approximated the sizes in paper first to inform my dimensions. From here, I designed the button units in CAD, starting with the wings/ 'big red button'.

wing_button.jpgwing_button_section_1.jpg
This was designed with housing a wing-release switch in mind. There were three spring 'posts' to allow it to pop in and out. This was 3D printed:

DSC_3503_1.jpg DSC_3505.JPG

The flanges were intended to help fix the button on the inside of the chest.

For Buzz's sound effect buttons:

asm0001.jpgsound_shot2_1.jpg

For this design, there were two spring posts and a central actuator to hit a switch. I ended up tinkering with this a little bit. I think I reduced the spring size/travel. The design could have been better but I didn't really have the time to iterate and I did get it working. Again, these were 3D printed.

I ordered one of these modules for the chest buttons: http://www.electronics123.com/shop/...utes-usb-recording-module-with-4-buttons-5320
Each button was programmed to have a different Buzz sound effect.
Below is a photo of the assembly stage after the buttons were finished and painted:

DSC_3517.JPG

I did design an actuating button for the laser in the arm, but my original intention to wire a switch here to the laser pointer in the forearm was scrapped in favour of the rig in the previous post. There is a video of the sound effects to come!
 
This thread is more than 7 years old.

Your message may be considered spam for the following reasons:

  1. This thread hasn't been active in some time. A new post in this thread might not contribute constructively to this discussion after so long.
If you wish to reply despite these issues, check the box below before replying.
Be aware that malicious compliance may result in more severe penalties.
Back
Top